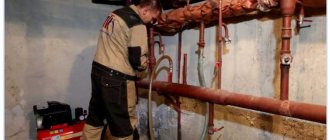
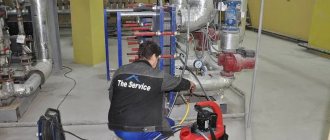
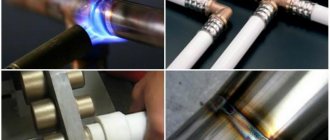
Water heating in a modern home is a complex system that must work reliably and uninterruptedly. However, there are a number of reasons why a failure occurs, such as installation errors, equipment wear and tear over time, etc. All these factors can affect the tightness of the circuits and cause malfunctions. To find the damaged area, a pressure test of the entire water heating system is required. How is this manipulation performed in a private (country) house and is it possible to do it with your own strength and hands? What level of pressure should it be? You can read about all this and watch the video.
What is pressure testing of heating and water supply systems?
Heating and water supply are two systems consisting of a large number of varied equipment. As you know, the performance of any multicomponent system is determined by the weakest element - if it fails, it stops completely or partially. To identify all weak points, pressure testing of heating and water supply is carried out. In simple terms, the pressure deliberately rises much higher than the working one, pumping liquid. This is done using special equipment; the pressure is controlled using a pressure gauge. The second name for crimping is hydraulic testing. It's probably clear why.
Heating pressure testing is carried out after any repair or before the heating season
When a heating system is pressure tested, the pressure is increased by 25-80% depending on the type of pipes, radiators, and other equipment. It is clear that such a test reveals all the weak points - everything that does not have a safety margin breaks, leaks appear in worn pipes and unreliable connections. Having eliminated all identified problems, we ensure the functionality of our heating or water supply for some time.
If we are talking about centralized heating, then pressure testing is usually carried out immediately after the end of the season. In this case, there is a decent period of time for repairs. But this is not the only case when such events are held. Pressure testing still takes place after repairs or replacement of any element. In principle, this is understandable - we need to check how reliable the new equipment and connections are. For example, you soldered heating from polypropylene pipes. We need to check how high quality the connections are. This can be done using crimping.
If we talk about autonomous systems in private houses or apartments, then a new or repaired water supply is usually checked simply by turning on the water, although even here a strength test would not hurt. But it is advisable to test the heating “to its fullest”, both before commissioning and after repairs. Keep in mind that those pipelines that are hidden in walls, floors or suspended ceilings must be tested before they are closed. Otherwise, if during testing it turns out that there are leaks there, you will have to disassemble/break everything and fix the problems. Few people will be happy about this.
How to make the right choice
When choosing, you need to take into account the capacity of the heating system.
When choosing a pump, you need to take into account the total capacity of the system that is undergoing the procedure and the frequency of pressure testing. There are models of various brands on the market, which must be chosen depending on their type. Manual models have a simplified design, do not cause complications and are inexpensive. But to create the required level of pressure when working with them, you need to spend more time, unlike electrically driven pumps. The devices vary in terms of operating time and are capable of producing results with varying accuracy, which is influenced by the power of a particular model.
If a low-power pump is used during the procedure, testing will take longer because such devices fill with water slowly. You need to select a pressure tester taking into account the dimensions of the pipeline system that is being tested. If we are talking about a private home, you can purchase a special supercharger that passes 2-3 liters of liquid per minute. For multi-storey buildings and heating mains, circulation pumps are used to ensure continuous movement of fluid within the system.
Equipment and test frequency
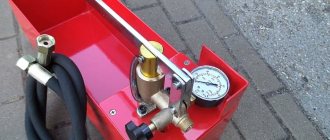
Pressure testing of centralized systems is carried out by personnel using standard equipment, so it is hardly worth talking about. But not everyone probably knows about the costs of private heating and water supply. These are special pumps. There are two types - manual and electric (automatic). Manual pressure testing pumps are autonomous, the pressure is pumped up using a lever, and the created pressure is controlled using a pressure gauge built into the device. Such pumps can be used for small systems - pumping is quite difficult.
Manual crimping machine
Electric pumps for pressure testing are more complex and expensive equipment. They usually have the ability to create a certain pressure. It is set by the operator, and it is “caught up” automatically. Such equipment is purchased by companies engaged in professional crimping.
According to SNiP, hydraulic testing of heating systems must be carried out annually, before the start of the heating season. This applies to private houses too, but few people comply with this standard. At best, they check it once every 5-7 years. If you are not going to test your heating annually, then there is no point in buying a pressure tester. The cheapest manual one costs about $150, and a good one costs from $250. In principle, you can rent it (usually from companies that sell components for heating systems or from offices that rent equipment). The amount will be small - you need the device for several hours. So this is a good solution.
Necessary tool
To create the required conditions during pressure testing, you need equipment that allows you to achieve the required pressure level. A pump is most often used. It, together with the check valve, is connected using a high-pressure hose to the system through a pipe. The main characteristics when choosing a device are the level of performance and the pressure it can create
If the device is powered by electricity, then pay attention to the operating voltage (220 V or 380 V)
When carrying out work with a small volume of the circuit, it is advisable to use a manual crimping machine equipped with a hydraulic cylinder. Greater efficiency and ease of use can be achieved by using an electrically driven piston device. The electric type of crimping machine will create the required pressure in a short time without applying any muscular effort. These devices, in addition to the pressure gauge, have monitoring and control equipment.
In private houses where there is low pressure in the system, fill it with water and then record the pressure readings on the pressure gauge.
Call specialists or do it yourself
If for some purpose you require a pressure test certificate for your heating or hot water supply system, you have only one option - order this service from a specialized organization. The cost of heating pressure testing can only be quoted to you individually. It depends on the volume of the system, its structure, the presence of shut-off valves and their condition. In general, the cost is calculated based on the tariff for 1 hour of work, and it ranges from 1000 rubles/hour to 2500 rubles/hour. You will have to call different organizations and inquire with them.
Companies involved in hydraulic system testing have more serious equipment.
If you have upgraded the heating or hot water supply of your own home, and you know for sure that your pipes and equipment are in good condition, there are no salts or deposits in them, you can carry out pressure testing yourself. No one will demand hydraulic test certificates from you. Even if you see that your pipes and radiators are clogged, you can wash everything yourself and then test it again. If you just don’t want to do this, you can call specialists. They will immediately clean the system and pressure test it, and will also issue you a certificate.
Certificate of hydrostatic testing of the system (pressure testing)
Why do you need to pressurize a heated floor?
Pressure testing of the heating system - checking it for the quality of tightness of pipes and fittings under high pressure. Testing can identify leaks and other defects. Each heating circuit must be checked separately.
Pressure testing of heated floors is carried out before pouring the concrete screed and laying the finishing coating, so that if defects are detected, they can be easily eliminated.
If a hydrofloor is installed in a wooden house using the “dry” method, then it must also be tested before the pipes are covered with gypsum fiber sheets.
Crimping process
Pressure testing of heating systems in a private home begins with disconnecting the heating boiler, automatic air vents and expansion tank from the system. If there are shut-off valves leading to this equipment, you can close them, but if the valves turn out to be faulty, the expansion tank will definitely fail, and the boiler will fail, depending on the pressure that you apply to it. Therefore, it is better to remove the expansion tank, especially since this is not difficult to do, but in the case of a boiler, you will have to rely on the serviceability of the taps. If there are thermostats on the radiators, it is also advisable to remove them - they are not designed for high pressure.
Sometimes not all heating is tested, but only some part. If possible, it is cut off using shut-off valves or temporary jumpers are installed - surges.
There are two important points: pressure testing can be carried out at an air temperature not lower than +5°C, the system is filled with water with a temperature not higher than +45°C.
The following is the process:
- If the system has been in operation, the coolant is drained.
- A crimping machine is connected to the system. A hose extends from it, ending with a union nut. This hose is connected to the system in any suitable place, even in the place of the removed expansion tank or instead of the drain valve.
- Water is poured into the container of the pressure testing pump and pumped into the system using the pump.
The device is connected to any available input - on the supply or return pipeline - it doesn’t matter - Before increasing the pressure, all air must be removed from the system. To do this, you can bleed the system a little with the drain valve open or drain it through air vents on the radiators (Mayevsky valves).
- The system is brought to operating pressure and held for at least 10 minutes. During this time, all remaining air is released.
- The pressure is raised to the test pressure and maintained for a certain period of time (regulated by the Ministry of Energy standards). During the test, all devices and connections are checked. They are inspected for leaks. Moreover, even a slightly damp connection is considered a leak (fogging also needs to be eliminated).
- During crimping, the pressure level is monitored. If during the test its fall does not exceed the norm (as specified in SNiP), the system is considered to be in good working order. If the pressure drops even slightly below normal, you need to look for a leak, fix it, then start pressure testing again.
As already mentioned, the testing pressure depends on the type of equipment and system being tested (heating or hot water supply). The recommendations of the Ministry of Energy set out in the “Rules for the technical operation of thermal power plants” (clause 9.2.13) are summarized in a table for ease of use.
| Type of equipment tested | Test pressure | Test duration | Allowed pressure drop |
| Elevator units, water heaters | 1 MPa(10 kgf/cm2) | 5 minutes | 0.02 MPa (0.2 kgf/cm2) |
| Systems with cast iron radiators | 0.6 MPa (6 kgf/cm2) | 5 minutes | 0.02 MPa (0.2 kgf/cm2) |
| Systems with panel and convector radiators | 1 MPa (10 kgf/cm2) | 15 minutes | 0.01 MPa (0.1 kgf/cm2) |
| Hot water supply systems made of metal pipes | operating pressure+ 0.5 MPa (5 kgf/cm2), but not more than 1 MPa (10 kgf/cm2) | 10 minutes | 0.05 MPa (0.5 kgf/cm2) |
| Hot water supply systems made of plastic pipes | operating pressure+ 0.5 MPa (5 kgf/cm2), but not more than 1 MPa (10 kgf/cm2) | 30 minutes | 0.06 MPa (0.6 kgf/cm2), with further testing for 2 hours and a maximum drop of 0.02 MPa (0.2 kgf/cm2) |
Please note that for testing heating and plumbing made of plastic pipes, the test pressure holding time is 30 minutes. If no deviations are detected during this time, the system is considered to have successfully passed the pressure test. But the test continues for another 2 hours. And during this time, the pressure drop in the system should not exceed the norm - 0.02 MPa (0.2 kgf/cm2).
Correspondence table for different units of pressure measurement
On the other hand, SNIP 3.05.01-85 (clause 4.6) has other recommendations:
- Heating and water supply systems are tested at a pressure of 1.5 times the working pressure, but not lower than 0.2 MPa (2 kgf/cm2).
- The system is considered operational if after 5 minutes the pressure drop does not exceed 0.02 MPa (0.2 kgf/cm).
What standards to use is an interesting question. For now, both documents are valid and there is no certainty, so both are valid. It is necessary to approach each case individually, taking into account the maximum pressure for which its elements are designed. So the working pressure of cast iron radiators is no more than 6 Atm, respectively, the test pressure will be 9-10 Atm. It’s also worth deciding on all the other components in approximately the same way.
Popular models of manual pressure testing pumps
Models of manual crimping machines from domestic and foreign manufacturers are widely represented on the Russian market, all of them are distinguished by their simplicity of design and relatively low cost.
A wide range of pressure testing pumps is produced by the famous German company Rothenberger, which has more than 1,200 employees and 12 factories in the USA and leading European countries.
Rothenberger RP 50 (100 cu) – a manual hydraulic pressure tester designed for checking the tightness of pipes, components and mechanisms in water supply, plumbing and heating lines. The water tank is made of galvanized sheet steel, the device has a pressure gauge in a metal case with three measurement scales and a built-in filter to protect against contamination. The pressure hose of the device is made of durable fabric braiding, the design includes double valves, the device is designed to work with water and oil.
Technical parameters of Rothenberger RP 50
- tank volume: 12 l.;
- maximum pressure: 50 bar;
- liquid supply: 45 ml. per beat;
- outlet diameter: 1/2 inch;
- weight: 8 kg.
Rice. 6 German compressor for crimping pipelines Rothenberger RP 50
Voll V-Test 50 (115 cu) - a pressure tester from a Belarusian manufacturer, has a durable steel tank, painted with powder paint and a two-valve pump assembly made of corrosion-resistant brass. A pressure gauge with three scales is responsible for the accuracy of measurements, the connected hose is made of rubber on a fabric basis, the unit works with water and oil.
- tank volume: 10 l.;
- maximum pressure: 50 bar;
- delivery: 45 ml. per beat;
- outlet diameter: 1/2 inch;
- weight: 8 kg.
Rice. 7 Mechanical pressure test pump Voll V-Test 50
Saturn NIR-60 (110 cu) - manual test pump (NIR) from a domestic manufacturer, the device is designed for hydraulic testing of various tanks and pipelines, the working fluid is oil and water.
Technical parameters of Saturn NIR-60
- operating fluid temperature: 5 – 80 C.;
- tank volume: 12 l.;
- maximum pressure: 60 bar;
- delivery: 40 ml. per beat;
- Outlet diameter: 1/2 inch.
Rice. 8 Hand pump for pressure testing of heating systems Saturn NIR-60
Air crimping
Not everywhere and not always is it possible to rent a crimping machine, just as it is not possible to buy one. For example, you need to test the heating in your dacha. The equipment is specific and the chances that someone you know has it is very low. In this case, pressure testing of the heating system is carried out with air. To pump it, you can use any compressor, even a car one. The pressure is monitored using a connected pressure gauge.
This type of crimping is less convenient and not entirely correct. Heating and plumbing are designed to transport liquids, which are much denser than air. Where water will not even ooze out, air will escape. Therefore, we can say with a high degree of confidence that you will have an air leak - somewhere there will be a loose connection. Moreover, it is difficult to determine the location of the leak during such testing. For this purpose, use a soap solution, which coats all joints and connections, all places where air can escape. Bubbles appear at the leak site. Sometimes you have to search for a long time. This is precisely why such pressure testing of the heating system is not very popular.
Pressure testing of a heated floor has its own characteristics - you must first check the comb and all the devices attached to it. To do this, close all the supply and return valves of the loops, filling only the heated floor manifold, and check it by raising the pressure. Having reset it to normal, the heated floor loops are filled one by one, and only then is excess pressure created. The process is described in more detail in the video.
Which method should I choose?
Many people have a question: which testing option is best for warm water floors? The air method is more convenient, since it is not always possible to put the system into operation in time when cold weather sets in, so there is a danger of freezing the entire pipeline.
With air pressure testing such problems will not arise. This is important for heating floors, since the coolant can be easily drained from the radiators, but this is quite difficult to do from floor circuits.
But with the air method, it is visually difficult to determine a leaky connection or a section of pipe through which air will escape. There will be no such problems with water, and you will immediately determine the right place.
In addition, when choosing a method for testing a heating system, you should take into account the type of pipes from which the water heating is made.
Shut-off valves
Shut-off valves must perform their main function - block the flow of coolant. If there are valves on the heating unit that do not “hold”, they need to be replaced. Different sections of the system are pressurized under different pressures, and if there is a non-working valve in the circuit, it will definitely manifest itself.
Marking of fittings
Ideally, everything should look like this: at the heating point there should be a diagram showing numbered and marked inlet and outlet pipelines, shut-off and control valves, drainage and drainage devices. The diagram must correspond to the current state of the system, that is, if changes have been made to the system, they must be displayed on the diagram.
All of the above devices must have tags with symbols corresponding to the symbols in the diagram (1,2 - shut-off valves on the supply and discharge pipelines, t1 and t2 - thermometers, P1 and P2 - pressure gauges, etc.).
In practice, at small heating points, inspectors do not always focus on this. The main thing is to make it clear what goes where, for example: “supply to the left wing”, “return from the right wing”, “supply to ventilation”, etc.
But if everything goes according to Feng Shui, this is an additional plus.
Inspection of wedge valves
Old-style wedge valves require additional attention during operation.
Wedge valve design: 1 - wedge, 2 - cover, 3 - flywheel, 4 - seat, 5 - body, 6 - o-ring, 7 - spindle, 8 - threaded bushing, 9 - bushing, 10 - stand, 11 - gland flange , 12 — stuffing box made of thermally expanded graphite.
In such valves, it is mandatory to pack the stuffing box every year. And during the year, if a leak occurs from the seal, it is necessary to tighten the flange. If this is not done, the valve will become unusable.
To replace the stuffing box, you need to unscrew the nuts on the union bolts, lift the flange, remove the old stuffing box and install a new one. The seal is wound in rings around the spindle and pressed against the flange.
There should be no signs of rust on the valve. The body should be painted black, the flywheel red, and the retractable spindle should be lubricated with grease.
About wiring diagrams
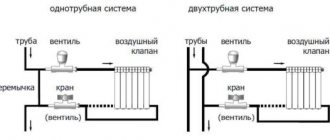
The simplest heating wiring diagram is considered to be a single-pipe one.
Its features:
- There is 1 circuit (closed in a ring);
- All radiators are connected in series;
- The coolant circulates in a closed circuit.
This is one of the simplest designs. But there are significant drawbacks here too. Thus, a single-pipe system is not suitable for large multi-story buildings. Since the further away the radiator is, the weaker it heats up. This means that the rooms will warm up unevenly.
And increasing the number of sections on a separate battery will not solve the problem. It’s just that the coolant tends to cool down along the way. And the last radiator in the line will be colder than the previous ones.
Therefore, it is worth installing a single-pipe system only in houses with a small area. You can compensate for this moment using a forced circulation pump. The changes are obvious:
- Pumping equipment is connected to the boiler;
- The coolant begins to circulate through the system with acceleration;
- The temperature will not change and all radiators will heat up correctly.
And at the same time, there are several disadvantages:
- Purchasing a pump is an expense;
- The equipment requires power supply;
- If there is a power outage, the heating will stop working.
Is it possible to wash a separate battery?
Now you know how to flush the heating system. However, sometimes it becomes necessary to clean a separate battery. There is a solution for this situation too.
Heating battery cleaning scheme
Important! Flushing a separate heating radiator must be done strictly before the start of the heating season.
Buy a flushing faucet from a plumbing store. Additionally, you need to purchase a rubber hose and a fitting with a thread that matches the diameter of the purchased flushing valve. Install the fitting onto the hose.
Direct washing is carried out in the following sequence.
First step. We connect the flushing tap to the heating radiator.
Second step. We connect a fitting with a hose to the flushing tap.
Third step. We direct the second end of the rubber hose into the toilet.
Fourth step. Open the flush tap and leave for 20-30 minutes. While waiting, hold the hose so that it does not jump out of the toilet.
Important! Although it is recommended to flush individual batteries strictly before the start of the heating season, in some situations the need for flushing arises when heating is in full swing. If this is your case, insert the hose deeper, directly into the riser. Otherwise, the hot coolant may destroy the toilet.
Video - Flushing a heating radiator
Table for selecting reagents for flushing the heating system
Prices for popular models of heating radiators
Heating radiators
Instructions for flushing the heating system
Pneumatic pulse cleaning scheme
There are 2 main methods for flushing the heating system, namely:
- using special hydropneumatic equipment;
- using chemical reagents.
Prices for popular models of air compressors
Air compressors
Flushing using the hydropneumatic method
Hydropneumatic flushing of heating systems - instructions
Hydropneumatic flushing of heating systems - instructions
This method is actively used by domestic housing offices and is quite effective. You just need to do everything in accordance with technology.
The principle is extremely simple: first, water is discharged from the system, then it is supplied back. A special pneumatic pump is used to “adjust” the water flow. As a result, under the influence of a fairly powerful pressure, scale and other deposits peel off, and when the water is drained, they are removed from the system.
To carry out this procedure yourself, you will need a pneumatic pump capable of pumping a pressure of more than 6 kg/cm2.
The sequence of actions is as follows.
Before starting work, you must turn off all taps
The end fittings are unscrewed using a wrench
First step. We close the return valve.
Heating system line diagram
Second step. We connect the pneumatic pump to the valve installed after the valve.
Third step. We reset the return line.
Fourth step. Let the pneumatic pump build up pressure above 6 kg/cm2, and then open the valve to which it is connected.
Fifth step. We close off all the risers one by one. We do this so that no more than 10 risers are blocked at one time. Compliance with this rule will make the washing procedure as effective as possible.
Sixth step. We switch the system to reset in the opposite direction. To do this we do the following:
- close the discharge and close the valve connected to the pump, and turn off the device;
- close the open valve, and then open a similar one on the “return”;
- we reset the heating system. To do this, connect the pneumatic pump to the valve in the opposite direction, then open the valve and turn on the pump. The liquid will move in a different direction.
You can determine the required duration of rinsing by eye. Has clear clear liquid started coming out of the system? We can finish! Return the gates and valves to their original positions and turn off the pump.
Prepare a suitable container to collect dirty water. If you wish, you can connect a hose to the battery and ensure that the dirty coolant is discharged into the sewer.
Chemical wash
Scheme of chemical flushing of pipes
This method can be used only in two cases, namely:
- if it is necessary to clean a heating system with natural circulation, built using steel pipes. It is advisable to use chemical reagents in situations where, for any reason, there is no desire to flush the entire system. Most often, blockages are deposited in heat exchangers. The system can silt around the entire perimeter. In the second case, chemical washing will not be of much use;
- if it is necessary to restore the old heating system. Over decades of operation, pipes can become clogged and overgrown so much that the power of the pneumatic pump will not be enough for effective cleaning. It would, of course, be possible to use a more powerful pump, but no one can guarantee that the pipes will not burst under such pressure.
Important! If the pipes are very old, with traces of corrosion and deformation damage, flushing may not have any positive result. Chemical reagents will simply dissolve the rust, causing the pipes to begin to leak. The only effective solution in such a situation would be to replace worn-out lines.
Flushing reagent
The flushing principle is simple: instead of coolant, a special solution containing acid and alkali is poured into the system. Then the mixture is circulated for 2-3 hours (if it is not the natural circulation line that is being cleaned, you will need to connect a pneumatic pump for this), after which it is drained and the pipes are filled with standard coolant.
Reagents for flushing and protecting heating systems
Important! According to the requirements of SNiP, such reagents are prohibited from being discharged into the sewer system. The best option is to neutralize the used mixture using a special composition. You can buy it in the same place where you buy the washing solution.
Never use such chemical mixtures to clean aluminum pipes. If the products remain intact after such washing, they will serve significantly less.
It is recommended to carry out mandatory flushing of the system of a private home at least once every 7 to 10 years.
