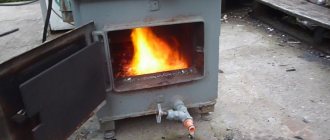
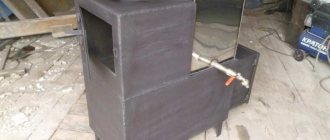
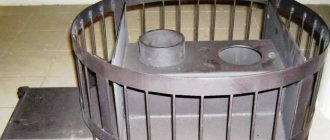
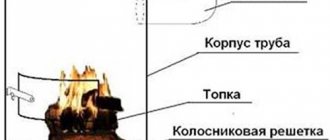
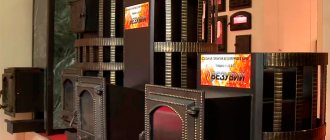
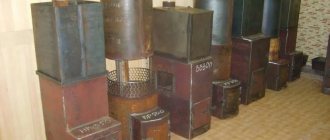
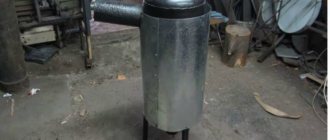
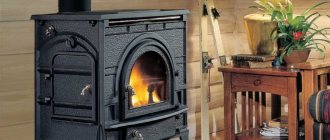
The humidity and temperature of the air, comfort and benefits for the body depend on the stove in the bathhouse. A sauna stove must be equipped with a tank for heating water, a chimney and a heater pocket for stones.
If you have a great desire to build a sauna stove with your own hands, and not to hire specialists, be sure to read this article several times, you can even print it out on a piece of paper and use it directly as a cheat sheet. At the same time, you will save significantly and gain invaluable experience, which will allow you to build similar structures for money in the future. External decoration plays an important role, because a bathhouse is a place of relaxation, both physical and moral, and the appearance of the stove plays an important role in this! After external finishing, the stove in your bath should become its “highlight”, an exclusive decoration that is simply pleasant to look at, like a painting.
The sauna stove is placed either with a combustion door into the adjacent room, or directly into the steam room, where firewood is stored. Naturally, it is better for the firewood to be supplied from the next room; if the size allows you, do just that.
Water tanks are mounted either behind the stove body on supports (floor or wall mounting), or they are mounted directly above the stove firebox. At the same time, a stationary floor mounting of the tank is safer than a wall mounting.
Description of a metal sauna stove and its main characteristics
You can, of course, buy a metal stove for the bathhouse. However, the best option would be to make it yourself. A simple option is a potbelly stove, which is a metal structure equipped with a door and a pipe. Low heat transfer and significant financial costs for purchasing fuel do not allow the heating installation to be used effectively, so it can be seen in rare cases.
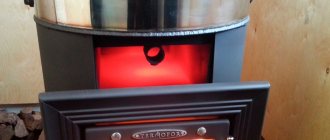
Another thing is modern iron stoves. Their attractiveness, high efficiency and highest fire safety rating are impressive. They are made from sheet iron, more than 0.4 centimeters thick. The structural components are:
- It is customary to use a thermal chamber for filling and storing stones;
- There is a tank designed to store water with a volume of 30-70 liters.
An iron sauna stove requires lining with refractory bricks. This makes it possible to evenly heat the air in the room and makes the structure completely safe for use.
Manufacturing examples
Having decided to make a sauna stove on your own, you need to approach the matter thoroughly. Firstly, choose a project that is best suited for the bathhouse, and secondly, make drawings to make it easier to build. There are many options for sauna stoves, so anyone can create their own version, taking into account some basics.
Here are some examples of homemade projects.
Metal with a tightly closing heater
This option is possible for a steam room measuring 2 by 3 and 2.3 meters high. The material, namely metal, is taken as a sheet, three millimeters thick. The air supply goes to the top of the firebox. A metal plate is welded to the back wall of such a firebox, and air is supplied into the hole between the wall of the firebox and this plate using tubes. This helps cool the back wall and push hot air up where the flue gases are concentrated. When mixed, the substances ignite. Thanks to this, the stones are heated to high temperatures, although much less firewood is used.
For a compact steam room
It is not difficult to build such a stove. To build it you will need a metal sheet up to five millimeters thick. If you take a thinner sheet, the stove will quickly burn out. Its dimensions are 90 cm in length, 80 cm in height and 60 cm in width. To create a chimney, a piece of pipe with a diameter of 11.5 cm is suitable. At the bottom there should be an ash pit with a door; between this part of the stove and the firebox, cast iron grates and heaters are placed to remove waste remaining after combustion. To do this, one third of the back wall of the heater is welded with a strong sheet of metal, where a chimney pipe is welded in the center, lowered down 10-12 centimeters.
The top of the oven is covered with a metal lid up to one millimeter thick. It is this that prevents the stones from cooling down and also prevents waste and ash from entering the steam room. The lid opens only when needed, namely before going to the bathhouse.
Simple heater
This is the best homemade stove, which is suitable for both a sauna and a simple bathhouse. The high temperature is reached in about an hour and a half. During this time, the 50 liters of water needed for swimming can boil. Such a stove has not one chimney, but two. The first is suitable for heating the room. The second is for the release of carbon monoxide and acrid smoke. The structure consists of sheets of iron 3-4 millimeters thick, but the firebox itself is made later. It is made of metal up to 6 millimeters thick. The kit also includes a small and large valve and two metal grilles.
The heater is made of steel up to three millimeters, which is attached to the “neck” of the firebox itself. Two pipes are placed on top, to which flanges with the necessary holes are welded for fixing the outlet pipe and for attaching the elbow.
With brickwork
In this option, double technology is used, that is, brickwork plus a metal body. Steel up to two millimeters is suitable here, and the brick must be heat-resistant.
First, a base is made to which the legs necessary for the stability of the structure are welded. Then they lay out a row of bricks. The remaining rows are built near the half-brick firebox. Install a grate and a grate for stones. It is also necessary to install a window for the valve, where the heat will be retained after the end of the fire. The last two rows are made solid, leaving only a place with a window for the chimney.
Having finished laying the brick and waiting for it to harden, you can begin welding the metal body, which plays the role of a case. It is necessary to cut out the metal for the ash pan and windows for loading. A door is installed, always with a seal. The metal base is complemented by a cold handle.
The last thing to weld is the lid with the hole for the chimney. When the stove is installed in the place allocated for it, you can lay the stones. Their bookmark plays an important role. After all, work efficiency also depends on this. It is better to take stones that are round in shape and of different sizes, from approximately 50 to 100 kilograms.
Having examined the types and designs of homemade sauna stoves, we can say with confidence that making one yourself is a completely doable job if you take into account all safety requirements when installing it. This will save money for the family, and the stove itself will become the property and pride of the owner.
In the next video you will see how to make a sauna stove from a pipe with your own hands.
Design features of a sauna stove
Iron stoves differ in design, the type of which is determined by the drawing.
The following varieties are distinguished:
| Devices with closed design | Compact, economical. To increase the heat capacity, the installations are lined with red refractory bricks both outside and inside. The material is fixed using metal clamps. The stone grate is located in the middle part of the structure. |
| Open Design Devices | They have a small tank and an open heater. They are installed in a steamy room to warm it up quickly and efficiently. A galvanized cover that covers the stones is necessary for greater efficiency of the structure. |
| Combined type structures | A distinctive feature is the presence of a firebox equipped with two valves, a blower, a grate, and a pair of pipes of different diameters (10cm and 14cm). For such installations, sheets made of high quality steel are used. The thickness of the iron reaches 5mm. |
An iron stove for a bathhouse may include a combustion body located horizontally or vertically in relation to the floor, two chambers with vertical loading and a heater located inside the structure. An iron sauna stove can be three-chamber, with horizontal wood loading, a water tank, and a heater.
A vertical firebox makes it possible to save more space in the steam room, however, the wood burns for a short time and will have to be constantly added in order to maintain the required ambient temperature. The horizontal firebox has significant dimensions and takes up significant free space, but the wood burns more slowly. Devices of this type are installed outside the steam room (in the dressing room), so there is a real opportunity to heat both rooms at the same time.
Helpful information
Traditionally, homemade sauna stoves are built from brick.
This material is able to heat up evenly and release heat slowly, which is important for the formation of healing steam. If the steam room has a small area, they try to place the entire structure in the washing room, and only the side of the stove is brought into the steam room
Simpler stove designs are made of metal. A universal option is ovens that use both brick and metal.
There must be a gap between the stove and the wall (as well as any other wooden bath structure). For a brick stove this distance is 30-40 cm, for a metal stove (lined with brick) - 60-70 cm, for a metal stove or metal pipe -100 cm.
The above distances can only be reduced if the walls or other wooden structures that are in close proximity to the stove are protected from accidental fire by foil with asbestos cardboard.
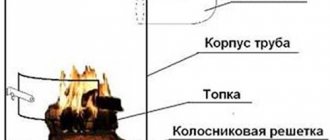
Homemade stove made from a metal pipe: layout of structural elements.
A homemade stove is made of ordinary bricks. Hole, slot and sand-lime bricks should not be used, since they do not provide uniform heating and quickly collapse under the influence of high temperatures. Poorly fired bricks are also not used. You can take used bricks if they are strong enough and there are no chips or cracks on them. Usually these are bricks from old dismantled walls and stoves. Before use, it is cleaned of solution and soot.
The size of the brick that can be used must correspond to 250x120x65 mm
It is very important that all its corners and edges are straight, the shape is correct, and various defects are absent. Most often, a homemade stove in a bathhouse is lined with bricks of grade 75-150 with a density of 1700-1850 kg/m³ and a weight of 3.6-3.8 kg
High-quality fired brick produces a ringing sound when tapped.
Types of stoves by shape
Do-it-yourself metal sauna stoves can be in the following shape:
- curly;
- rectangular;
- horizontal;
- cylindrical.
Rectangular installations are considered the most popular because their corner zones do not heat up to very high temperatures. The shape of the device is directly related to the uniform heating of both the installation itself and the room. Cylindrical and round shaped units have the lowest degree of heat transfer, so fairly thick iron is used for their production. Rectangular structures are distinguished by enviable stability, but have cold corners.
Manufacturing stages
1. To obtain a boot-shaped stove with a heater, we will need four metal boxes. The first and second boxes will be joined together using a detachable connection and form the oven itself. In the first of them there will be a firebox, in the second (“top” of the boot) there will be a hole for the chimney. The third box with stones will be inside the furnace. The fourth removable stainless steel water box is installed separately.
2. To avoid errors during assembly, the sheets of metal are first grabbed together, starting from the bottom of the sheets. Final welding is carried out only after the product has been completely assembled and inspected. To prevent smoke from penetrating into the room, the connection of the elements must be of very high quality.
We invite you to familiarize yourself with Do-it-yourself bathhouse chimney insulation
3. We assemble a box for stones measuring 50x50 cm. To prevent the top sheet from moving out during welding, it is better to install it on a tripod with a magnet attached to it.
4. In order to grip the lid and bottom, you can place a thin metal square under them to ensure their stability.
5. The bottom of the box for stones, which will bear the entire impact load of the fire, is made of a sheet with a thickness of at least 10 mm.
6. Using a grinder, a door for the heater is cut out in the upper part of the box. Its size should be sufficient for steam to escape.
7. In the lower part of the third box, in which the stones will be located, 2-4 holes are cut for pipes (the number of pipes can be arbitrary) at a distance of at least 5 cm from the bottom of the cube to improve traction. A cube with heavy stones will be installed on them.
8. Cut a hole for the firebox measuring 28x28 cm.
9. In the upper part of the first box we make a hole for inserting the second cube. We cut and weld two 4 cm plates around the perimeter of this hole on three sides to strengthen the cut site and a corner in the left, fourth part. The first three strips are attached to the inner surface, the second - to the outer part of the cut with slight mixing. A small gap is left between the plates for inserting a second box.
10. One plate is welded to the doors of the firebox and heater to strengthen them. The firebox is separated from the ash pan by a grate made of 10-12 cm steel rods. To ensure complete combustion of the fuel, it is necessary to ensure better air flow, so the grate bars are welded along the ash duct.
11. A third cube is inserted into the second box onto the pipes welded in its lower part. in which the stones will be located.
12. To strengthen the inner cube for stones, small gussets are welded to it.
13. To clear the soot, a small hole is made above the door, next to which bolts are welded on 4 sides to install the door. Before its installation, for tightness, it is wrapped with asbestos thread and screwed with brass nuts. protecting metal from acidification.
14. A lid with a hole for a chimney pipe 12x12 cm (the size of half a brick) is welded to the top of the heater. To install it, a metal “skirt” is welded to the hole. The cube with the stone box installed is inserted into the first one.
A metal heater not only heats up quickly, but also cools down almost instantly. Therefore, to take bath procedures, it is necessary to heat the device well. Heating a steam room for a group of people will be quite difficult.
There are several ways to assemble the device yourself. It can be made from a metal container, sheets or pipes. If you do not have the skills to work with a welding machine, it is recommended to assemble the unit from a pipe. The diameter of the structure will be 80 centimeters. and the height is approximately 170 centimeters. A heater and a container of water are made on top. To increase the temperature in the steam room, you need to pour water on the stones.
Tools and materials
- To make equipment with your own hands, first of all, you need to prepare a drawing, the so-called sketch with exact dimensions.
- Metal pipe with a height of 180 cm and a diameter of 60 cm. The walls of the pipe should have a thickness of about 10 millimeters.
- 8mm metal sheet.
- Steel rod with 10mm diameter.
- Metal doors.
- Grate.
- Tap.
- Chimney.
These materials are sold in construction stores. It is also necessary to prepare a welding machine and a grinder.
A homemade long-burning stove is made with your own hands in several stages. In order to assemble the structure efficiently, it is necessary to carry out all the work consistently.
Using a grinder you need to cut a metal pipe in half. The first part will be needed to make the firebox, and the other part will be needed to heat the water tank. At the bottom of the first pipe you need to make a small hole (blower), the dimensions of which are 20X5 centimeters. It is also necessary to weld special brackets for the grate from the inside. Make another hole for the firebox a little higher: 20X25 centimeters. Then the doors are installed on the fixed hinges.
The heater should be located above the firebox, into which a grate or metal grate is installed, the cells of which should be smaller than the size of the stones.
It is necessary to make a window in the heater for pouring liquid. It is recommended to place it opposite the firebox, and then install the door. A chimney is installed above the grate, after which stones are laid. You need to weld a metal circle on top and make a hole in it for the second pipe. Welding seams should be checked for water tightness, since there will be a tank of liquid on top.
Based on the drawing, you need to weld a tap at the bottom of the second pipe. Then secure the pipe section to the heater using a welding machine. The seam must be checked for water tightness. Two halves of the lid are welded to the tank. One should be welded, and the second should be installed on the hinges.
The surface of the near wall must also be insulated. To do this, you can use metal sheets. Also, a homemade long-burning structure can be lined with red brick to prevent ignition. This nuance should also be included in the drawing.
There are quite a lot of drawings of a sauna stove and each of them has its own functionality. Let's start with the furnace firebox.
- The firebox is the first thing to do. You determine the size of the firebox yourself, based on the size of your steam room. The main thing to remember is that the width and height of the firebox must be the same.
- On some drawings of metal stoves you can see ready-made solutions that you can buy in a store rather than cut and cook yourself. For example, doors, grilles, handles, and so on. You will save a lot of time if you buy them at the store.
- In almost all drawings, the firebox consists of 2 parts. In one part, firewood is burned, and the other is designed to collect ash and also serves as an ash pit.
- If stones will be placed on the top of the firebox, then it should be made of a grate. You can make a decorative lattice for beauty.
We invite you to familiarize yourself with the DIY sauna stove: 4 types with drawings, photos and order
Detailed drawing of a metal sauna stove
To create certain conditions in the steam room, different stoves are used, and different approaches to their installation are also used. If you are setting up a sauna, you will need to maintain the maximum area of contact between the stove body and the air and ensure rapid circulation of air flows along the walls.
It all comes down to heating the air in the steam room as quickly as possible. A small open heater, located above the firebox, can heat the stones to 200-250 ºС. It makes it possible to get a little steam - as a rule, this is enough for a sauna, because you only need to achieve 15% humidity.
In a Russian bath, a different microclimate is created - low temperatures are reached and a lot of steam is produced. Moreover, it should consist of very small droplets heated to 130-150 ºС - such steam is called “dry”. Such a microclimate gives the body lightness and strength. “Dry” steam can only be obtained by heating stones to values of more than 500 ºС. To achieve such indicators, stones are placed in a firebox, that is, in a closed heater.
To make a stove for a bathhouse with your own hands as high quality and practical as possible, its body is made of thick metal and the casing is made of thin metal, because it is not subject to overheating.
When placing the heater above the firebox, holes can be made in the body for ventilation. In this case, a portion of the air rising along the walls will be directed into the heater, blowing the stones and increasing their temperature. This ventilated heater is perfect for saunas.
Recommendations from specialists for installing an iron sauna stove
The main point is the presence of a high-quality foundation. Afterwards, it is necessary to take a number of measures aimed at fire safety, which are as follows:
- A metal stove should be installed at a distance of at least 100 cm from the wall.
- To avoid fire in the room, it is necessary to cover the walls located in the immediate vicinity of the structure with foil and heat-insulating material, which will enable wooden walls to avoid ignition.
- An iron stove requires chimney insulation. You can resort to sandwich pipes.
- It is imperative to build a brick sarcophagus on top of an iron stove. Its appearance will improve, and safety from possible burns when touching the hot metal walls of the oven will increase.
Horizontal model
The body is positioned horizontally. In such models, the open heater is welded on the sides to the body. The outlet for combustion products is located on the side.
Note!
DIY birdhouse: step-by-step diagrams and drawings for making it yourself. Types of birdhouses and materials + design ideasDo-it-yourself landscape design: planning and zoning of the site, selection of decorative elements. New products and design ideas (photo + video)
- Do-it-yourself sliding gates at the dacha: options for construction materials, preparation of the territory + step-by-step instructions for doing it yourself
The advantage of the horizontal model is that the door to the firebox can be moved into the rest room, so you don’t have to carry firewood into a humid room with steam.
In addition, such models heat the dressing room better - this is important if the bathhouse is spacious enough. The tank is usually hung from the end of the stove.
Laying waterproofing
Step 1. After 14 days, we can begin laying bricks, although the foundation must first be waterproofed. For these purposes we will use a simple roofing material. We cover the base with two layers of this material.
Step 2. To do this, we need to cut strips of roofing material so that they protrude beyond the perimeter of the base by about 5 centimeters on each side. We lay the second strip of material with an overlap of at least 10 centimeters over the previous one. Similarly, we continue to cover the foundation with strips.
Step 3. Now we begin laying the second layer of roofing felt. We do this in the same way as described above, but perpendicular to the stripes of the first layer.
Step 4. Quite often, bitumen or other mastic is used to fix waterproofing. But we will not do this, since the first level of the furnace will consist of a solid brick layer, therefore, it will reliably fix the strips of roofing material.
Finishing
Most often, the stove-heater is left without finishing. Red brick is laid out for jointing, and all bulges and irregularities are sanded. At the same time, it is also practiced to enhance the color of bricks with a solution of sulfuric or hydrochloric acid. However, the stove-heater can be plastered or tiled.
If you decide to plaster, then the layer should be made up to approximately 15 mm. For this work, you can use the following compositions with proportions:
- clay (1) – asbestos (0.2) – sand (2);
- lime (2) – sand (0.2) – asbestos and gypsum (2);
- sand (3) – clay (1) – cement (1) – asbestos (0.2).
Immediately before plastering, the oven is heated. After this, the first continuous layer is wetted and applied. When the first layer has set, the next layer is applied. As a result, the surface of the wall should be rubbed so that the wall is smooth and looks neat. Finally, whitewashing can be done.
Selection of stones
River stone
Based on the name of the stove, it uses special stones that undergo sanitary and geological examination. As for the specific choice of stone, there are several options:
- Soapstone chlorite.
- Jade.
- Gabbro-diabase.
- Raspberry quartzite.
- Porphyrite.
For baths, sea stones are considered to be the best option. However, such an opinion is unfounded. As practice shows, river stone can withstand high temperatures much better. Sea stone is destroyed very quickly, as it does not have sufficient strength.
Types of stones
But in addition to the type of stone, you should choose the right size and shape. For example, these could be medium stones with a smooth structure. Remember that there must be enough stones, as this affects the quality of heating and steam release.
So, when deciding which stone is best to use for a stove, remember not only practicality, but also the beauty of the room. Beautifully shaped stones will be a real decoration of a Russian bathhouse.
In this article we familiarized ourselves with the most common type of stove that is used to equip a Russian bath. As you can see, the process of its construction is quite complex and responsible. Therefore, there is no need to rush to start work. Carefully study all the recommendations in this article, diagrams, photographs and video material.
Masonry mortar
For laying fireclay bricks, a mortar prepared from white fireclay clay is used. You can also purchase a ready-made composition for laying fireclay. You cannot place the entire oven on this solution. Why? This solution is sintered into a monolith at a temperature of 700–800°C. There are no such temperatures in external masonry. Therefore, after a short time it will crack and spill out, which will lead to the destruction of the masonry.
For external masonry, a solution of quartz sand and clay is used in a ratio of 1 (clay) : 5 (sand). The sand must be of river origin or quarry. River sand is somewhat worse, since its grains of sand are round and round, and the solution itself will have worse characteristics. Therefore, preference is given to quarry sand. The sand is sifted through a mesh with cells of 2–2.5 mm. This will prevent large particles from getting into the solution.
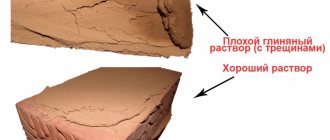
As for clay, it can also be obtained from a quarry from a depth of at least two meters. The quality of the clay should be checked. To do this, soak 200 g of clay in water for a day. Then roll the clay into a “bun” and leave it to dry under a canopy in the open air. After 2 days, drop it onto a stone slab from a height of 170 cm. If the “bun” has crumbled into several large parts, then clay is suitable.
The selected clay must be soaked in water to a paste-like state and ground through a sieve. First through large cells, and again through small ones.
Heater location
Depending on the area of the steam room, a stove of a suitable size is designed. If, as a result, the heater takes up space up to 2 m2, then it can be installed in a specially made niche in the wall. Due to this, heat loss can be prevented, since its combustion will be carried out directly from the steam room. Although in most cases the heater is designed in such a way that its firebox is carried out from the next room.
A sauna stove should be installed so that the heat from it spreads into the dressing room, washing room and steam room. Thanks to this, it will be possible to make a common chimney with three separate chimney channels for a gas boiler, fireplace and heater stove.
Photo
Kamenka buller (buleryan)
Sauna stove-heater “Breneran”
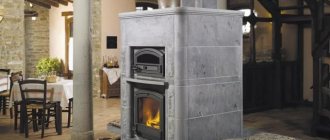
Sayany Vitra stove Termofor Stove for a Russian bath Made of cast iron In the steam room, the heater is combined with a fireplace in the dressing room
Fireclay furnace fencing Homemade stove-heater
Did the article help you?
Masonry bricks
For laying a stove, it is important to purchase well-fired and high-quality bricks. It should not have chips or cracks. Its edges must be smooth. The quality of a brick can be checked very simply. If, when dropped, it falls apart into several large pieces, then the brick is suitable. If, when dropped, it crumbles into many small pieces, then such a batch of bricks is not suitable for a heater.
Commissioning
Before you are going to light the stove, you should let it dry thoroughly. To do this, open the doors, vent and vents open for 7 days, this way the oven will dry out faster. If the stove does not smoke when lighting, it means the draft is good.
You should not rush to light the stove. Otherwise, if there is insufficient drying, cracks may form in the masonry.
Masonry
The masonry process is very painstaking and complex. There are a large number of subtleties and nuances here, understanding some of which comes only with experience. Therefore, to make this work easier for you, this section contains several videos that tell you step by step and show how to lay row by row.
As an example, consider the manufacture of an open small stove-heater. The size of such a stove is 102x62 cm. It is capable of heating a steam room with a tank, while the tank itself is located separately. It uses an interesting water heating system - an open siphon. So, a pipe is welded into the tank at a slight angle, which is sealed at the end. It should be under an open fire in the firebox. As soon as the water in the pipe boils, it rises into the tank, and cold water comes in its place.
The diagram below shows an example of a stove with an open heater:
Diagram of an open heater
And also a diagram of the order of the firebox of an open heater:
Order of the firebox
Below in the diagram is the order of brick laying of the stove:
Order of brick laying
If you want to make a closed stove-heater, then keep in mind that this is much more difficult to implement. There are many nuances that must be taken into account when laying it. It is quite difficult to describe the entire technological process, so we suggest you watch an introductory video. The peculiarity of such a furnace is that the reservoir for stones is lined with fireclay bricks:
Video about making a closed stove:
It is worth noting that upon completion of the masonry, drying should be 10 days. At the same time, drafts are unacceptable. Only after this time can the first fire be fired.
Photo instructions for ordering the heater stove
Stage 1-4
Stage 5-8
Stage 9-12 Stage 13-16
Stage 17-21 Stage 22-25
Construction of a firebox and ash pit
It is very important to correctly calculate the dimensions of the firebox. In this case, it is worth taking into account various factors, starting from the presence of a collector for heating water and ending with the type of fuel for heating the bath. The average depth of the firebox is 800 mm. 250 mm is allocated for the hot water system, and 550 mm is the usual length of firewood. The height of the firebox can reach 350 mm and the width 400 mm. With such dimensions, 8 to 10 logs of firewood can be placed in the firebox.
Water container
Immediately before building the stove, it is important to determine the volume of the tank in which the water will be heated. The volume of the tank will depend on the intensity of visiting the steam room. So, the calculation is made based on one liter of hot water per person. It is best to use an open container. Although there will be evaporation, there are a number of positive aspects:
- Convenient when filling the container.
- The ability to carry out maintenance or repair of the internal part if necessary, for example, remove scale, clean and dry.
- In winter, completely remove water, protecting the tank from freezing the water in it.
Chimney
The heater stove differs from its analogues in that natural stones are used to accumulate heat. The first segment of the pipe passes through just such a compartment with stones. The chimney can also pass inside a container of water to heat it. In all other respects, there are no special differences in the construction of the chimney. It can be assembled from sandwich pipes or ceramic blocks. The manufactured chimney must be insulated.
As for the lower part of the chimney, it is made of steel, right up to the ceiling. It is necessary to install a damper when passing through the ceiling pipe.
The gate is designed to improve combustion intensity, as well as to regulate draft.
If a sandwich pipe is used, then it has two walls, between which there is a heat-insulating material. They can be installed in the area from the ceiling to the fungus on the roof. Basalt mats are used to insulate a brick chimney. They wrap the pipe. Wire is used to secure the mats. An umbrella or fungus must be installed on the chimney. This will protect the chimney pipe from sediment entering it.
When arranging a chimney, you should decide what type it will be: external or internal.
You can learn about other subtleties of arranging a chimney pipe from the video:
Foundation structure
The location for a stove made by hand from metal is determined during the design process - a foundation must be poured under the stove. Under a light wooden bathhouse there may not be a strip foundation - only a columnar one.
Therefore, the foundation for the stove is often poured separately from the foundation of the house. The best option is to pour a concrete foundation with reinforcement. The minimum dimensions are 1x1m or 1x1.5 for a horizontal oven.
The top of the concrete is covered with two layers of fire-resistant solid red brick in a mortar of clay and sand (the cement mortar will crack from the heat). The foundation should be raised 300 mm above the floor. The top is covered with steel sheet.
