Today, a variety of heating devices are used in greenhouses, differing both in design features and type of fuel. They run on electricity, gas and solid fuel. You can make a good stove for a greenhouse with your own hands, or you can purchase a ready-made model - here everyone is determined by their capabilities and planned budget. But those who are sure are right: a greenhouse is not a house, and therefore there is no point in investing a lot of money in heating it - the idea simply will not pay off. Therefore, consider the popular options below on how to make a good stove with your own hands - they are a huge success among gardeners and are practically in no way inferior to expensive industrial models. In this article we will look in detail at the manufacture of the most popular types of stoves for greenhouses.
- 2 Option No. 2. Standard greenhouse stove using wood chips and wood
- 3 Option No. 3. Making a sawdust stove is profitable!
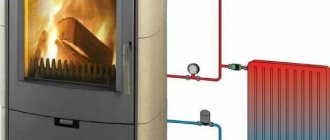
- 4 Option No. 4. A stove with a heat exchanger - for warm watering!
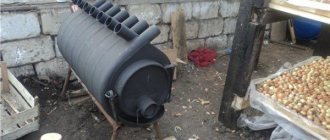
- 5 Option No. 5. Greenhouse buleryan - nothing complicated!
Features of modern products - a hidden threat
What is the reason? I think, first of all, in the recent publications on the pages of newspapers and magazines, as well as on television screens, about what modern sellers of “healthy” products feed us. As it turned out, for the most part, all these beautiful and appetizing delicacies do not always bring the desired benefits to the human body, and in some cases they can cause serious harm to the body, even death. In addition, it is much more pleasant to see vegetables and berries on your table that were picked just a few minutes ago from the garden, without pesticides or other chemical additives. The benefits of such products are undeniable.
Materials for constructing a greenhouse oven
The most suitable option for the manufacture of a heating device is metal, the use of which will ensure uniform heating of the entire room.
The main part of the design is a metal case, for which the following available means are suitable:
- welded steel cylinder;
- cut gas cylinder;
- wide thick-walled pipe;
- tank or barrel.
Having chosen a material suitable for the manufacture of the housing, you need to stock up on a rolled metal product for the smoke duct and a steel strip (reinforcement, angle or channel). These materials are enough to create your own heating equipment for the greenhouse.
Oven - solution to the problem
Many areas of our country, due to climatic conditions, are not predisposed to growing heat-loving plants. The latter simply do not have time to mature. But you can grow excellent vegetables all year round in your greenhouse plot. How? The answer is simple - use a greenhouse stove.
Stoves for heating greenhouses allow you to harvest crops all year round, even in areas with a cold climate.
Expensive doesn't mean impossible
Understanding that a stove for a greenhouse requires the use of energy resources and their high cost, we want to devote this article to the question of how to make a stove for a greenhouse using fuel with your own hands, the purchase of which involves minimal costs, and in some cases will not cost you at all no costs. Do-it-yourself greenhouse stoves should be economical, easy to operate and use available fuel.
Fuel - take a look around
Unreal? You are wrong. So where to start? If you already have a small greenhouse on your site, it’s time to take care of its heating. First of all, you need to decide on the type of fuel that your stove will use to heat the greenhouse. Option one: there are woodworking companies near you. This is not uncommon in our northern regions. The main waste from such enterprises is wood chips and sawdust. This means that it is most profitable to build a stove using sawdust with your own hands.
Sawdust - simple and long lasting
But heating a greenhouse in cold weather requires constant operation of the stove. This means that we will need to build a stove that, while heating the greenhouse around the clock, will consume a minimum amount of fuel and with one or two refills. In other words, you will need a stove for a long-burning greenhouse. The picture shows a stove burning sawdust.
Sawdust stove diagram
Almost anyone can make this long-burning stove with their own hands in literally one day. At the same time, the stove perfectly heats the greenhouse room.
What do manufacturers offer?
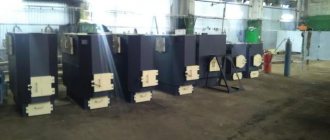
If you cannot make a stove for a greenhouse yourself for some reason, you can purchase a ready-made heating unit designed for long-term burning. The choice of models on the market is not large. Furnace models may differ from each other in operating principles:
- in convection units, the air is heated by convection, repeatedly passing through the stove casing;
- pyrrolysis systems produce heat due to the afterburning of gases that are formed during the combustion of fuel;
- models that combine both operating principles have the highest efficiency.
Model examples:
- The multifunctional stove "Vologda" heats rooms through gas generation. Laying 5 kg of firewood allows the unit to operate continuously for at least 8 hours. Therefore, you can safely leave the system overnight and not worry about the greenhouses cooling while the owners are at work. The stove is equipped with a cooking panel, a water heating system and can be used to heat a sauna, which allows the device to be used all year round.
- Buleryan or “Breneran” is designed in such a way that it consumes cold air from below and releases it to the top already warmed up. This system allows you to quickly warm up the room with slow fuel consumption. The location and design of the upper pipes supplying hot air make it possible to heat several rooms at once using special hoses.
- Oven “Professor Butakov”. The domestic device for long-term combustion “Professor Butakov” has high heat transfer, but the burning time of the fuel in the system is much shorter, and cleaning the pipes is more difficult than other systems. Warm air is supplied from the oven only upward, which should be taken into account when placing seedlings, because the lower layers of air warm up much less.
- Slobozhanka or “Super Potbelly stove” will heat a greenhouse with an area of about 50 sq.m. in just 15 minutes. 7 kg of firewood is enough for at least 6 hours of continuous operation. You can connect tubes to the stove to heat the water circuit and thus run a heating system around the entire perimeter of the greenhouse. The device is undemanding in terms of fuel: for its operation, you can use up to 30% sawdust, peat, agropellets, cones or waste from agricultural production with a humidity of up to 40%.
Not all trash is trash
How does a long-burning stove work and what is it made of? You can make such a stove with your own hands from any available material:
- Sheet steel
- Propane tank
- Large diameter pipes
- Old metal barrel
A simple barrel - why not bake?
As can be seen from the figure, a homemade long-burning stove is a container with a lid separated by a metal partition dividing it into two parts. At the bottom, the legs are welded and a door is installed. A piece of pipe is welded in the upper part, acting as a chimney. We did not specifically indicate the dimensions, since everything depends on the containers and materials used. Let's say you are using 200 liter drums. You will need:
- Metal barrel 200 l – 2 pieces
- Pipe section 159 mm
- Lengths of reinforcement or steel strip
We build a stove - we cut, drill, cook
Let's start production. In principle, you can use one barrel, just having two barrels will greatly simplify the manufacturing process.
- Cut out the top of the first barrel . In the place indicated in the figure, cut a hole and weld the chimney pipe.
- In the bottom, strictly in the middle, cut a hole with a diameter of 100 mm . That's all for now with this barrel.
- We mark the second barrel . To do this, install it vertically and mark 250 mm from the bottom.
- After this, the barrel must be cut into two parts .
- is cut in the lower part for storing firewood and a door is installed. It can be made from any available material.
- Legs made of reinforcement or steel strip by welding Here you can improvise.
Final assembly
We have a stove itself for heating the greenhouse with a chimney and a separate firebox with legs and a door.
- We connect them as shown in the figure and weld them. Try to make a quality seam.
- All that remains is to make the lid .
- You can make it from the remains of the barrel from which we made the firebox.
- That's it, the oven is ready. All that remains is to install it in the greenhouse and connect it to the chimney.
We will not dwell on the chimney in detail; our resource describes in some detail the various types of chimneys.
Option number 4. A stove with a heat exchanger - for warm watering!
Here's how to make a stove from two barrels at once - combustion will take place in the first, and the second will serve as a heat exchanger.
So, the order of work:
- Step 1. Take two metal barrels with thick walls - one for two hundred liters, the second for fifty. Housings from square washing machines are ideal.
- Step 2. Cut off the top of the barrel. From the smaller one we make a lid, securing the edges with reinforcement. We weld the handle and make legs 10-12 cm long from three corners.
- Step 3. Using a grinder, we cut out a support partition from a sheet of metal for mounting the camera. In the center we cut a hole with a diameter of 6 cm.
- Step 4. Inside we insert a slightly smaller tank with a drilled hole - also 6 cm in diameter. We lay the partition in the shape of a triangle from steel rods. The height of the support should be 15 cm; we place this stand on the bottom of the outer barrel.
- Step 5. We make a box under the partition to collect combustion products. It will have a bottom, walls and handles for opening and closing the stove. For this box, cut a 30x13 cm hole in the wall of the external tank.
- Step 6. We weld a 1 mm thick steel box to the hole. Weld a pipe into its central part and, using a clamp and thermal insulation, attach a pipe to it.
- Step 7. In order to protect the metal parts of the stove from corrosion, cover all parts with heat-resistant paint or aluminum chips and liquid glass.
How to work with such a stove? We add fuel, use, as in previous versions, a cone-shaped pipe and compact sawdust around it. Then take it out and throw a lit long match inside the formed channel.
Charging the Furnace - Requires Skill
We will also need a special device for “charging the stove.” The figure shows how the compaction cone is structured. It can be made from wood or any other available material.
The main thing is that its lower part fits freely into the central hole of the partition separating the stove and the firebox. It will be enough if the cone enters the hole to a depth of 15 - 20 mm. The top of the cone should have a diameter of 150 mm. Now you can refuel the oven. To do this, remove the lid and insert the cone into the hole, thereby blocking it. We gradually load sawdust into the oven, compacting it well. It is necessary to load two-thirds of the oven volume.
Sawdust stove - launch
When the sawdust is loaded and compacted, remove the cone . A cone-shaped hole formed in the sawdust. We put a small amount of wood chips into the firebox and set them on fire. They have one task - to set fire to sawdust. Due to the draft passing through the hole in the sawdust, they quickly flare up; you can splash a little kerosene or diesel fuel at the very beginning, or you can do without them. When the sawdust starts to burn, you can close the lid. As you can see, we only needed the firebox for ignition; the rest of the time, the entire combustion process will take place inside the stove.
Sand seal - simple and effective
The oven started working. If you have doubts about the tightness of the lid, you can install a simple sand seal, as shown in the figure.
Sand gate
But if the chimney is correctly selected and the draft is good, there should be no smoke from under the lid. Using the door you can adjust the draft.
Pyrolysis couldn’t be easier
Depending on the size of your stove, it will heat the greenhouse for several hours. So, for example, a similar stove made from a propane cylinder can operate without refueling for 8 to 10 hours. As for the 200-liter barrel, the operating time without refueling reaches more than 30 hours. It all depends on the adjustable draft and ambient temperature. The duration of operation of a pyrolysis furnace is determined by the use, in addition to burning sawdust, of burning gases emitted by sawdust. This is a kind of simplest version of a pyrolysis oven.
But the most interesting thing is this:
- If you do not have two barrels, you can make this stove without a firebox .
- Just place the barrel on the legs, weld the chimney, cut the bottom hole, fill with sawdust, close the lid and you are ready to start.
Of course, it won’t be very convenient to light it, but the stove will work just as well. just need kerosene, diesel fuel or a little used oil to light it. The draft can be adjusted using a damper installed in the chimney pipe.
Potbelly stove for a greenhouse
A potbelly stove is a simple and economical option for organizing the heating of a greenhouse, which appeared in Russia after the revolution, during the times of war communism. The prototype of the device is considered to be an ancient Russian stove. The heater system is ingenious and primitive: an instantly heated dilapidated barrel with a welded firebox door, a chimney, a pipe for the exit of warm air and a jumper in the upper third of the tank.
Sawdust, firewood and coal are used as fuel for the installation. The intensity of combustion depends on the nature of the combustible fuel and the access of air to the firebox.
The only drawback of heating is the constant monitoring of the operation of the device.
The heating system is based on the following factors:
- The movement of hot air through a pipe laid in the central part of the greenhouse or on the sides.
- Formation of hot air above the jumper and exit from a special pipe.
- Thermal radiation from the furnace planes.
Recycling plus heating
Stoves for heating greenhouses can use other types of fuel. For example, if you use a furnace that runs on used motor oil , then you are unlikely to have a problem purchasing this type of fuel. Many enterprises and service stations will be happy to get rid of working hours. Let's look at a waste oil furnace. Of course, it is more difficult to manufacture , but everything will be more than justified when using it. Homemade stoves for greenhouses using this type of fuel never lack it in areas with a wide network of service stations and enterprises using trucks.
Operation of the furnace during mining
The figure shows a diagram of this furnace. becomes red hot during operation . You can successfully cook food on it.
Scheme of the furnace in production
We provide precise drawings describing the materials for the manufacture of this furnace. You can use a stainless steel chimney pipe.
Drawings and dimensions of the furnace during development
Chimney – vertical only
Let’s make a reservation right away that this stove does not involve the use of horizontal sections of the chimney. In other words, we choose a chimney for this stove that is strictly vertical.
The operating principle of pyrolysis boilers - their pros and cons
After reading the advertising brochures of manufacturers of long-burning boilers, you can truly be sure that they are products of high technology that are beyond the control of an ordinary person.
However, in fact, the pyrolysis process, i.e., the decomposition and gasification of solid fuel, occurs with any method of its combustion, and pyrolysis furnaces differ only in that they have two separate chambers for the separate combustion of solid and gaseous substances.
Conventional and pyrolysis-type furnaces are complex and expensive
. Therefore, it should be easy to recreate such a design with your own hands if you have a welding machine and the skills to work with it (as a last resort, you can always contact a professional welder). Of course, it will not be possible to completely automate the process of monitoring and loading the combustion chamber, as is possible in a factory furnace, but the price of such a homemade product will be incomparably cheaper.
So, in any gas generator boiler there are two chambers:
- loading chamber - fuel with a high yield of volatile substances (wood and its waste, brackets, coal, coke) is supplied here;
- combustion chamber - gases enter it from the first compartment and air from the secondary supply.
In the loading chamber, the supply of oxygen is artificially limited, due to which firewood or coal does not burn, but smolders, slowly releasing heat into the environment. The released wood gases pass into another firebox, where secondary air is mixed with them, and the volatile products burn completely in it.
As a result, the combustion process lasts 12 hours or more, and the firewood, even the largest, leaves a minimum of ash.
Diagram of any long-burning gas generator
However, this design also has disadvantages:
- Firstly, such a stove, either factory-made or self-installed, is very demanding on fuel moisture content - if it exceeds 20%, the firewood must be dried. For the same reason, even before installing a stove for a greenhouse, it is necessary to equip a woodshed.
- The second disadvantage is the instability of combustion with a small (less than half) load of the solid fuel compartment.
Furnace in operation - start-up and principle of operation
This oven works as follows:
- Used oil is poured into the container through the filler hole , 2 - 3 l
- Light a paper wick and light the fuel
- Cover the hole with a flap so that there remains a hole with a diameter of 10 - 20 mm
- After the fuel ignites, adjust the degree of its combustion using the damper
- After 5 - 6 minutes the oven will heat up and enter operating mode
- regulate the furnace power using the damper by adding fuel into the filling hole
When adjusting the furnace power, note the time during which your furnace operates on a certain amount of fuel. With the help of simple calculations, you can achieve a result in which you will have to add fuel to the stove tank a minimum number of times.
After all, it is not the fuel itself that burns, but the vapors formed during heating. In this oven you can use:
- Waste oil
- Heavy oil products that cannot be regenerated
Combustion in this furnace occurs in an optimal mode, in which minimal emissions of harmful substances occur into the atmosphere.
- If you go even further and install a water or air jacket on your stove, then this stove can be connected to a water heating system , the power is quite enough.
- As for the greenhouse, heating with this stove will allow you to receive heat practically for nothing , spending time on delivering used oil.
Agree with the nearest organization or service station, and prepare several barrels on the site for fuel for the heating stove for greenhouses. Your greenhouse will always be provided with free heat, and the service station will be glad to get rid of harmful petroleum products.
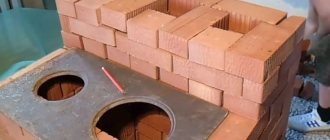
Method No. 2: brick oven for a greenhouse
An excellent option for year-round heating.
To build a stove for a brick greenhouse, you will need:
- 220 solid ceramic bricks;
- 80 fireclay bricks;
- 80 l of masonry clay mortar;
- 30 l of masonry fireclay mortar;
- 0.25 m3 of foundation concrete;
- a grate for the grate made of cast iron, a door for the firebox, blower and cleaning, a smoke valve;
- waterproofing material.
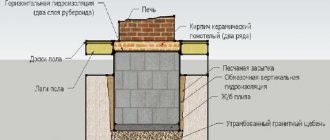
Below is a cross-sectional diagram of the furnace:
The brick oven has an increased heat capacity, so the greenhouse can be heated in severe frosts
A do-it-yourself brick oven for a greenhouse is made as follows:
1. The weight of the stove is large; a slab foundation will be required. Thickness – from 20 to 30 cm. Base area – 0.7x1 m. A trench is dug over this area, 40–45 cm deep. Formwork is laid around the perimeter. The foundation slab is reinforced. All that remains is to fill the foundation with concrete.
The bottom is leveled with sand, a layer of 20 cm
2. A firebox is created for stowage and an ash pit for waste disposal. The process is carried out according to the scheme. The starting 4 rows of the building are laid out from red brick. A clay mortar is used for adhesion. A cast iron ash pan door is installed.
The subsequent rows of the furnace, namely from 5 to 12, are made of fireclay bricks. In this case, a solution that is not afraid of fire is used. In row 5 the grate is installed. Rows 6 to 8 are equipped with a combustion door. The firebox arch will be in rows 9, 10, 11 and 12.
The door is fixed in the masonry using metal wire
3. Subsequent rows of the stove (13–15) are made of refractory bricks. Rows 13 and 14 will cover the arch of the firebox. Row 15 is equipped with a cleaning door. Starting from the 16th century, the masonry is made of ordinary brick. A cleaning door is also installed in row 16. The channel for the chimney will be rows 17 to 21. The first smoke damper is installed in row 22.
Rows 13-22 of the stove are made of refractory bricks
4. Subsequent rows (from 23 to 27) are also made for the smoke channel. Starting from row 28, the channel is narrowed, and at row 19 another smoke damper is installed. And the 30th and 31st rows will be the roof of the furnace. From the 32nd row a chimney of a certain height is formed. It is created with a bandage and consists of 4 bricks.
Stove rows 23 to 27 are created for the smoke channel
The stove for the greenhouse was made from bricks with your own hands. It remains to check its functionality.
If the greenhouse is low, then the stove can be made with a smoke channel located horizontally
Single barrel oven
We have already mentioned that you can get by with just one barrel, but the efficiency of such a stove will be lower, and in order to adjust the temperature regime with such a stove, you will have to work a little more.
All you need to do:
- Place the barrel on the legs and weld the chimney; it must have a damper;
- Afterwards, cut the bottom hole and fill the barrel with sawdust in the manner already described.
- You will have to create a small space under the stove to ignite the sawdust.
Yes, it is somewhat more difficult to light such a stove; kerosene is not too much, just use it with caution. The draft in such a device is regulated by a damper in the chimney.
Refilling the stove with fuel
To load sawdust into the oven, remove the lid and insert a cone into the central hole of the dividing partition. The oven is loaded with sawdust approximately two-thirds in height with careful compaction. After loading sawdust, the cone is removed.
Place some wood chips through the hole in the firebox and set it on fire. To speed up the kindling process, it is possible, but not necessary, to use a little kerosene. The sawdust flares up intensely thanks to the draft that is formed in the hole formed by the cone.
After the sawdust ignites, close the lid. The firebox in the stove is designed for the process of igniting sawdust, and the draft of the unit is controlled using the door.
Advice! If the stove for a greenhouse on sawdust is made of a gas cylinder, then it will be able to heat the greenhouse with one filling of sawdust for 10 hours. A stove made from 200 liter barrels can operate for more than a day without refueling. The duration of its operation depends on the intensity of traction and the outside temperature.
Such a sawdust stove for a greenhouse is the simplest version of a pyrolysis heat generator.
Source of the article: https://kotel-otoplenija.ru/pechi-dlya-teplic-na-opilkax
Barrel stove - preparatory stage
Let's consider the most elementary, and therefore accessible, design. The entire stove is a container (barrel) with a lid divided into two parts by a metal partition. Also, the legs are welded to such a barrel - no matter what the bottom is rotten, and as a fire safety measure, a door is installed for loading fuel. A chimney, a piece of ordinary metal pipe welded on top, would also be useful.
What to make a stove for a greenhouse from?
- 200 liter barrel, 2 pieces;
- Sections of reinforcement (steel strips);
- A pipe section of 159 mm.

