If you don’t want to pay for electricity or bother with a wood stove, then you should buy an autonomous gas heater to heat your dacha. It is not necessary to connect to a gas pipeline; the heater successfully burns propane from a cylinder. The question is choosing a household heater - for one room a portable version will be enough, in another case you will need a more powerful stationary device. To clarify the situation, we suggest making a brief overview of heaters using bottled and natural gas.
General design of the “autonomy” and principle of operation
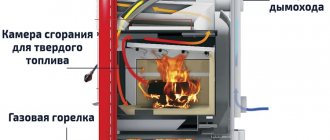
Autonomous interior heaters differ in design, however, in general terms, the device consists of:
- combustion chambers;
- heat exchanger;
- fan;
- fuel tank (on some models);
- a sleeve designed to supply air to the combustion chamber and exhaust gases;
- The delivery kit includes a fuel pipe, fuel line pump, wires and fasteners.
As for the operating principle of an autonomous heater, it looks like this:
- Cold air enters the combustion chamber, forced by a fan into the flame tube area;
- The air heated in this way is returned to the car interior;
- Combustion products escape through a heat-resistant sleeve;
- Devices that additionally perform pre-heating of the engine, which has a common circuit with the cooling system.
How does the heating system work?
The fan blades capture air and direct it to the heat exchanger. The air flow heated by it circulates throughout the building, performing several cycles.
The main advantage of the gas heat generator design is that the arrangement of the chambers and compartments prevents the mixing of spent fuel decay products with the air from the room
While operating the equipment, there is no need to worry that a pipe will burst and you will flood your neighbors, as often happens with water heating systems. However, the heat-generating device itself contains sensors that, in emergency situations (threat of breakdown), stop the fuel supply.
Heated air is supplied to the room in several ways:
- Ductless. Warm air flows freely into the space being processed. During circulation, it replaces the cold one, which allows you to maintain the temperature regime. The use of this type of heating is advisable in small rooms.
- Duct. Through a system of interconnected air ducts, heated air moves through the air ducts, making it possible to heat several rooms at the same time. Used for heating large buildings with separate rooms.
The movement of the air mass is stimulated by a fan or gravity. The heat generator can be installed indoors and outdoors.
Using air as a coolant makes the system as profitable as possible. The air mass does not cause corrosion and is also not capable of damaging any elements of the system
In order for the heating system to function correctly, the chimney must be correctly connected to the gas thermal energy generator.
If the smoke duct is installed incorrectly, it will become more likely to become clogged with soot build-up. A narrowed and clogged chimney will poorly remove toxic substances.
Interior liquid heater
The device is integrated into the overall system of the car - it is connected to the fuel line, and the electrical components of the heater are connected to the car's electrical circuit. When turned on, the liquid heats up in the cooling system and passes through the engine and radiator. As it heats up, the fan turns on and warm air is supplied to the cabin. The device, using a sensor, automatically regulates the refrigerant pumping and fan speed.
The liquid interior heater is turned on either manually or automatically according to the start time specified by the user. In addition, some models are controlled remotely, which allows the car owner to warm up the car in advance.
How to choose a heat generator?
When choosing heating equipment, you need to take into account a lot of details. First of all, it is important to assess the area of the heated room. The larger the building, the more powerful the heat generator should be.
The heat capacity of a building is calculated using the formula:
р=V·ΔT·k/860
p is the desired heat capacity;
V - heated area (the height, length and width of the room are multiplied);
ΔT is the difference in temperature in the building and outside it;
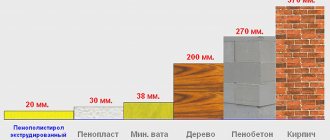
K - thermal insulation (indicators of the material with which the building is insulated).
Indicators of the most commonly used materials:
- double layer of brick - 1-1.9 W/m°C;
- single layer of brick - 2-2.9 W/m°C;
- wooden panels or corrugated sheets - 3-4 W/m°C;
- modern heat and waterproofing - 0.6-0.9 W/m°C.
The indicator for the number of kilocalories in kilowatts is 860. Generally accepted standards - for 1 kW of heat generator power, 30 cubic meters of forced air are required.
The power of the air heater must exceed the power of the burner by at least 15%. Such equipment is reliable and effective in any situation. Its use reduces energy costs
Knowing the value of heat capacity, you can select equipment that can heat the entire area of the room.
Nuances when choosing a heat generator
Before purchasing heating equipment, you must:
- arrange a chimney to release toxic gases;
- think over a system of ventilation ducts for circulating heated air;
- Using the formula, calculate the power of the device.
Having completed all these steps, you can safely go shopping.
If there are problems with ventilation in the room, it is recommended to install a powerful floor-standing generator and synchronize its operation with ventilation that takes air directly from the street
To select a high-quality gas heat generator model, you need to pay attention to the following nuances:
- type and design of the burner - relevant if a fuel change may be required;
- warranty card and technical passport - a guarantee of the purchase of original (not defective) equipment;
- high-quality components - such equipment is more expensive, but its service life is much longer.
Taking these factors into account, the selected heat generator will last for many years.
Tips for choosing reliable equipment
By following simple recommendations you can avoid purchasing low-quality goods:
- It is better to make purchases at certified points of sale. Often, at wholesale stores and on the Internet, defective products are sold under the guise of high-quality equipment. The trap is the price halved.
- If it is not possible or you did not have time to calculate the required power of the device, then the consultants in the store will do this for you. To do this, you only need to know the area of the house, the height of the ceilings and the thickness of the walls. After making calculations, specialists will offer the optimal model for your home.
- It is recommended to purchase brands that have positive reviews on the Internet. You can also find out in advance how the equipment behaves during operation and other features.
For home use, the ideal option would be models such as Airmax D 28, Titan 25 (30, 35), Fuela, TG-7.5, Dragon 12.
Types of interior heaters by power source
Interior heaters also differ in power sources:
- Electrical appliances are divided into 12 and 24 V models;
- Gasoline;
- Diesel;
- Gas.
12V interior heaters have low power - up to 200 W, and operate from a 12V car cigarette lighter. The device heats the driver's seat and windshield. 24-volt models are used primarily in trucks.
A gasoline interior heater, in addition to heating the air inside the car, warms up the engine. However, such devices are difficult to install and have a higher cost compared to air devices.
Diesel heaters operate on the same principle as gasoline heaters and offer the same options. However, they consume less fuel, which makes their use more expedient than warming up the car with a standard “stove”.
Choosing equipment for a private home
There are times when home owners independently try to determine what equipment for air heating at home is needed for their heating system. Unfortunately, ignorance of certain rules and failure to comply with requirements leads to the purchase of insufficiently powerful equipment - and then the system does not work well.
Stationary gas heat generator
In order to select the most suitable heater model, you need to calculate such an indicator as the minimum power required for high-quality heating of the existing room. To determine the heat capacity of a room, you should use the formula
Р=VхΔTхk/860
In it, V (m3) is the nominal area of the building. ΔT (°C) – the difference between the temperature inside and outside the building. k is the building’s thermal insulation index. If it is unknown, this information can be obtained from a special reference book. 860 is the coefficient that converts kilocalories into kilowatts.
Advantages and disadvantages of autonomous interior heaters
Autonomous interior heaters have the following advantages:
- Do not depend on external power sources;
- Suitable for long-term use;
- Economical;
- They have good power;
- They have a remote control option.
Among the disadvantages of such devices are:
- Difficulty of installation;
- High cost of the device itself and installation;
- Some models depend on the quality of the fuel used for them;
- The equipment depends on the operation of a stable battery.
Purpose
Risking staying in the cold for several hours, many do not think about the possible consequences. In fact, the engine cools down in a couple of hours, and the interior cools down even faster. To avoid the need for repair of autonomous devices later, most manufacturers advise contacting professionals for installation. But, if you have some experience and appropriate skills, you can install such a device yourself.
Heating from a running engine is provided in all passenger cars and commercial vehicles. However, to provide heat during long-term parking, the most effective option is to install an autonomous heater. In order to correctly and effectively ensure their installation and operation, you should study the types of units, their characteristics and capabilities.
TOP 5 tips for choosing an autonomous interior heater
To buy an effective interior heater, but not overpay for it, follow these tips for choosing autonomous “stoves”:
- Decide on the type of equipment - electric, gasoline, diesel or gas;
- Decide on the power of the device - do not buy a powerful autonomous heater for a passenger car. The device will place an increased load on the on-board network and also consume a lot of fuel;
- Study manufacturer ratings, reviews and prices. Preliminarily look at reviews of the models you like. This minimizes the risk of purchasing the wrong equipment;
- Do not buy “autonomy” from “hands-on”, try to purchase equipment in trusted stores;
- Find out the cost of installing equipment in advance.
By following the above tips, you will buy a functional and efficient car interior heater, which will help maintain an optimal microclimate inside with significant fuel savings.
Precautions for use
Any type of gas device requires regular cleaning and checking the equipment for possible fuel leaks.
Gas heaters should be used exclusively for their intended purpose.
Such devices should not be installed near flammable materials and objects, or without the need to remove the protective grille on the housing.
Equipment repairs are carried out only in specialized service centers. It is important to remember that the heat source can be propane or butane. The first option is most effective in winter, and the second allows you to create a comfortable temperature in the off-season or when heating non-residential premises.
Operational nuances
To prevent the repair of autonomous heaters from becoming a frequent task, it is necessary to take into account some points when using them:
- When purchasing the device in question, you need to study the features of its operation and installation. In addition, the required and available power and other parameters should be compared.
- Each time the system is activated, a check of its functionality is required. If there are leaks or other defects, immediately contact repair specialists.
- Check its functionality. Make sure there are no leaks or any damage. A filler leak can lead not only to heater failure, but also to carbon monoxide poisoning of passengers or the driver.
- Do not try to constantly select the maximum heating mode when turning it on. Excessively dry air is harmful to the body; you will need to ventilate the interior more often, which does not help save resources.
Fuel pumping
Before the very first start, it is necessary to pump the fuel. To do this, simultaneously press the two lower buttons - OK and down arrow.
The words “H” and “OF” will light up on your display.
Switch to ON.
After this, the pump starts in a jerky manner with clicks. The corresponding icon is displayed on the screen.
To turn off pumping, set everything to OF mode by pressing the down arrow. The first step when pumping is to fill the filter.
Eventually the liquid in the tube should reach the end of the fuel hose.
Pull it and clamp it with a clamp at the corresponding inlet into the stove.
Upon completion of pumping, we proceed to the first launch.
Diesel option
Let's consider the features and operating principle of an autonomous diesel interior heater. As consumer reviews indicate, it can be equipped with various additional functionality (timer, regulator or pre-starter). In practical terms, this product is considered one of the best. The unit allows you to warm up the inside of the vehicle in a few minutes.
The heater is a device consisting of the following elements:
- A block with a combustion compartment, which is one of the main components in the operation of the device.
- The presence of a separate fuel line makes it possible to connect to a common line or work autonomously, regardless of the activation of the power unit.
- An exhaust system that removes exhaust gases.
- In addition, the heater is equipped with clamps for its installation in the engine compartment.
The unit responsible for control can be remote or toggle switch. Additional elements are included in the package taking into account product modifications.
Step-by-step instructions for assembling a Chinese Webasto
How to assemble this heater and prepare it for operation? The first thing you need to think about is attaching a metal plate to the wall on which this stove will stand.
To do this, it is convenient to use small metal corners.
But with sufficiently thick walls, you can make a more reliable fastening with studs.
Next, before placing the stove on the plate, do not forget to thread the power cable through a special slot.
Screw the exhaust corrugated pipe with a clamp to the pipe, from the side of the hole with the aluminum radiator.
Those who have already tested this stove in operation suggest fitting the exhaust with a high-temperature sealant. A conventional clamp cannot always create such a tight connection that completely isolates the exhaust gases.
Here's a look at the results of operating such a stove without good exhaust sealing. Gases visibly escape.
When installed in a car and the pipe protruding on the street, this is not critical. But when installed inside a small garage with poor ventilation, the smell may be noticeable.
On the other side, where there is a plastic grille with a fan, air is taken in.
Professionals and the manufacturer advise taking fresh air from the street, and not from the garage.
The stove has two independent air circuits. For the first circuit, air is taken from outside, heated by a burner, after which the metal radiator heats up and the air is released along with the exhaust gases back into the street.
This air flow is needed for combustion of the mixture, and not for heating, as some are mistaken.
In the second circuit, the air inside the garage is driven. If you take air from the garage, then you will simply throw already heated warm air masses outside, thereby worsening the efficiency of the heater!
Where is the best place to place this stove and where to secure the platform? Someone, without much fuss, stuffs this thing into a standard case from a computer system unit.
At the same time, connecting it from the computer power supply. But it’s better to do everything wisely. Place it where it is easiest to remove the exhaust gases outside.
For example, you can place it near an existing ventilation grill. And if you have a potbelly stove in your garage with a pipe leading out into the street, then place the heater not far from it.
This way, the exhaust pipe can be led directly into this furnace and there will be no need to break or drill the walls.
In this case, the stove itself will heat up to 50 degrees from the gases and also release this heat into the room.
And as an option, you can install a heating radiator nearby. First lead the exhaust from the heater into it, and only then take it out.
This way, your hot exhaust gases will not be wasted, and will additionally heat up another battery in the garage.
Just be careful with sealing the joints. Use a high temperature sealant here too. It handles high temperatures calmly. Entry and exit from the radiator is done through pipes.
Some even recommend installing two radiators in order to further increase efficiency. Should not be doing that. When the heater switches to low mode, a dew point will form inside the batteries and condensation will accumulate.
You always want to leave some heat on the outlet tube that will be exposed to the outside. This outlet should never freeze.
Otherwise, at one point, the hole will become clogged with ice and gases will flow into the garage. When working well, such a pipe “smoke” like a real potbelly stove.
In addition, do not forget that according to the instructions, the outlet through the direct flow pipe should be no more than 2 meters.
Therefore, as you understand, a large number of radiator sections cannot be connected here. And repairmen of such stoves claim that for stable operation of the entire unit, the exhaust and intake pipes must be the same length.
After connecting the pipes, we move on to the fuel outlet.
It somehow needs to be screwed from the inside into a plastic 10-liter tank. To do this, you will have to drill a hole with a diameter of 8mm in the tank.
This can be done in two places. Which one depends on where your filler neck is located. But in any case, the outlet should always look down towards the floor so as not to accidentally “snatch” air.
This fuel outlet must be installed through the inside of the tank. To do this, insert the wire through the drilled hole and bring it out of the neck.
Next, screw the fuel outlet to it by threading the wire through the hole in it.
And tighten the whole thing back so that the guide end of the tube faces outward.
All that remains is to tighten the nut, which presses the sealing rubber from the inside and seals the joint.
We recommend reading: Heated floor temperature - optimal and maximum value
Next, cut off a few centimeters of the rubber hose that comes with the kit and pull it onto the fuel pipe sticking out of the tank. A piece of hose is needed to put the filter on it.
Position it following the directional arrows that indicate the movement of fuel.
On top of the filter, through another piece of hose, a thin fuel supply tube is inserted. All connections are tightened with clamps.
When the outlet for diesel fuel is prepared, you can secure the tank to the wall.
At the same time, remember that for safety reasons, the tank should be located below the burner in the stove.
So that under no circumstances could fuel flow inside by gravity.


