Here you will learn:
- Purpose and main functions of the Russian stove
- How does a Russian stove work?
- Types of Russian stoves
- Main materials of construction
- Foundation for a Russian stove
- Finishing: options, photos
- How and how to heat a Russian stove
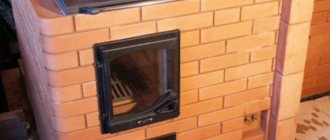
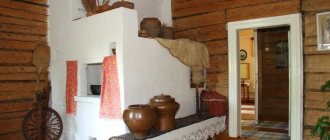
The Russian stove is a massive structure that is used mainly for heating a room and cooking food. In addition, it can be equipped with a bed on which to warm up during the cold season, a hob or a fireplace. Before you build such a structure in your home, you need to thoroughly understand all the nuances of its operation, evaluate all the characteristics and scale of the upcoming work. Below we will try to list the advantages and disadvantages of the classic Russian stove.
Traditional Russian stove design
The advantages of the furnace include the following parameters:
- Durability.
- Fire safety.
- Heat capacity (slow cooling).
- Cooking food without contact with fire.
- Relatively low cost.
The disadvantages include:
- Relatively low efficiency (no more than 30%).
- Uneconomical fuel consumption.
- Uneven heating of the room (the difference between the temperature of the upper and lower parts of the room can reach 20 ° C).
- Uneven combustion of fuel (near the mouth the fuel burns much faster due to excess oxygen).
- Inability to observe food during preparation.
Dishes with food are placed on hot coals near an open fire.
Purpose and main functions of the Russian stove
One of the advantages of Russian stoves is their versatility.
Here is a list of just the main tasks that can be solved with the help of these useful structures:
- heating the entire house or individual rooms;
- cooking on the stove and in the crucible;
- drying herbs, mushrooms, berries, fruits;
- using a couch as a sleeping place;
- heating water for household needs;
- drying clothes;
- heating the samovar.
The construction of the stove is designed so that it heats the house. To do this, a brick structure is erected in the center of the building or positioned so that heat flows into adjacent rooms. If the building is small, then there is enough heat to ensure that the temperature in all rooms is comfortable for living.
For spacious houses, structures are built that are large in size or have additional heating parts - shields, boilers for heating water.
Hot water from the hot water boiler is passed through pipes leading to heating devices - radiators. They are usually located in rooms away from the stove
To save on fuel and make the home more comfortable, owners of buildings with stove heating carefully consider thermal insulation, since a lot of heat is lost through cracks in door and window openings, cold walls and floors.
Food cooked in a Russian oven has a special taste and richness. It doesn’t just “fit” when heated, as would happen on a regular stove, but languishes
Thanks to this method of preparation, soups, porridges, roasts, and stews retain the beneficial properties of the products included in their composition.
Owners of Russian stoves often like to “warm the bones” on a stove bench - a wide horizontal surface that heats up during the combustion process and cools slowly. Thus, the bed remains warm until the morning. Dry heat is beneficial for people with certain diseases, such as joints or respiratory problems.
The oven is also used for household purposes - for example, for drying everything in the house. During construction, they think of small niches in which they used to put hats, mittens, and pants that were wet after a winter walk - by the morning they became dry and warm.
To dry vegetables, herbs, and berries, wider niches were made so that the crop could be evenly distributed over the surface and ensure good heating. We also used a stove and floor
Often, sheds were built near the stove - wooden plank sheds that continued the bench and performed the same functions. Since the floors were under the ceiling, they were also always warm.
Principle of operation
How the process of fuel combustion and removal of combustion products occurs is shown in the cross-sectional drawings of a Russian stove presented below:
The movement of gases in a Russian stove is carried out not only due to the natural draft created by the chimney, but also due to the peculiarities of the combustion process. Cold air from the room enters the mouth, meeting along the way with the opposite flow of flue gases. At the same time, they practically do not mix; air occupies the upper zone of the passage, smoke - the lower. Having met at the outlet and the mouth, the flows exchange heat, as if a natural gas-air heat exchanger was working.
To build a Russian stove, you need to understand very well how all the processes take place in the firebox. Heated air enters the combustion zone, and flue gases leave it through the upper zone of the firebox, exiting through the mouth, high and further into the chimney. But this does not happen immediately; the combustion products make several revolutions inside the firebox and are burned, giving off as much heat as possible to the walls of the stove. They are forced to do this by the inclined configuration of the chamber and the presence of a threshold, whose role is identical to the fireplace tooth in large English fireplaces. That is, within the firebox, multi-pass heat transfer by gases is organized without the installation of unnecessary smoke channels.
On the one hand, due to the large dimensions of the firebox, the size of the Russian stove with a stove bench is also quite large. On the other hand, the efficiency of the furnace is at least 60%, which is an unattainable indicator for most other solid fuel air heating units. Not to mention the ability to maintain temperature for a long time and the healing properties of the Russian stove.
And only in it you can cook amazingly tasty dishes, you just need to do it correctly, using the simmering process after the crucible has died down. Finally, a well-finished Russian stove looks great even in a modern interior.
Over the years, the ancient design has undergone a number of modernizations, resulting in many modifications, for example, a heating and cooking stove with a low bench. In this case, although the principle of operation of the Russian stove is preserved, the heating of the floors no longer occurs due to the furnace, but from flue gases passing through many channels. This modification is quite difficult to implement, especially for beginners.
Therefore, it makes sense to consider how a conventional Russian stove with a stove bench and stove is laid. Only here the heat source is equipped with one more function - heating water for household needs. Let's look at the whole process in order.
How does a Russian stove work?
Traditionally, a Russian stove with a stove bench was used to heat the house. Structurally, it consisted of the following elements:
- foundation (custody);
- furnace body (mass);
- crucible;
- mouth;
- pole;
- undercoat;
- underbake;
- stoves;
- roof;
- hello.
Structure
The crucible is a fuel combustion chamber (firebox), which can figuratively be called the “heart” of the furnace. Also used for cooking. Its upper part is called the arch, the lower part is called the under or flank, and the front wall is the cheek.
The fuel is placed through the mouth, which is a hole in the Russian stove in front of the furnace, having a height slightly less than the roof of the firebox. In front of the mouth there is a shelf - an auxiliary platform on which dishes or other objects are placed during or after use. It is separated from the mouth using a valve. The unheated part under the shelf (sub-rack) is used to store dishes and kitchen items. Firewood was stored in the oven - an internal niche under the ledge.
The Russian stove was equipped with a hail - a special device with the help of which smoke was forcibly released into the chimney. Small niches (stoves) were made inside the stove body, with the help of which the heating surface was increased, herbs, berries and mushrooms were dried in them, and dishes were stored.
Russian stove with fireplace and stove bench
The bed was built on the top of the stove, the so-called roof. Its continuation was the polati - a flooring made of boards between the wall of the house and the stove, where one could sit comfortably, sleep and enjoy the warmth of the bricks, and in the summer dry vegetables, fruits and mushrooms.
Types of Russian stoves
There are main types of buildings:
- Classic stove with a stove bench. This is a common version of such a structure.
- The stove with stove is a more modern and convenient design. It does not include a bed. In summer, the main purpose is the process of cooking, and in winter, the main use is to warm up the house.
- Mini oven. This type of mechanism is very small in size and is used only for cooking.
- Heating device with fireplace.
Option #1 – simple
The main parts of the so-called simple oven are the cooking chamber, the oven and the pipe. Nothing superfluous, no additional elements that complicate the design.
This option is ideal for a seasonal country house, as it takes up little space and perfectly fulfills its purpose - it heats the room and helps prepare food.
In order for the fuel to burn better, it is placed not towards the back wall of the cooking chamber, but closer to the mouth, thus the hot gases evenly heat the under, walls and roof of the firebox
Food is prepared by placing the dishes also near the mouth. Nowadays bread is baked on baking sheets and in special forms, but previously it was simply “planted” with a spatula on a pre-cleaned and swept bottom.
Calculations confirm that a simple stove is suitable for heating a house with an area of up to 30 m². If additional heating is needed in the sub-furnace, a heating element is installed to ensure air heating in the coldest zone - near the floor
To increase the heating efficiency, the flues of the flood chambers are made separate and placed near the walls. You can also create a firebox in a fire pit, equipping it with a cast iron stove for quick cooking and heating of ready-made dishes.
To build a simple stove, you will need approximately 1610 pieces of solid brick, about 70 buckets of masonry mortar on clay, a pair of smoke valves, a damper and a samovar.
Option #2 – adobe
The main difference between an adobe stove is the use of adobe - a clay solution prepared in a certain way. Brick is used only for laying pipes and hearths. One medium-sized oven will require about 3.5-3.6 m³ of well-mixed solution of the correct consistency.
One of the important indicators of clay composition is density. It’s easy to check the required level: you need to form a brick and place its central part on a stick. If it retains its shape and does not bend, the solution is mixed correctly.
Elements for masonry are prepared as follows: clay and sand are poured onto a flat surface in a layer of about 15 cm, then fragments of the required size (usually 20-25 cm wide) of a rectangular shape are cut out from the layer. In essence, you get homemade bricks.
The finished bricks are placed one next to the other, constantly knocking and leveling, then the excess clay is removed with a scraper. It is important to use a level to check horizontal and vertical surfaces
A common mistake made by beginner stove makers is using water to wet the bottom row. This weakens the solution and causes cracks to appear. During breaks, the top row is protected from drying out: covered with rags soaked in water and wrung out.
The erected stove is dried for about a week, then heated with dry wood. During the heating process, clay bricks release steam, and the “bricks” acquire the necessary structure. Only after 5-6 days the oven becomes ready for use.
Option #3 – “Teplushka”
There are several modifications of Teplushka stoves, which differ in size and minor design nuances.
What all the structures have in common is that they are heated evenly over their entire height, and accordingly, heating is carried out from floor to ceiling. The design is thought out in such a way that the surface of the stove is approximately 2.5 times larger than that of a simple Russian stove
Another advantage is the variety of fuel used. In addition to traditional firewood, you can use coal, dung, straw briquettes, and pallets. If you compare any of the Teplushkas and a traditional Russian stove, then the first option requires much less fuel.
Cooking does not require much effort. You can start cooking it after the wood has burned out and store it warm for about another day. The combustion process takes a short period of time - from half an hour to an hour.
The two main structural elements are chambers: the lower (heating) is located under the hearth, in the oven, and the upper (cooking) is located at the level of the hearth. But the fire can be carried out in two ways - both through the furnace and through the lower heating chamber.
Oven models differ in size. For example, “Teplushka-2” without a stove, but with a small hot water boiler is 1.68 x 1.29 m, and “Teplushka-4” with a stove built into the hearth is 1.29 x 1.29 m.
Option #4 – “Housekeeper”
The name of the stove “Ekonomka” speaks for itself - the heating device is simple in design, compact and economical. Moreover, not only firewood with a low resin content is suitable for the firebox, but also any other types of solid fuel.
Main dimensions:
- length – 1.4 m
- width – 0.89 m;
- height to pipe level – 2.24 m;
- distance from floor level to pole – 0.77 m;
- the distance from the floor level to the bed is 1.4 m.
The design consists of two separate chambers: a heating chamber, which is located below, and a cooking chamber, raised above for ease of use.
Despite its compact size, there are “Economy” options with hot water boilers or stove benches, as well as attached stoves with a cast-iron stove
The stove is equipped with two fireboxes: one is usually located on the front side, the second on the right. The cast-iron stove is placed so that it covers both fireboxes at once, but the large burner should be located above the main one, and the small one - above the additional one.
It is not recommended to use both fireboxes at the same time. Typically, the large one is used in winter, for general heating, and the small one - in the warm season, for cooking. If one of the fireboxes is “idle,” all its doors (furnace, ash) must be closed to create draft.
The good thing about the “housekeeper” is that you can cook food on the hearth for a long time after heating. Even after 10-12 hours, the required temperature will be maintained in the furnace.
Option #5 – Potapov’s designs
V. A. Potapov focused on the two most effective modifications, differing in design:
- A rectangular stove 0.51x0.64x1.82 m with a heat output of 850 kcal/h per day with one firebox.
- A rectangular stove 1.16x0.64x1.89 m with a heat output of 2400 kcal/h per day with one firebox.
Distinctive features of the first option are the presence of a cooking chamber with a cast iron stove, an oven and a ventilation hole.
The heating method is winter-style, that is, through a large firebox. Gases can be discharged in various ways: through a wall chimney, a cap pipe or a root pipe
The number of views and gates can be different, their presence can be easily combined. To build this modification, 260 pieces of solid brick and approximately 12 buckets of clay mortar are required.
The second version of the stove is attractive because it runs on different types of solid fuel. But when using anthracite or coal during construction, the following nuances are taken into account: the grate is lowered below the usual row, and all heated parts of the chambers are made of refractory bricks. A total of 580 pieces of red brick and 20 buckets of clay mortar are required.
There is a simple way to increase the heat transfer of a structure: it is necessary to repeat the last rows, thereby increasing the height. If a ceiling is involved, then the ceiling above it must be plastered.
Option #6 – Volkov’s designs
I.F. Volkov improved the heating and cooking stove, which operates not only from firewood, but also from other types of solid fuel. Dimensions: 0.89x1.02x2.24 m. If the firebox is fired once a day, the daily heat transfer will be 2260 kcal/h.
The Volkov stove is suitable for heating 1-2 rooms in a small private house. You can cook dinner for a family of 5-6 people in it at the same time.
Both traditional heating methods are used: winter and summer. The movement of hot gases and heat distribution are controlled by valves. If you heat in the summer, the gases heat up both the stove, the oven, and the hot water box.
Construction requires approximately 520 red bricks and 20 buckets of mortar. The crucible will require approximately 50 kg of refractory clay.
Drying racks and doors can be made independently or purchased at a specialized store. Purchased cast iron products look more presentable and are an element of interior decor.
Option #7 – “Swedish” Buslaeva
The compact thin-walled stove by K. Ya Buslaev is loved by the owners of private houses for its good heat output, which with two fireboxes per day reaches 4500 kcal/h.
The height of the structure is 2.10 m, length and width are 1.16x0.9 m. The thinness of the walls is ensured by one layer of brick installed on the edge
Necessary conditions for the construction of a heating device:
- pre-soaked brick;
- solid foundation;
- thin, high-quality seams.
Various types of solid fuel are suitable - coal, firewood, briquettes, pallets.
The cooking chamber has a special structure: to ensure the release of steam during cooking, it is equipped with a separate ventilation duct.
The design, in addition to the firebox, cooking chamber and blower, also includes an oven and a stove for drying. Two more smaller stoves are designed for storing cutlery and kitchen utensils
The firebox and cooking chamber are exposed to the most heat; accordingly, they are usually lined with refractory bricks.
For construction you need: 550 bricks, about 40 buckets of clay mortar, as well as doors (furnace, blower, for the cooking chamber), grate, view, oven box, cast-iron stove, valves.
Detailed lists of materials with sizes and orders of the presented types of Russian stoves can be found in specialized literature.
Video description
This video will help you understand the process of installing oven doors:
- 10th row of masonry.
The bottom of the furnace is formed from bricks. The arches of the small and large combustion chambers are also combined. In this case, the openings of the smoke exhaust ducts, which are located in the rear part of the heating structure, are not filled. They are discharged into the cooking chamber. In addition, at this stage the space for the water tank is also blocked.
- 11th row of masonry.
The corner of the metal prepared earlier is secured. It is installed on the edge of the masonry. Its installation is carried out immediately above two combustion chambers. A metal corner is needed to securely place the hob.
When laying the same row, a grate is installed with a large firebox. Moreover, its final fixation is carried out only at subsequent stages.
- 12th row of masonry.
The formation of the side walls of the cooking chamber begins. In this case, a valve is mounted to the left of the plate. It is installed in a horizontal plane. This is a damper that will be used to block the outflow of hot air from the furnace into the smoke exhaust duct. On the same row, the laying of the chimney begins, located to the left of the vertical valve.
Start of laying the 12th row Source builders58.rf
- 13th row of masonry.
Construction of the side walls of the brewhouse and other parts of the furnace structure continues, including the laying of the outer contour of the structure.
- 14th row of masonry.
An inlet hole into the chimney is formed. Its opening will be carried out by sliding a vertically located valve. The walls of the crucible are also exposed. In addition, the hole for the valve is designed.
- 15th row of masonry.
At this stage, the Russian brick stove narrows inside. Using blocks, the brewing compartment begins to be covered. In addition, the formation of a pipe to remove combustion products continues.
- 16th row of masonry.
The left and right outer side walls of the stove are held together with metal strips. The bricks themselves on this row are laid in exactly the same way as at stage 15.
- 17th row of masonry.
A strip of metal is mounted on the back wall and the arch above the cooking compartment continues to narrow, as well as the chimney is laid out. In addition, a metal corner is fixed above the opening of the hob. A steel strip is also installed nearby. Bricks will be removed from these two elements, from which the ceiling above the slab will be formed.
Metal corners of different sizes for the stove Source stpulscen.ru
Main materials of construction
The main material for a Russian stove in a country house or in a hut is, of course, refractory brick, which is made from fireclay clay. It is used for laying the combustion chamber, where the temperature reaches its maximum. Ceramic bricks are used to implement the rest of the structure.
Each housekeeper - a Russian stove or a Russian fireplace, is equipped with metal or cast iron parts - all kinds of dampers and doors. They must be prepared in a certain quantity, namely:
- combustion door (250x205 mm), ash door 2 pcs. (250x140 mm), cleaning door 2 pcs. (130x140 mm.) and ventilation (size depends on the diameter of the chimney pipe);
- grate 380x250 mm;
- valve 3 pcs. (140x140, 260x260 and 180x140 mm.);
- view (diameter 230 mm);
- flap for the furnace (450x380 mm);
- water heating box (500x280x120 mm);
- two-burner stove (400x700 mm);
- strips of steel (1430x25x2, 1000x50x12 mm.).
For the correct laying of a number of elements - vaults and housekeeper arches - templates are needed, which must be disassembled without much effort and time. For their manufacture, parts made of plywood and wood are used.
Correct mixing
To lay out a Russian stove with your own hands in a hut or dacha, you need about 3.5 m3 of ready-made mortar. Therefore, the necessary ingredients are taken in the ratio indicated above, and water is added to them in a ratio of 1 to 4, according to the volume of clay used. For example, 1.2 m3 of clay, 0.3 m3 of water and 2.4 m3 of sand.
As a container, you can use an iron barrel or a tin box, in which the clay is pre-soaked for several days. Then sand is added and mixed with feet in high boots until the mixture becomes homogeneous. Due to the fact that masonry joints should be no more than 3 mm. (fireclay brick) and no more than 5 mm. (ordinary brick), all large parts and small stones must be removed from the finished mortar.
Foundation for a Russian stove
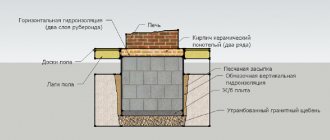
Since the furnace is a massive and heavy structure, it requires a separate foundation. Therefore, starting the construction of a stove in an already built house will be problematic - you should think about this in advance.
The ideal option for reliability would be a slab monolithic foundation made of reinforced concrete. The base of the stove foundation is not connected to the foundation of the house and is an independent structure. Its construction is carried out using standard technology. The edge, i.e. the protrusion formed by the upper edge of the foundation and the first row of masonry, must be at least 50 cm. Before starting masonry, waterproofing is laid on the foundation - roofing material folded in two layers.
Most often, the stove is located near an internal wall with a shallow foundation. In this case, its base should be on the same level as the base of the stove. To ensure the independence of the foundations, a gap of at least 5 cm is left between them, into which sand is poured. The upper edge of the furnace foundation does not reach the level of the finished floor by 14 cm.
In cases where the furnace is located near the outer wall, under which there is a recessed strip foundation, its pit is expanded and sand and gravel is backfilled with careful layer-by-layer compaction. After this, a slab foundation of the stove is installed with a gap of 5 cm from the base of the house - a setback, while the depth of the base of the stove foundation is at least 50 cm. Sand is poured into the setback, and its end walls are formed with brickwork.
If the stove is installed in an opening cut in a load-bearing wooden wall, it is necessary to connect the resulting ends of the lower crown. This is done using steel strips 6 mm thick and 60 mm wide, which are placed on the logs on both sides of the wall and tightened with bolts with a diameter of 16 mm. The opening is framed by wooden posts. Between them and the future oven, a circulation gap of about 5 cm wide should form, which is called cutting. In the foundation of the house under the wall there must also be a pre-provisioned gap equal to the width of the stove base plus a 5 cm offset on each side.
Nuances of choosing a heater
When selecting a wood-burning stove, it is necessary to take into account working conditions, the specifics of the material, financial costs and personal preferences
Before purchasing a unit, you should pay attention to the following points:
- Brick structures are characterized by high heat transfer, but require financial investments in construction. Cast iron heats the room well and is installed without a foundation.
- Functional heating and cooking models are equipped with several burners and an oven.
- Pyrolysis devices ensure complete combustion of fuel.
- The optimal wall thickness of a furnace with a water circuit is from 75 mm.
- A unit with automatic fuel loading is loaded with circular sawn timber 10-15 cm thick.
- Due to their low efficiency, cooking and heating structures are suitable for rooms up to 25 m2.
- If you have a sauna or bathhouse, opt for a heater.
- The safest type of firebox is closed.
- It is easier to connect an expansion tank and heat exchangers to modifications with an oven.
Finishing: options, photos
The finishing of the stove should be given special attention, because the stove is a very large structure and will undoubtedly be the center of attention in any room. When finishing the stove, it is best to strive for the smoothness of all surfaces and the ability to keep them clean. Before carrying out finishing work yourself, you need, first of all, to assess the scale and complexity of the work, as well as compare the cost of different finishing methods. Before any finishing work, the surfaces of the oven must be cleaned of dirt and dust.
Finishing methods can be very diverse; let’s look at the basic and frequently used ones, which can be done without special professional training:
- Plaster. Plaster gives the stove a neat appearance, it allows you to correct defects made during masonry, and also fills masonry joints. The plaster solution is selected depending on the required quality of finish, purpose and humidity of the room. Clay-sand mortar is mainly used, and if necessary, lime, alabaster or cement is added to it. It is recommended not to exceed the thickness of the plaster coating by more than 1 cm.
- Mopping the walls followed by jointing the masonry joints. Work is being carried out to clean the walls of the furnace from mortar protruding from the seams, to fill the seams more completely and give them the desired appearance. When performing work, it is very important to promptly clean the bricks from the mortar with a damp cloth before it hardens.
- Furnace finishing with natural stone. Lately, this method has been gaining great popularity. Before gluing the stone to the stove, you should first lay it out on a horizontal surface in order to ideally select the size and color, after which the stone is transferred to the walls according to the approved plan. For laying natural stone, ready-made heat-resistant mastics are used.
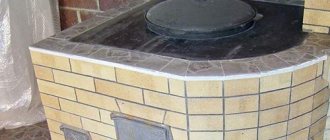
- Tiling. This method is very labor-intensive and responsible. The lining of the stove with tiles must be done in parallel with the brickwork, row by row, and the first row of tiles is laid out first, and then the row of brickwork. The tiles should be connected to the main masonry with wire, and to each other with staples and pins. The tiles are placed on a clay mortar, which is placed in the rumps (special projections of the tiles on the back side). Depending on the desired look, the tiles can be arranged one under the other or intertwined. Before installing the tiles, they are laid out on a horizontal surface to select the ornament and cut to the required dimensions. There are 1.5 mm thick seams between the tiles horizontally, which are filled with gypsum mortar. Vertical seams are done flush. When installing tiles, you must strictly observe horizontal, vertical, vertical planes and angles.
Painting the stove with paints
The use of natural stone in the finishing of the stove
Artistic decoration with tiles
The stove is plastered and whitewashed with lime
The stove is neatly built of brick with jointing
After plastering or mopping the surfaces of the stove, it can be painted or covered with lime. Paints must be water or casein based. With the help of such paints, which can be multi-colored, you can paint the stove and give it a unique and inimitable design.
The metal elements of the stove are painted with special heat-resistant varnishes or paints.
What mortar to use for masonry
The reliability and durability of the finished stove directly depends on the quality of the masonry mortar. The masonry will be carried out using a sand-clay based mortar.
There is nothing complicated in preparing the solution. Take clay, fill it with water and soak it. Sift the mixture through a sieve and then stir into “clay milk.” Finally, add some water to obtain a sufficiently viscous and plastic solution.
Remember, the reliability and strength of the stove directly depends on the correct preparation of the masonry mortar. If you do everything right, the stove will effectively heat your home for many years. Violate the technology or decide to save a lot on materials - the thermal unit is unlikely to be able to fully reveal its potential and stand for any length of time.
Mortar used for laying the stove
How and how to heat a Russian stove
Coal or wood are usually used as fuel. In this case, it is better to use logs made of pine or birch. They are distinguished by longer burnout and heat retention. Nowadays coal can be bought in various stores, but you can make it yourself. To obtain good charcoal, you need to select firewood of a similar size and cut off as many branches and branches as possible. They are laid in the shape of a well, and sprinkled with splinters on top. This is done to ensure they tan quickly. To obtain uniform coal, you should heat it so that the heat remains for a long time. To do this, the device is heated with a large batch of firewood.
IMPORTANT! Daily heating of such a unit has its own individual characteristics. For example, the ignition site should be located as close to the mouth as possible. Then, when it burns well enough, it is advanced into the furnace. This requires special dexterity, as in the process of tossing logs.
Usually the logs are simply thrown into the firebox, and then driven into the furnace with a poker. Firewood should be heated slowly and gradually, in several passes, without loading a large amount of firewood at the same time. Before putting it in the oven, wet wood should be thoroughly dried by placing it in the oven.
Recommendations for use
The stove does not require maintenance. To avoid undesirable consequences, you must follow the rules for using a mini-oven:
- You cannot fire two fireboxes at the same time. In this case, the ash and combustion doors of the unused firebox must be tightly closed;
- Do not use flammable liquids such as gasoline or kerosene for kindling;
- keep the heater damper closed. If there is a need to open it, then first you need to open the ventilation duct valve;
- monitor the amount of ash. Remove it in a timely manner, otherwise there will be no fuel savings, because it will absorb heat and the heating of the rooms will deteriorate. It is better to do this procedure at least twice a week;
- you need to let the fuel warm up well for ten minutes, and only then start cooking food in the oven;
- It is not very practical to use paper for kindling - it burns quickly. It’s better to put wood chips or birch bark in the oven;
- Check periodically for any cracks in your stove. If any are found, they need to be repaired. If the damage is significant, then major repairs will have to be made. A clear indicator of a problem is a decrease in the heating temperature produced by the stove. The house has become colder - inspect the stove;
- It is preferable to carry out repairs in the warm season, when the stove is not used for heating;
- Before burning fuel, you need to close the doors of the ash pit and fireboxes;
- you need to clean the chimney in a timely manner;
- It’s better to start heating the stove during the day, then by the evening the whole room will warm up;
- It is preferable that the fuel be dry. And to ensure that it is not exposed to moisture and water and does not become damp, store it in a specially designated place. It should be dry and closed;
- It is desirable that the logs are approximately the same thickness and length. This is necessary because thin ones burn too quickly, and thick ones, on the contrary. The house will not be heated well enough in this way;
- stack the logs not randomly, but in a certain order. First, rake the coals with a poker closer to the door. Place a log across it. Then thinner firewood is laid obliquely, and thicker firewood is laid on top of it.

