Installing heated floors under laminate on a wooden base is gradually gaining popularity. There are 3 main types of design, each of which differs in efficiency, reliability and cost. Which one you should choose depends on the type of room.
For example, a water floor with a heavy concrete screed is more suitable for private houses, and an electric floor for apartments. You can do the installation yourself, the main thing is to take into account all the recommendations from the manufacturer and follow the instructions.
Find out how to install various types of electric heated floors under laminate: infrared, carbon, cable, in the form of heating mats, amorphous metal.
We determine the optimal combination of the type of heated floor and wooden base
The construction of warm wooden floors under laminate is somewhat complex. This is due to the base material: wood easily absorbs moisture, as a result of which it can be significantly deformed, and with rapid evaporation of moisture, it becomes covered with cracks and defects form.
When laying laminate flooring on a heated floor, the difference should not be more than 1 mm, however, if moisture is absorbed, this value may increase, which will lead to failure of the structure. The solution to this problem is the use of moisture-resistant materials, with the help of which additional waterproofing is achieved.
It is important to note that wood is considered a good heat insulator, so in most cases laminate, parquet, linoleum, etc. are used as flooring, rather than wooden boards. They are also not used as underlayment for flooring.
The following structure can be erected on a wooden base as a warm floor:
- electric;
- infrared;
- water
Water
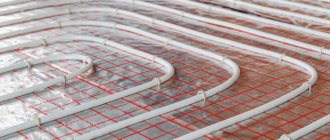
This type is considered the most affordable and safe. Its operating principle: pipes made of polypropylene or metal-plastic are laid on a prepared base. Hot water flows through the pipeline, which simultaneously heats the underlying substrate and laminate.
A significant disadvantage of this design is the large diameter of the pipe and, as a result, the height of the heated floor increases. If you have low ceilings, this can be a serious problem.
If you plan to install a water system under a laminate on a wooden floor, you should consider the following points:
- room temperature – no higher than 28 degrees;
- ensure that there are no sudden changes in temperature;
- the heating element should not warm up above 50 degrees.
Before installation, it is important to take into account that it is quite difficult to make such a warm wooden floor under a laminate yourself; most likely, you will need the help of specialists. Despite the effectiveness of a water floor, it is rarely installed in dachas and small private houses.
Operational costs are low, but installation and initial start-up may require significant financial investment. When carrying out installation yourself, it is important to monitor the quality of the work performed and the absence of physical damage to structural elements, because this can lead to leaks and breakdown of the entire system in the future.
Infrared
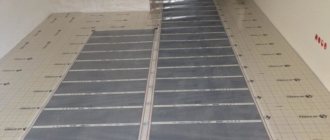
By type, infrared flooring is considered a type of electrical system, but the difference lies in the nature of the heat emitted. The source is a film sheet coated with a polymer and a layer of conductor, placed on the subfloor.
Each component of the heating system is enclosed in a layer of polyethylene film, which is designed to ensure reliability and safety, but does not increase the thickness of the heated floor.
The main advantages of the infrared system for wooden floors under laminate:
- it is easy to carry out installation with your own hands; even a complete novice in repair work can carry out the procedure on their own;
- no load on the wooden base (as is the case with a water floor);
- small thickness;
- rapid heating of the structure;
- ease of temperature control.
The main disadvantage is the high price!
Electric
Like infrared heated floors under laminate, the electrical structure is connected to the electrical network using a cable. When electricity is connected, a magnetic field is formed, all structural elements heat up, and if all components of the system are laid correctly and all installation technologies are followed, then the heat will go up into the room.
This type has all the advantages of infrared floors, but is more affordable. Today, these factors ensure the popularity of the electrical system as a warm wooden floor under laminate.
The only drawback is the possibility of a short circuit. However, this can be solved by covering the base and ceiling with a special agent, as well as ensuring safety when working with the electrical network.
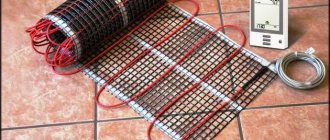
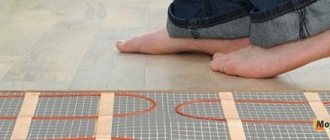
You can also lay thermomats on a wooden floor - this is a more advanced type of electric floor.
Video description
Video on how to make a warm floor on a wooden floor under tiles:
Recommendation! When using parquet boards as a finishing coating, the base must be strong enough. This is especially true when the distance between the joists is large and they will sag on a soft floor, but thick wooden boards will make the warm floor ineffective. Therefore, it is better to lay parquet on plywood on top of screed or frequently located supports.
Laying infrared film flooring under laminate on a wooden base
Watch the video
Warm floor in 1 hour with your own hands when renovating a room in an apartment
Stages of installation work for laying infrared heated floors on a wooden laminate floor:
- Prepare the rough base: you need to remove large debris from the surface. Apply a coating that reflects infrared rays and heat to the prepared surface. The most commonly used is Penofol or a similar material. The canvas is laid with the foil surface on top to prevent heating of the lower apartments (in the case of a multi-storey building), concrete floor or basement (in the case of a private house). The elements are placed end-to-end, and the connecting seams should be taped with construction tape.
- A film is laid, which acts as the main heating element of the underfloor heating system. During the installation process, most likely, there will be a need to cut the material, but you should do this yourself very carefully and only in specially marked areas. When placing the film, keep a distance of 5 cm from the wall, and 25 cm from the heating appliances and devices. Also, one sheet should not be allowed to overlap another. The connection at the seams is ensured with ordinary tape.
- Terminals are connected to the copper elements (they are sold in a set with IR film), from which wires will then come off. It is recommended to maintain parallelism when connecting the terminals so as not to violate the independence of the connection.
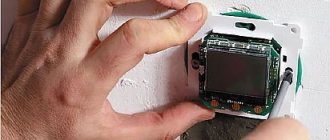
- A 220 V wall thermostat is installed (at a distance of 50-100 cm from the floor), to which wires from the terminals are laid. Wires also extend from the thermostat to the temperature sensor, which must be placed strictly between the carbon strips under the film (the sensor can be fixed with adhesive tape).
- The insulation is placed and the laminate is laid.
During installation work, it is prohibited to use nails or similar fasteners that could damage the integrity of the IR film, because this can be the main reason for a short circuit or failure of the underfloor heating system on a wooden floor.
Some tips for safe operation
When planning the installation of a heated floor, do not forget that neither electrical cables nor water pipes should be laid under heavy furniture. Also, do not install heated floors in close proximity to a wood stove, gas fireplace, stove or other heating appliances.
For rooms for various purposes, you can program different temperature conditions, for example, in the bathroom and living rooms it will be comfortable at 22-24 ° C, and in the kitchen and in the corridor 20 ° C is enough
Practical nuances:
- After completing the repair, leave the heating system on and maintain the same temperature conditions for 3-5 days. This precaution will allow the entire “pie” of the floor to be heated evenly and accurately and ensure reliable operation of the system.
- At the beginning of the heating season, the underfloor heating system must be properly prepared for use. To do this, increase the heating level by 5-7 units every day until the temperature reaches the required value. This approach will avoid sudden temperature changes that can damage laminate and other materials. In the same way, turn off the heating during the warm period.
- Do not forget that infrared film flooring does not tolerate moisture well. Therefore, it is not recommended to install it in rooms with a humidity level of more than 70%, and to dry the laminate after wet cleaning.
- The optimal temperature for heated floors is 20-30 degrees Celsius.
Last but not least, do not cover heated laminate flooring with carpets or other furniture that will interfere with the efficient distribution of heat.
Installation technology for electric heated floors
Heating cable for wood covering
Installation of an electric heated floor under a laminate on a wooden floor occurs in several stages:
- Removing the old floor covering, preparing the rough surface (removing debris and damage). The floor must be as level as possible; this is checked using a building level.
- Creating a waterproofing surface to prevent droplets of condensed moisture from appearing under the laminate. To do this, a boardwalk is created, the components of which are treated with a liquid-repellent agent. As a base, wooden logs are erected, located at a distance of 60 cm.
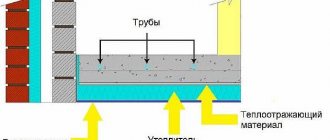
- Creation of a thermal insulation substrate. Chipboard or plywood boards are placed under the joists installed in the previous step to create insulating niches. They contain thermal insulation material. Then a film is placed on top that can reflect heat. This is required to direct the heat upward and not warm up the floor or floors below. Metal insulation is additionally applied to the joists at the cable turning points.
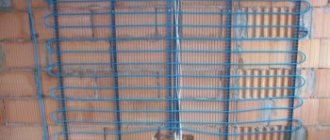
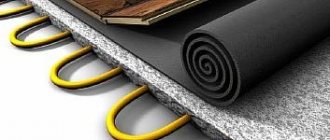
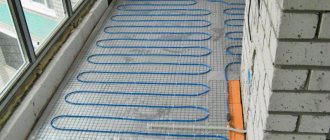
- The heating cables are laid according to the diagram (the diagrams are the same as when laying infrared film). The easiest way is to implement a snake in the form of a single electrical circuit. The distance between the parts of the circuit must be the same so that the laminate on a wooden floor is heated evenly. The laid electrical cable is secured with specialized clamps.
- The temperature sensor is placed in a corrugated pipe, which is placed between the cables. All cables (electric heated floor and sensor) are connected to the thermostat. It is installed at a distance above 50 cm from the floor.
- A substrate is placed on top, on which the master will lay the laminate.
It should be noted that if it is necessary to provide heating for a high-density room, it is recommended to make several independent circuits, each of which is connected to a separate thermostat. If this is not done, there is a danger of overloading the electrical network.
Base and thermal insulation
The basis of a warm water floor is made up of beams and wooden elements attached to them. Between the beams at the bottom there is a subfloor.
The basis of a warm water floor
In many cases it is nailed to the underside of the beams. If this ceiling is interfloor, then the finishing ceiling material is installed from below on this subfloor. On top of this floor lies a vapor barrier material. It is necessary to protect the insulation from moisture coming from below. For this purpose, a waterproofing film or diffuse membrane is used. It is best if such a substrate is spread in a continuous sheet over the beams and spread between them so that it fits tightly to the subfloor.
Thermal insulation is installed on top of the waterproofing substrate. It can be polystyrene foam or basalt wool mats. The width of the sheets of these materials should exceed the distance between the beams by 5 centimeters. Thanks to this, the insulation is tightly placed between the floor logs, which eliminates the chance of gaps through which air can move. The desired insulation thickness is 100 millimeters. Thinner material can also be used. This is noted in many videos about installing thermal insulation.
Installing a water heated floor on a wooden floor under a laminate
Video
Warm floor under laminate
The base will be created using polystyrene foam boards with a foil surface. We will assume that the rough wooden floor under the laminate is made of OSB panels. Installation of a water heated floor on a wooden base consists of the following steps:
- Removal of small and large construction and general debris. It is necessary to sweep away the debris with a broom and vacuum.
- Now you need to create a technological gap using a damper tape. As a rule, when using a warm wooden floor, an increase and decrease in temperature leads to a change in the shape of the boards. To prevent damage, a similar gap is made using tape or laminate backing (but the thickness should be greater - about 8 mm). The tape is placed around the entire perimeter of the room.
- The next stage is applying a layer of polyurethane foam, onto which it is necessary to glue the slabs to the base. If the repair is done by yourself, it is important to carefully apply foam around the entire perimeter and a small amount in the center.
- If the stove is placed in a corner, it is necessary to cut an L-shape that fits the size. When marking yourself, make a cut approximately in the middle of the tile so that the grooves on the corners line up exactly.
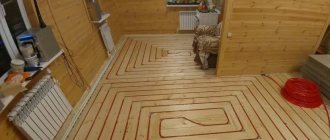
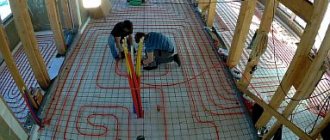
- The entire surface is laid in a similar manner. Heated floor pipes can be laid according to various schemes. The options shown in the image below differ in heat transfer, operational efficiency and the complexity of DIY implementation.
- The pipes through which water is supplied must be brought into the room and carefully placed in the channels. The pipes must be tightly fixed. Thanks to the shape of the channels, the contact area and connection density increase.
- A base is created for laminate flooring on a wooden floor. It should be borne in mind that even taking into account the high density of polystyrene foam sheets, it is advisable to make an additional base layer. If you neglect this and lay linoleum directly on the polystyrene foam substrate, the risk of pipeline failure increases significantly. An additional layer can be created from gypsum fiber panels (for example, superfloor from the manufacturer Knauf). They often have special slots that allow all components to be combined into a single whole using polyurethane foam. After that, a thin underlay is laid on the surface of the water floor, and you can begin to place the laminate.
When choosing the type of arrangement of a warm wooden floor under a laminate, you should focus on the diagram.
The most common option is considered to be “snake”. It assumes increased efficiency of heat transfer, but the end of the pipeline will contain cold liquid.
If you install the heating system yourself and have the appropriate experience, you can implement a more complex scheme yourself (for example, a double snake).
Expert answer
Good afternoon, Vladimir.
I don’t want to upset you, but using a heating cable to install a heated floor under a laminate on a wooden base is not the best idea. The fact is that such heating systems must be installed in a screed - this is the only way to achieve uniform heating and ensure fire and electrical safety of the structure. In addition, leveling with a cement-sand mixture will create an even base for laying the laminate.
Perhaps you were planning to lay a substrate on top of the cable, hoping that it could smooth out those very 3 mm of its thickness? Unfortunately, in this case, the laminate planks will not be able to lie flat on the base, so the floor will “play” during operation. As a result, the locks of individual panels will begin to deteriorate and cracks will appear - the coating will quickly become unusable.
On the other hand, if you plan to use a wooden base as a subfloor, you miss the opportunity to arrange a screed. Of course, you could, at your own risk, install high-quality waterproofing and put a thin layer of cement-sand mortar on top of the cable circuit, but experts do not recommend doing this. Firstly, in this case the wood will not be ventilated, and secondly, the service life of the subfloor will be reduced due to the large temperature difference on both sides of the boardwalk.
In your case, there are several ways to solve the problem. If you still plan to use a cable heater, you can:
- take a chance and lay the cable in a thin layer of concrete on top of the boards (of course, ensuring high-quality waterproofing);
- dismantle the wooden base and build a heated floor from scratch. To do this, a layer of waterproofing and insulation made of polystyrene foam boards are laid on a concrete or soil base. The heaters can be attached to a building mesh, previously laid on thermal insulation - among other things, it will also serve to reinforce the structure. All that remains is to make a screed and you can begin installing the laminate.
As you can see, both of these methods are quite labor-intensive and not without their drawbacks. For this reason, we recommend that you abandon the use of a heating cable in favor of an infrared film heater. In this case, the problems will disappear on their own. All you have to do is mount the IR film on top of the substrate. After this, the laminate can be laid directly on the heaters.
Laying laminate
Before laying the laminate after installing the electrical or water system, you must make sure that the assembled heated floor is functioning correctly. It is recommended to periodically start the system for 3 days, raising the temperature by 5 degrees every day.
If you created a water type of floor with your own hands, you must immediately apply maximum pressure and make sure that the pipeline is not damaged and that there are no various leaks. After checking, you need to wait until the coating has cooled to 15 degrees, then you can lay the laminate on a heated wooden floor.
When the installation is completed, the master begins laying the laminate:
- A polyethylene backing is created, it is placed end-to-end, and the seams are covered with construction tape.
- Laminate sheets are placed on the underfloor heating substrate. As a rule, sheets are not placed close to the wall; a gap of 5 mm is maintained. Otherwise, you must follow the manufacturer's recommendations.
We invite you to find out whether you need a substrate or not, which one to choose for laminate, what types there are and how to install it
Preparatory actions
Painstaking work must be done before laying the laminate.
It all starts with checking the evenness of the floor; it must meet certain standards. For 2 m² of floor, the height should not change by more than 2 mm. Otherwise, the panels on four sides equipped with special locks will become loose over time, which will lead to their breakage. Constantly growing cracks will appear, clogged with debris and dust. The floor will begin to creak. If there is a slope at the base, it should be uniform and not exceed 4 mm per 2 m². It is better not to place furniture resting on 4 legs on these areas; it will lose stability, and doors, if any, will no longer close. The temperature and humidity of the substrate should also be checked. Wood should have a humidity of less than 12%, concrete 4%, and a floor temperature of more than 15°.
Basic mistakes
When installing a warm wooden floor with their own hands, novice craftsmen often make the following mistakes:
- Incorrect arrangement of elements. Heating components should be located only in areas where there is no furniture or other objects on top, otherwise the surface will not be heated, and a violation of the heat dissipation may cause a breakdown of the system.
- Incorrectly cut cable or IR film. This should be done only in special places designated by the manufacturer. If the cable turns out to be longer, it should be laid again, but placing the turns closer to each other.
- Turns of electrical cables or elements of IR film should not overlap each other, otherwise the system may overheat.
- The absence of a stage of cleaning the subfloor from debris or the presence of an uneven floor with flaws. It is important not only to remove all debris (even small ones), but also to check with a building level that the surface is level.
- There is no step to check the functionality of the heated floor before laying the laminate. If a defect is discovered after this, it will be much more difficult to fix the system, because You will need to dismantle the floor covering and reinstall the system.
- If you plan to install a warm wooden floor under laminate in several rooms, then you need to install an individual temperature controller in each room.
During operation, it is important to prevent the floor from overheating; it is advisable to maintain the temperature in the range of 20-30 degrees. If you plan to be away for a long time, then during the cold season you cannot turn off the heating; it is enough to turn it on to the minimum value. To prevent breakage, do not damage the floor (even to drive nails).
Thus, the difficulty of installing a heated floor on a wooden base depends on the type of structure and room.
Electric underfloor heating is considered the most optimal in terms of efficiency and cost; it can be installed in any type of room.
You can carry out the installation yourself, the main thing is to carefully follow the instructions from the manufacturer.
Liquid heating
Underfloor liquid heating is a pipeline made of pipes through which coolant circulates in the form of a liquid. It can be water, antifreeze, propylene glycol: it is used in a closed heating system. The main is placed on a flat concrete surface, covered with a deep screed, on which a substrate, laminate or other floor covering is laid.
The coolant line can also be placed on a wooden floor, but this installation method is rarely used. The wooden floor does not weigh down the ceiling. This is its advantage. The pipeline is laid “dry”. There is no need to mix the screed solution and wait for the concrete coating to dry. There will be less dirt in the room. How to lay a highway on a wooden base?
- It is necessary to conduct an audit of the floor. Damaged joists should be replaced. The plank floor is leveled using sheets of plywood. They are reinforced with self-tapping screws or mounting adhesive. The rough base must be level.
- It is necessary to prepare a circuit for the pipeline. It is made from wooden blocks. They are placed parallel with a pitch that is equal to the diameter of the pipe; provide space for laying the substrate.
- The first row of bars is taken out. They retreat a certain distance and lay the 2nd row.
- The contour is covered with metal plates so as to form a gutter. The first line of the highway is laid in it.
- An arc-shaped trench is built at the turning point. In this case, the pipe will be protected from mechanical damage.
- Next, a circuit is drawn for the second turn of the line. It is placed at a distance of 0.5 cm from the first structure.
- The circuit is installed over the entire surface of the floor. Metal plates are placed in each gutter.
We recommend: Characteristics of Nexans underfloor heating
To facilitate the work of laying the main line on a wooden surface, ready-made circuits and metal heat exchange plates are used, which are disconnected from the general canvas by hand, without any devices; Dotted lines are provided in places where the fabric breaks.
The circuit is made of lightweight foam, which will serve as additional insulation for the water supply. The pipe is laid in the grooves. Lightly pressing it with your feet: wear shoes with soft soles. There is no need to strengthen the highway. The pipe is completely immersed in the grooves formed by the wooden contour.
After testing the “warm floor” system, the pipes are covered with plywood sheets. They are reinforced with self-tapping screws
Care should be taken not to get into the pipe and not to damage the integrity of its surface. In place of self-tapping screws, it is recommended to use glue for woodworking
Next they work with the laminate.
- A polyethylene film and a foil backing made of extruded polystyrene foam are spread on the plywood. The coating is reinforced with tape or glue.
- Laminate is laid on the substrate. A tongue-and-groove connecting lock is provided on the end side of the board.
- Lamination begins on the far side of the room, from the window.
- It is necessary to ensure that the seams are staggered. This will reduce the load on the connecting locks and make the surface more stable.
- It is recommended to treat the joints with wax or soap.
- The seams are treated with sealant.
To correctly lay the slats, you need to make a drawing and transfer it to the floor surface. 1 row of laminate is laid along the longest wall. The same boards are used. Row 2 starts with ½ board. Row 3 starts again with the whole board. The sequence is repeated. This installation technique allows you to place the seams in the correct order.
