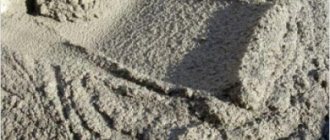
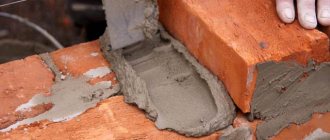
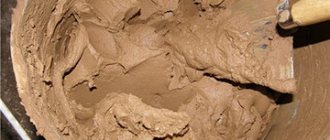
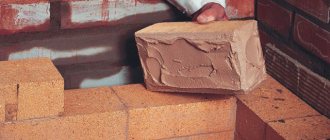
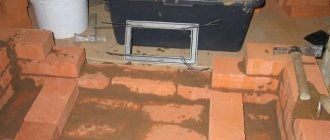
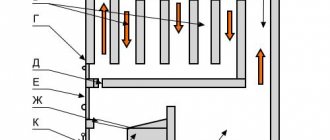
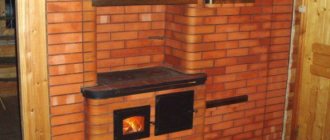
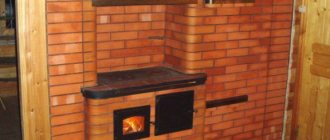
Regardless of what type of mixture is used to lay the stove, it must be effective, because this means structural strength, good appearance, and safety during operation. There are several main compositions: clay, cement, lime. Each type of mortar is used at different stages of construction, so it is impossible to determine a universal option.
Absolutely all experts agree that bricks should be laid on clay.
Only this material has the necessary characteristics:
- When heated, the volumetric expansion of a normal mortar will coincide with that of a brick. This prevents the occurrence of cracks during operation.
- The material does not emit harmful substances at high temperatures.
- The strength when heated remains the same.
- The necessary adhesion between the bricks is ensured.
To prepare the correct mixture, you need to follow a number of steps.
Choice of solution
Nowadays, there is a choice to determine how to heat your home. Using a stove for this purpose has a number of positive aspects. One of them is the absence of the need for additional communications. The stove creates a unique feeling of comfort that central heating radiators or electric heating devices can hardly provide.
But when laying a stove yourself, it is important not to lose sight of several important points. First of all, you need to remember that the oven is constantly at a very high temperature. The stove must be placed in such a way that this feature does not increase the risk of fire.
Further, the high temperature also affects the furnace itself, so the material from which it is made and the solution used must retain their qualities in such conditions. What are the requirements for bricklaying mortar?
One of the main ones is that it does not crack over time. Experienced craftsmen create a seam between bricks with a thickness of no more than three millimeters, which increases resistance to high temperatures. Another important characteristic of the mortar is the adhesion strength of the bricks in the masonry. Its plasticity will allow you to fill all the gaps between the bricks.
Ash
The last folk supplement that deserves attention. At first glance, ash does not inspire confidence, but keep in mind that it is an environmentally friendly product. A small amount of ash helps make concrete strong and flexible. This mixture is perfect for renovation work in an apartment or private house.
As you can see, there are many folk additives that help you obtain professional concrete at home. Which recipe to resort to is up to you. The main thing is to remember something else: in the pursuit of cheapness, it is important not to forget about quality and further operating conditions. This will help you find a middle ground.
Mixture composition
The solution consists of:
- binding components.
- filler.
- water.
They are selected in such a way as to meet the necessary requirements. Sand is used as a filler. The most important thing is the correct choice of binding components and compliance with the required proportions when creating a solution. Each such component has its own important features.
For example, clay will allow you to later move the stove if necessary. In addition, this material’s composition is suitable for high-quality bonding of bricks. If we talk about laying a foundation or the base of a furnace, then cement is more suitable as a binding element.
Insulating a bathhouse ceiling with clay
Despite the cheapness of clay, you should not think that it is quite simple: dig up clay and fill the ceiling with it.
In this case, it will crack and have less thermal insulation properties. Therefore, since ancient times, clay has been used in combination with other materials. For example, these include:
- sawdust;
- ground straw;
- tree bark;
- sand;
- expanded clay
The combination with sawdust, straw and sand is considered the most common. The use of expanded clay is advisable when laying clay in layers.
Any of the above additional components will provide increased layer strength and better thermal insulation.
For clay mortar
Let's consider the process of preparing the solution. To do this, you need to first prepare all the components of the solution. Let's start with water. It should not have a muddy or any other odor. The sand should be uniform and not coarse. In order to make ordinary sand suitable for mortar, there are two ways.
If you have a sieve with one and a half millimeter cells, then you can simply sift the sand. Otherwise, you can use a wooden frame and burlap stretched over it. Then filter the sand. When preparing clay, its fat content is important. Before using it, you need to determine this characteristic of it.
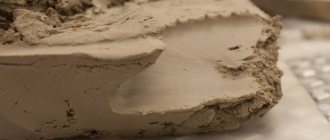
The simplest way to do this is to make a ball of clay, dry it and throw it onto the floor from a height of one and a half meters. If it remains intact, then the quality of the clay is good; if it cracks or crumbles, then it is not greasy enough.
There is a more accurate way to do this. If you roll a ball out of carefully kneaded clay and squeeze it between two boards, it will get to such a state that cracks will appear on it. If this required squeezing more than a quarter, then the clay is not fat enough.
If by a third, then the material is of high quality. If the cracks are more than half the diameter, then the clay is too oily. Using thin clay may cause the masonry to crumble. Oily clay in mortar can cause significant shrinkage.
When preparing the solution, sand and water are gradually added to the clay until the consistency of thick sour cream is obtained. Sand may be needed from half the volume of clay to double the amount.
The solution can be stored for up to two days, stirring it before use. Additives can also be used to increase its strength. To do this, you can use 150 grams of salt or one kilogram of M400 cement per ten kilograms of solution.
Sequence of work:
- Clay is poured into the trough and allowed to soak. Leave for a period of six hours to two days. During this entire time, the mixture is stirred regularly. Water will be needed in the amount of a quarter of the weight of the clay.
- Add sand in small parts, mixing thoroughly. The mixture will be ready when it slowly slides off the shovel.
- The final readiness of the solution is checked as follows. A flagellum is made (one and a half centimeters thick, twenty centimeters long). They connect it into a ring with a diameter of about five centimeters and evaluate the appearance. If there are no cracks, then the solution is too greasy and you need to add sand. If there are a lot of cracks, then you need to add clay. The solution is ready if there are small cracks.
How are proportions chosen?
From 1 to 5 parts of washed, purified sand are placed on one part of clay, which implies that the exact amount is achieved experimentally. First, an experimental batch is made, and then, depending on the resulting consistency, either sand or clay is added. The ideal 1:1 ratio is only suitable in cases where the clay is completely normal, that is, it is not greasy or depleted. Unfortunately, when it is mined with your own hands, it is quite difficult to find something similar. The correct clay-based oven mortar must be plastic. It should slide off easily from a smooth and absolutely clean trowel. The resulting mixture must be checked for the quality of adhesion. It is applied to the brick, which is pre-soaked. The mortar is laid in an even layer 5 mm thick, and then another brick is placed on top and pressed well. Half an hour later they check. It should show how well the two structural materials adhere.
Lime
Clay mortar is not suitable for all parts of the stove. It is not suitable for a chimney where condensate collects because the latter contributes to the formation of cracks. For a foundation, clay mortar is not strong enough. In these cases, it is customary to use lime mortar.
How it is made:
- Lime paste is prepared by mixing one part quicklime and three parts water. It is not recommended to do this yourself. It comes into contact with the skin or the respiratory tract. It is better to purchase it in a specialized store.
- Sand is mixed with the resulting lime paste in a ratio of three to one. It is recommended to first sift the sand through a sieve and rub the mixture through cheesecloth.
- To increase the strength characteristics of the solution, you can add cement. The composition of the resulting mixture is as follows: one part cement, two parts lime paste and ten parts sand. First, sand and cement are mixed, then diluted with water until a viscous state is achieved. Then add this to the lime dough and mix. If necessary, you can add additional water.
We make a free foundation from stone and clay. Or you can do it without clay at all, but it’s just as durable
Well, we have seen a total increase in prices for all building materials, and significantly. So, how should a budget country homeowner proceed? If a couple of years ago it was possible to build a house for 1 million, today even two is not enough. And this is without finishing; I’m generally silent about finishing and arrangement.
Well, I wrote about this in one of the previous publications, so there is no point in repeating myself. But it makes sense to consider what it is possible to build a country house from today at least at the prices of the year before last? Are there any other building materials that have not risen in price?
Since I have divided this problem into several main parts (foundation, walls, roof, insulation), then in each of these parts I will consider each part separately. And let's start with the foundation. First briefly, and then in more detail.
For the construction of the foundation, we have long been using cement, sand, water and reinforcement, not counting some other little things like additives, however, their weight in the overall construction is insignificant. Our water has not become more expensive, but the fittings have begun to cost 2-3 times more than 2 years ago. But the mass of reinforcement in the foundation is not so significant for a novice developer; for some reason, the main cost for him is cement and sand. And even without taking into account the rise in price, concrete costs too much money - about 200 thousand rubles. Is this a lot or a little? And what if we add reinforcement, which in reality, that is, in total, will cost almost the same?
This is approximately how much concrete costs for us, and this is without delivery. This is approximately how much concrete costs for us, and this is without delivery.
Do you think a budget developer will bear such costs?
Of course, a frame house can be placed on piles, which will somewhat reduce the cost of the foundation, but what if the house is made of aerated concrete? Even if you use piles, such a foundation will still cost no less than a strip foundation. But this is only hypothetically, because a normal specialist would not recommend putting a stone house on piles to anyone. Well, especially me.
Map of soil freezing depth in Russia. According to the indicated value, strip foundations should be deepened, because even the most insulated blind area will not save from frost heaving Map of the depth of soil freezing in Russia. According to the indicated value, strip foundations should be deepened, because even the most insulated blind area will not save you from frost heaving
So what can you use to build a cheap foundation? And from what people built it from before the invention of concrete. Such foundations are called rubble, or more precisely, rubble clay, because clay with various strengthening additives, for example, lime, was used as a binder. Yes, lime, unlike rubble and clay, costs money, but still the costs for it will be completely microscopic in comparison with the costs for concrete and reinforcement.
Rubble clay foundation with a plinth in Crimea. It stood for 2.5 thousand years and nothing was washed away. To build a house on it, it will last just as long. Rubble clay foundation with a plinth in Crimea. It stood for 2.5 thousand years and nothing was washed away. Build a house on it - it will last just as long
Well, someone will start saying that the clay will be washed away and the stones will crumble. Naturally, they will wash out and crumble if you do everything according to modern understanding. But our ancestors did not wash away anything, and nothing crumbled, because they made rubble-clay foundations according to their minds, and not according to their understanding.
Ancient Chinese rubble clay foundations in Primorye in the Far East. And the dampness there is not like in Crimea, and not even like in England. This is the wettest region in all of Eurasia, if anyone didn’t know Ancient Chinese rubble-clay foundations in Primorye in the Far East. And the dampness there is not like in Crimea, and not even like in England. This is the wettest region in all of Eurasia, if anyone didn’t know
An interesting point: for some reason, few people know that in the UK, foundations for private houses have long been built not from concrete, but from aerated concrete blocks. This is how a trench is simply dug, and aerated concrete blocks of grades D450-500 are placed in it without any special waterproofing; in particularly wet soils, D700 blocks are used, but not higher. Why not higher? Yes, because in the UK, and throughout Europe, there is simply no such equipment with which it would be possible to produce aerated concrete of grades higher than D700. Of course, it’s not because it’s not there because they’re such fools, but because they don’t need aerated concrete above D700 there. So the British are building their foundations from aerated concrete blocks there. Both cheap and cheerful.
Using cement mortar
For the chimney and for the foundation of the stove, you can also use cement mortar along with lime.
Its distinctive features are:
- High strength.
- Fast hardening.
In this case, the ratio of sand and cement depends on the brand of the latter. Just as in previous cases, the sand must be thoroughly sifted before use.
The manufacturing process is as follows.
- Thoroughly mix sand and cement in the required proportions. Make sure there are no lumps.
- Before use, add the required amount of water. The solution should be mobile, but should not slide off the shovel. In this case, it can be considered ready. It must be used within one hour, otherwise it will harden.
PVA glue
A popular recipe used by many folk craftsmen. Surprisingly, this method has proven itself so well that it is actively used even in the professional sphere (when permissible according to GOST).
The main effects of adding PVA glue:
- increased strength;
- improved water resistance;
- providing excellent mobility.
Based on the last point, it is clear that the effect of using PVA glue is similar to the previous recipe when adding soap. However, keep in mind that PVA is an excellent adhesive material, actively used in repair work, and therefore its addition makes the concrete solution more reliable, efficient, and of high quality.
How much does it cost to add PVA when mixing concrete? Experts recommend using 200 grams of glue per standard 20-liter bucket. This is quite enough to obtain a truly high-quality solution.
The resulting mixture can be used for various purposes:
- filling of architectural forms;
- carrying out renovations in the apartment;
- construction of various objects in the country.
If the quality of the solution is a priority requirement, then you can replace PVA glue with pure polyvinyl acetate, since it does not contain any starch. This will help make the solution even more waterproof.
Using standard mixtures
The domestic industry offers ready-made mixtures for creating mortar for laying furnaces. They can be divided into two types:
- Simple mixtures.
- Improved mixtures.
In the first case, we are talking about dry mixtures of clay and sand. You need to add water to the desired consistency and the solution will be ready. The consumption of such mixtures is approximately 25 kilograms per ninety bricks. It allows you to make a seam with a thickness of no more than three millimeters.
In the second case, we are talking about mixtures that include various additives using the achievements of modern technologies. They create additional resistance to high temperatures and moisture. Increases the strength and durability of masonry. Consumption is approximately twenty kilograms per hundred bricks.
Let's talk about their main varieties:
- Dry fire-resistant mixture (mortar). It is used for internal elements of the furnace where exposure to high temperatures occurs.
- Mixture for laying external elements.
- Special plaster mixtures for stoves.
- Heat resistant adhesive. It is usually used for lining the stove with ceramic tiles.
Manufacturing recommendations
Construction stores sell ready-packed mixtures for masonry. They consist of high quality clay mixed with fine sand.
To make masonry mortar with your own hands, you have to take sand and clay from the area. Stove makers sometimes use several types of raw materials from different areas. In order not to make a mistake and not to bring the wrong material, it is useful to consult with local craftsmen.
Which clay to choose and how to determine its quality
Clay is a finely dispersed rock with a particle size of thousandths of a millimeter . The chemical formula of the bulk of the rock is Al2O3 . This material is very plastic, susceptible to mechanical stress, clay paste will withstand the thinnest modeling. The volume of raw materials swollen with water increases up to two times .
The composition of clays includes oxides of iron and other metals, plant residues, hydrocarbons, carbonates, chalk particles, and iron sulfide. Impurities give this rock its different colors .
Fatty clays are finely dispersed and highly plastic . When dried, the raw material cracks greatly, although the dried pieces are highly durable. Such rocks contain from 3 to 15% sand.
Lean (sand-enriched) clays, on the contrary, have low plasticity . When dried, they become fragile, destroyed due to the high content of granular material and are close in composition to sandy loam. They contain more than 80% sand.
Additives to the solution
To improve the characteristics of the solution, various additives are used. The use of salt or cement can significantly improve the adhesion strength of clay and lime mortar.
In those mixtures that are on sale, the range of additives is much wider:
- Water-retaining additives make it possible not to soak the bricks when laying them.
- Reinforcing heat-resistant fibers increase resistance to heat and prevent possible cracking of the seams.
- Other additives may also be used.
Chicken eggs
It seems incredible, but ordinary chicken eggs significantly improve the quality of concrete, making it suitable even for the construction of all kinds of structures. The recipe for mixing the mixture with the addition of chicken eggs comes from ancient times.
Nowadays, high-quality cement with a high degree of viscosity is used to prepare concrete, but many still add chicken eggs, which help:
- improve strength;
- increase adhesion properties;
- increase density indicators;
- enhance water resistance.
The question arises: how many eggs are needed to make super-quality concrete? The answer is simple - a lot. In modern realities, this is impractical; besides, there are many other ways to improve the quality of concrete, and it is better to leave chicken eggs for cooking.
Why is sawdust not used for insulation in its pure form?
Despite the fact that clean sawdust reduces heat loss well in any building, it has three serious drawbacks:
- They cake over time, which is why voids appear in the insulating layer, which have a higher heat transfer coefficient.
- Wood sawing waste is a very attractive place for various rodents that settle in it.
- Pure sawdust can only be used to fill a clearly limited space, so it cannot be used to insulate walls without voids.
Arbolit
In the 60s of the last century, a building material called wood concrete was patented. Currently, slabs made from it are actively used for ceiling insulation in private homes. This type of material is nothing more than ordinary lightweight concrete. Such panels, 100 mm thick, can be prepared at home, using a homemade method, if you dry the mass in special flat molds.
To make them, they are used for sawdust and shavings. All wood-based materials contain sugary substances that contribute to the destruction of the concrete structure. To neutralize them, the shavings are treated with lime milk before use and then dried. After such preparation, it is an ideal filler for the manufacture of insulation boards.
Preparatory work
To carry out this stage you will need the following tools and consumables:
- Hammer and set of chisels for removing old coating
- Scrapers, metal brushes and spatulas for cleaning the surface.
- Solvent and rags for removing paint.
- Hammer for tapping the surface.
- Grinding machine and set of wheels.
- Primer and a paint brush or roller for applying it.
- A container, a drill with an attachment, or a special construction mixer for making mortar.
Specifications
In terms of thermal conductivity, clay-sawdust coating ranks second after gypsum-perlite mortar - its thermal conductivity is 29 W/m ×°C. In its pure form, the thermal conductivity of clay is 69 W/m × °C, that is, almost 1.5 times lower than that of a cement-sand mixture.
Another important indicator for plaster is vapor permeability . After all, moisture must be removed from the premises to avoid condensation. Vapor permeability coefficient for clay = 0.11-0.15 mg/(m*hour*Pa). This is more than that of log walls. Therefore, clay is excellent for plastering wooden houses.
The density (ratio of mass to volume) of clay is 1700 kg/cubic meter. m. Brick has a similar density.
The consumption of clay plaster with a layer thickness of 1 cm is 15 kg per 1 sq. m.
Preparing walls before plastering
Clay mortar, due to the lack of chemical bonds with the plastered surface, does not adhere well to a smooth base. Therefore, when facing bricks, the joints must be jointed before plastering.
To reinforce wooden surfaces finished with clay plaster, shingles are used . The use of plaster mesh in this case is not very convenient. Since clay is not as flexible as gypsum, it will not bond well to the mesh.
Shingles are narrow boards 3-5 mm thick, which are nailed onto the wall. The wooden planks are positioned at an angle of 45°. Moreover, the nails should not go into the wall completely, but only halfway. The rest of them are bent and recessed into the wall. In this case, the shingles will hold up better.
Advantages and disadvantages
Plastering walls with clay has many advantages:
- Environmental friendliness; clay does not contain harmful impurities.
- Fire resistance: it is absolutely not afraid of fire.
- This material easily sticks not only to concrete or brick, but even to wood. In the latter case, shingles are used to secure it.
- Even a non-professional can work with plastic clay mortar.
- It is able to “breathe,” that is, absorb moisture from the air and release it when the relative humidity changes, which is very important for creating a comfortable microclimate.
- Adsorption. It has been noticed that allergy sufferers feel more comfortable in rooms decorated with clay plaster. After all, clay can absorb odors and bind harmful substances.
- It costs absolutely nothing: you can dig it up with your own hands in the nearest quarry or in your garden.
- Good sound insulation and heat conservation.
