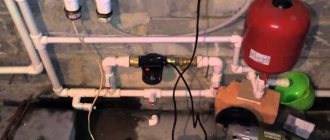
There are many apartment buildings with an “in-wall” heating system scattered throughout the former Soviet Union. They can be found both in Moscow and in Murmansk, St. Petersburg, Chelyabinsk, as well as in many cities of Belarus and Ukraine. But what is this “battery in the wall” - a whim or stupidity of Soviet architects? Or an innovation that appeared too early? And what to do with it today: change it or leave it as is?
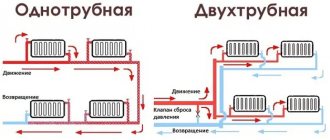
Single-pipe water heating system for a multi-storey building
In multi-storey buildings, such a system is often used; a steel pipe is used as the main material (in private heating systems, the use of polypropylene or metal-plastic is acceptable).
- the design of the system and its design are calculated in accordance with SNiP for laying pipelines;
- sections of the main line running outside or in the basement are insulated so that the heat does not go to waste;
- buildings use a vertical single-pipe system - a cheap and effective heating option;
- design and calculations are carried out at the construction stage - the optimal option, diagrams and drawings with calculations related to heating are approved by the relevant authorities before the start of construction;
- Before putting into operation, pressure testing and commissioning are carried out.
Why in the USSR were batteries built directly into the walls in Khrushchev buildings?
Today, only the lazy do not criticize the layout of the Khrushchev buildings. Either the kitchens with balconies are small, or there is no room to turn around in the bathrooms, or you can hear the neighbor’s TV louder than your own. However, we should not forget that the government's primary task 50-60 years ago was to provide people with their own housing. And in order to put the house into operation as quickly as possible, architects and engineers resorted to optimization of construction. In many houses, heating is built directly into the walls.
Advantages and types of heating network for a house with two mains
The main distinctive feature of this system is the presence of two pipes:
- One of them transports the coolant from the heating boiler to heating devices and registers;
- The second line is needed to remove the cooled liquid and return it to the boiler.
Schematic diagram of the operation of a two-pipe heating system
The advantage that such a two-pipe system has is a uniform supply of coolant with the same temperature to all heating devices.
If a single-pipe line is used, then the coolant has to pass through all pipelines and heating devices sequentially - as a result, the batteries and radiators located at the end of the circuit do not warm up well.
There is an opinion that a two-pipe system requires double the amount of fitting costs (compared to a single-pipe system). But this is not entirely true: a one-pipe system requires the installation of large-diameter pipes, while in a two-pipe main, you can get by with products of a smaller diameter, and accordingly they will cost less. The same applies to fitting sizes - the difference in cost is small.
The small size of the heating elements does not spoil the interior of the room, but if necessary, the pipeline can be mounted (and thus disguised) in building structures. The result is a closed pipeline system.
The location of pipes combined into a single heating network can be done in one of the following ways:
- Horizontal. Such a heating system is usually installed in low-rise, long buildings, for example, a warehouse or a production workshop. The horizontal network is also most often installed in panel-frame buildings, i.e. where there are few or no partitions at all and it is possible to install risers on the staircase or in the corridor. A horizontal network implies constant circulation of coolant.
- Vertical. This method involves connecting heating devices to the main riser installed vertically. The vertical system is used in multi-storey buildings, where each floor is connected separately. A horizontal two-pipe system will cost the homeowner less, but a vertical network creates almost no air pockets, which simplifies its operation.
Initial work
Layout of heating batteries on the balcony.
- Bulgarian.
- Hammer.
- Steel plates.
- File.
- Cement solution (1 share of cement, 3 shares of sand, as much water as required).
- Polyurethane foam.
The next step is to install the mounting system into the load-bearing wall. The easiest way to do this is to use a steel plate, which has a thickness of up to 2 mm and a width of 25-30 mm. The length of such a plate will be arbitrary, but preferably 300-350 mm, in order to place it at a sufficient distance beyond the load-bearing wall, but at the same time fully maintain the strength of its fixation. To do this, use a hammer drill to hollow out a series of holes to a depth of 50 mm, then they are cleaned and you can try to install a steel plate there. If the plate fits in freely enough, then you can fill the hole with cement solution, where the plate is immediately reinserted. Some prefer to use mastic or other available material instead of cement, which is quite possible, but be sure to take into account the thermal effect when choosing.
Next, in the place where the radiator will be directly installed, you should use a grinder to make small recesses so that the entire structure can be mounted there without being afraid of any surprises. The ideal option is to finalize everything with a file, so as not to leave any pointed ends and to round off existing corners.
Loggia heating scheme.
After this, 2 places on the main pipe are selected where additional batteries will be connected, one of which will supply water, and through the other it will be discharged. Opposite these places, you should use a hammer drill to organize through the walls. Load-bearing walls have one characteristic feature - they are often so wide that it is extremely difficult to select a drill, and often you even have to make 2 holes opposite and carefully try to match the joint. After the holes are made, they can begin to be expanded to the diameter of the pipe plus 0.5 cm, because it will be physically impossible to insert the pipe into a hole made end-to-end. After complete installation, it will be possible to fill the hole with foam or other filler that will be sufficiently sealed and resistant to temperatures. You can't leave weak spots near the walls, because... Although they will not play a role in the quality of heating, they will allow drafts to pass through.
Finally, about the scope of application
To avoid problems during operation, use single-pipe heating networks in suitable conditions:
- “Leningradka” works well in one-story dachas and small houses with an area of up to 150 m². If the quadrature does not exceed 70 m², one common ring for all batteries is sufficient, otherwise the system is divided into 2 circuits or a pipeline of a larger cross-section is laid.
- In a 2-story building, you can assemble an open-type gravity single-pipe circuit or a closed version with bottom wiring - your choice. In case of power outages, it is preferable to organize gravity flow and place the circulation pump on the bypass.
- Gravity flow with an accelerating manifold, used in one-story buildings, is characterized by inertia. Radiators warm up slowly, the water cools down greatly due to the low flow rate, and the boiler operates in extreme mode. It is better not to use this circuit at all; it is outdated and will not work normally without a pump.
- Feel free to divide the Leningradka into 2-3 separate floor loops with the optimal number of batteries on each. Do not combine the radiators of all floors into a single circulation circuit - the last devices will remain cold.
- The single-pipe Leningrad system is a suitable option for installing autonomous heating for a 2-3-room apartment.
Experts who prove the indispensability of single-pipe heating systems often refer to Soviet-built multi-story buildings, saying that they have 20 radiators per riser. But they forget to mention the pressure and performance of pumps from a centralized network, which is unattainable in private homes. Do not listen to would-be specialists and use the best system options - two-pipe, collector or associated.
Problem
The main problem that my relatives told me about was absolutely cold radiators in two adjacent rooms, while in other rooms the radiators became noticeably warmer with the start of the heating season.
- In rooms with warm radiators, the average daily temperature was +17C;
- In rooms with non-working heating +13C.
As they say, feel the difference...
For several days, calls from neighbors and relatives to the heating network ended in approximately the same way - nothing, because... the house is a cooperative one, and its maintenance is not their responsibility, except in emergency cases.
And for a cooperative of 60 apartments (4 entrances), where more than half of the residents are people of deep retirement age, it was expensive to maintain its permanent plumber out of pocket. The part-time specialist only made sure that there were no leaks during the startup of the system, and nothing more.
Searching of decisions
Having arrived at the place, the first thing I do is check the taps on the radiators and on the bypasses - everything is in the open position in both rooms. I open the Mayevsky taps on each radiator - a thin stream of water informs that there is pressure in the system and the radiator is not air-filled. But you need to find out whether there is any coolant in the system at all.
For this purpose I go to the basement of the house. From the elevator unit I determine the direction and find “my” supply and return pipes.
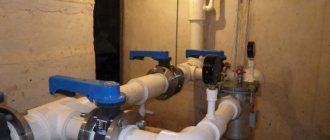
This is our highway.
Having reached the location of the apartments at our entrance, I see two pipes - supply and return. To the touch, both pipes differ quite noticeably, so it was not difficult to determine that the colder one was the return pipe.
In the foreground is the return line.
I use my hands again - both risers are cold, although literally a meter before this section the temperature was more than comfortable. The reason is the airing of the system on the upper fifth floor, which is why the coolant does not circulate.
I leave the basement and go to get acquainted with the neighbors on the upper floor, simultaneously inquiring from other residents about the presence of shut-off valves and their condition. As you would expect, they all have cast iron radiators installed 30 years ago.
The fifth floor is a bridge between rooms.
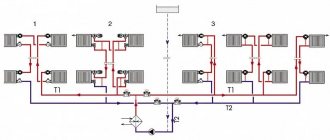
In Khrushchev-era houses there is no technical floor, so the coolant is supplied from below from the basement. To clarify the operation of the heating system, I propose to consider the diagram presented below.
Red arrows show the direction of movement from the supply, blue arrows indicate the return direction.
We return to the fifth floor apartment. In two rooms of a family of pensioners, cast iron radiators with 12 and 7 sections were installed. They were the ones who had to be ventilated.
The reason for the lack of heat is the accumulated air inside the radiator.
The only way available for this is using a nipple (a prototype of the Mayevsky tap) embedded in the radiator plug.
Upcoming job.
- Old galvanized bucket 12 liters;
- Pliers;
- Two flat blade screwdrivers;
- Several floor rags - splashes will be inevitable.
Here it is our simple tool.
I install a bucket under the radiator.
Since a lot of splashes are expected, I provide a place to work around the radiator - I remove flower pots and move the furniture further away
Then I take a screwdriver and carefully, so as not to lick the edges, unscrew the screw counterclockwise
The effort has to be excessive.
- The old system did not work on the first try, I had to use pliers - with their help I turned the screwdriver until the screw came off the stuck place;
- The hiss of air marked the beginning of the air lock coming out. Within 3-4 minutes, the air left the radiator, after which cold water flowed in a thin stream;
- Having adjusted the screw so that the water poured into the bucket, I gave it time - in about half an hour, when the bucket was half filled, the temperature of the water changed from ice to warm, after which I screwed the screw back.
How not to remember the classic: “Oh, it’s getting warm...”
I did the same operation with a cast iron battery in another room. A few hours later, the apartments became noticeably warmer - the thermometer showed an increase of a couple of degrees. Of course, there is no need to talk about a complete solution to the problem of cold in the apartment, because... The coolant temperature is far from 75C, but it’s not yet a bitter winter outside.
I hope that my experience will be useful to some of you. If the symptoms are similar, negotiate with the neighbors on the top floor and ventilate the riser before the onset of winter. Good luck, comrades!
Types of radiators for heating apartment buildings
In multi-storey buildings there is no single rule allowing the use of a specific type of radiator, so the choice is not particularly limited. The heating scheme of a multi-storey building is quite universal and has a good balance between temperature and pressure.
The main models of radiators used in apartments include the following devices:
- Cast iron batteries
. Often used even in the most modern buildings. They are cheap and very easy to install: as a rule, apartment owners install this type of radiators themselves. - Steel heaters
. This option is a logical continuation of the development of new heating devices. Being more modern, steel heating panels demonstrate good aesthetic qualities, are quite reliable and practical. They combine very well with the control elements of the heating system. Experts agree that steel batteries can be called optimal for use in apartments. - Aluminum and bimetallic batteries
. Products made from aluminum are highly valued by owners of private houses and apartments. Aluminum batteries have the best performance when compared with previous options: excellent appearance, light weight and compactness are perfectly combined with high performance characteristics. The only disadvantage of these devices, which often scares off buyers, is the high cost. However, experts do not recommend saving on heating and believe that such an investment will pay off quite quickly.
Conclusion
The correct choice of batteries for a centralized heating system depends on the performance indicators that are inherent in the coolant in the given area. Knowing the cooling rate of the coolant and its movement, you can calculate the required number of radiator sections, its dimensions and material. We should not forget that when replacing heating devices, it is necessary to ensure that all rules are followed, since their violation can lead to defects in the system, and then the heating in the wall of a panel house will not perform its functions (read: “Heating pipes in the wall ").
Centralized heating systems demonstrate good qualities, but they need to be constantly maintained in working order, and for this you need to monitor many indicators, including thermal insulation, wear and tear of equipment and regular replacement of worn-out elements.
Owning an apartment in the city is a luxury item. It also provides comfort and coziness for its owners, since a city apartment is the most common place to live for modern city dwellers. It is worth noting that a good heating system plays an important role in creating a comfortable environment in such an apartment.
The heating scheme of a multi-storey building is a very important detail for any person.
In modern life, such a scheme has many design differences from conventional heating methods. Therefore, heating schemes for a three-story house or more guarantee effective heating of the walls even in the most unpredictable weather.
How to find out where the battery goes in the wall?
There are no batteries, but pipes encased during the manufacture of panels. They can be in the form of coils to increase heat transfer. It's called panel heating. I lived in such a house for quite a long time. The solution is very simple. By electrical wiring. All wiring is routed in channels that are formed when ordinary rubber hoses are placed into the mold during the manufacture of wall panels at the reinforced concrete concrete plant. After stripping the panel, the worker pulls the protruding end of the hose and removes it. This creates a channel in the panel with a diameter of about 25 mm. As a rule, the channels are straight. They go from the transfer case to the niches for sockets and between the transfer cases. There are also channels in floor slabs. Find the transfer cases, they are located under the ceiling, open them, count the number of wires, look where they go. Open the sockets and see where they come out. Draw straight lines between the points on the wall with a pencil - this is the location of the electrical channels. Correctness control. Plug any tool with a commutator motor into the outlet and turn it on. If it is too noisy, connect it through a carrier and take it to another room. Take a transistor receiver on medium or long waves, bring it to the wall so that the larger size of the housing is perpendicular to the axis of the intended channel. The maximum buzz of the receiver will be at the moment when the center of the magnetic antenna of the receiver coincides with the axis of the channel in which the wire runs. The center of the magnetic antenna is usually close to the center of the receiver body (1-2 cm back and forth). You can practice on the carrying wire and mark the maximum buzz with a pencil on the body. I had a Speedola back then. This way you can mark out almost all the wiring in the apartment, you just need to connect such an improvised noise generator instead of lighting bulbs. Now about the heating pipes. Place your palm on the wall and look for the warmest areas of the wall. Connect these areas with a pencil line from the ceiling to the floor. The approximate location of the pipe was obtained. Tune the same receiver to a weak station in the DV or MV range and bring it to the wall in the same way as you did with the wiring and look for the maximum increase in the volume of the received station. This will be the location of the pipe axis in the wall with an accuracy of 1-2 cm. I don't think you need much precision. Typically, heating pipes are located in the internal wall panels in an area of approximately 1-1.5 m from the external wall panel. I wish you good luck, go for it. Nick_Nick.
Heating system in an apartment building: connection diagram and features
To meet the heating needs of residents of high-rise buildings, centralized heating systems are well suited. Centralized heat supply involves the transfer of heated coolant from the boiler room through a network of insulated pipes connected to a multi-story building. Centralized boiler houses have sufficient efficiency and make it possible to combine low operating costs and acceptable efficiency indicators for heat supply to multi-storey buildings.
But in order for the efficiency of the central heating supply to be at the proper level, the heating scheme in an apartment building is drawn up by professionals in their field - heating engineers. The fundamental principles by which a home heating scheme is designed are to achieve maximum heating efficiency with minimal resource consumption.
Contractors and builders are interested in providing apartment owners with a reliable and productive heat supply system, therefore the heating scheme of a multi-storey building is developed taking into account the current cost of heat resources, the thermal output of heating devices, their energy efficiency and the optimal sequence of connection to the circuit.
How to heat a balcony in winter: brief conclusions
A balcony with an installed heater can become a full-fledged additional room. Heat can be transferred into it in different ways, both simple and exotic. When using solar panels for an apartment, all the electricity for heating the loggia will be free, but the installation will be too cumbersome.
Innovative warm plinth - the ideal solution for the smallest balconies. According to the experience of most, the simplest way to heat a small room is a conventional battery, but you must obtain permission from the BTI for its installation.
Heating system of a multi-storey building
The heating system of a multi-storey building is quite complex and its implementation is a very responsible undertaking, the result of which will affect all people in the building.
There are several heating schemes for multi-storey buildings, each of which has its own advantages and disadvantages:
- The single-pipe vertical heating system for a multi-storey building is a reliable system, which is why it is popular. In addition, its implementation requires less material costs, ease of installation, and parts can be unified. One of the disadvantages can be noted: during the heating season there are periods when the air temperature outside rises, which means that less coolant gets into the radiators (due to their blocking) and it leaves the system not cooled down.
- A two-pipe vertical heating system for a multi-storey building - this system allows you to directly save heat. If necessary, the thermostat closes, and the coolant will continue to flow into unregulated risers, which are located on the staircases of the building. Due to the fact that with such a scheme gravitational pressure arises in the riser, heating is often organized using the lower gasket of the distribution line.
- The two-pipe horizontal system is the most optimal in terms of both hydrodynamic and thermal performance indicators. This system can be used in houses of various storeys. Such a system allows you to effectively save heat and is also low-vulnerable even in cases that were not taken into account by the design. The only drawback is the high cost.
Before starting installation work, it is necessary to design the heating. As a rule, the design of the heating system of a multi-storey building is carried out at the design stage of the house itself. In the process of designing a heating system, calculations are made and a multi-story heating scheme is developed down to the location of pipes and heating devices. At the end of the work on the project, it goes through the stage of coordination and approval by government authorities.
As soon as the project has been agreed upon and all necessary decisions have been received, the stage of selecting equipment and materials, their purchase, and their delivery to the site begins. At the site, a team of installers is already starting installation work.
Our installers carry out all work in compliance with all standards, as well as in strict accordance with the design documentation. At the final stage, the heating system of a multi-storey building is pressurized and commissioning work is carried out.
The heating system of a multi-story building is of particular interest; it can be considered using the example of a standard five-story building. It is necessary to find out how heating and hot water supply function in such a house.
Heating diagram for a two-story house.
A five-story building requires central heating. the house has a heating main inlet, there are water valves, and there may be several heating units.
In most houses, the heating unit is locked, which is done to achieve safety. Despite the fact that all this may seem very complicated, the heating system can be described in simple words. The easiest way is to take a five-story building as an example.
The heating scheme for the house is as follows. After the water valves there are mud traps (there can be only one mud trap). If the heating system is open, then after the mud traps through the inserts there are valves that are located from processing and supply. The heating system is designed in such a way that water, depending on the circumstances, cannot be taken from the back of the house or from the supply. The thing is that the central heating system of an apartment building operates on water that is superheated, the water is supplied from a boiler room or from a thermal power plant, its pressure ranges from 6 to 10 kgf, and the water temperature reaches 1500°C. Water is in a liquid state even in very cold weather due to increased pressure, so it does not boil in the pipeline to form steam.
When the temperature is so high, the hot water supply is turned on from the back of the building, where the water temperature does not exceed 700°C. If the temperature of the coolant is low (this happens in spring and autumn), then for the normal functioning of the hot water supply this temperature cannot be sufficient, then the water for the hot water supply comes from the supply to the building.
Now you can disassemble the open heating system of such a house (this is called an open water intake), this scheme is one of the most common.
Purpose and principle of operation of the elevator unit
It was said above that the water in the heating system of a multi-story building heats up to 130 degrees. But consumers do not need such a temperature, and heating the batteries to such a value is absolutely pointless, regardless of the number of floors: the heating system of a nine-story building in this case will not be different from any other. Everything is explained quite simply: the heating supply in multi-storey buildings is completed by a device that turns into a return circuit, which is called an elevator unit. What is the meaning of this node, and what functions are assigned to it?
The coolant heated to a high temperature enters the elevator unit, which, in its principle of operation, is similar to a dosing injector. It is after this process that the liquid carries out heat exchange. Coming out through the elevator nozzle, the coolant under high pressure exits through the return line.
In addition, through the same channel, the liquid is recirculated into the heating system. All these processes together make it possible to mix the coolant, bringing it to the optimal temperature, which is sufficient to heat all apartments. The use of an elevator unit in the scheme makes it possible to provide the highest quality heating in high-rise buildings, regardless of the number of floors.
Which scheme is better to choose?
The selection of wiring is carried out taking into account many factors - the area and number of floors of a private house, the allocated budget, the presence of additional systems, the reliability of power supply, and so on. We will give a number of general recommendations for choosing:
- If you plan to assemble the heating yourself, it is better to opt for a two-pipe shoulder system. It forgives beginners many mistakes and will work despite the mistakes made.
- If you have high requirements for the interior of rooms, take the collector type of wiring as a basis. Hide the comb in the closet, and route the lines under the screed. In a two- or three-story mansion, it is advisable to install several combs - one per floor.
- Frequent power outages leave no choice - you need to assemble a circuit with natural circulation (gravity flow).
- The Tichelman system is suitable for buildings with a large area and a large number of heating panels. It is not financially feasible to install a loop in small buildings.
- For a small country house or bathhouse, a dead-end wiring option with open piping is perfect.
If the cottage is planned to be heated with radiators, heated floors and water heaters, it is worth adopting a dead-end or collector wiring option.
The two indicated schemes can be easily combined with other heating equipment. Date: September 25, 2022
Heat is against the law
Unfortunately, housing and communal services did not care about their fellow citizens, not caring about insulation or heating on the loggia, and not giving permission to carry out from the central branch. A slightly strange approach to this issue, although in essence, the system doesn’t care; one balcony or an extra battery does not put a load on the overall heating system; rather, on the contrary, it relieves it. Finding out on your own how to install heating on a balcony and installing it is illegal. This is specified in the offenses and you can pay a tidy sum for it, which is a rather unpleasant prospect. But every coin has a flip side; housing and communal services simply do not give official permission to such a trick, avoiding solving the problem.
If, nevertheless, the balcony is conceived in terms of an independent room, then heating is not a whim, but an urgent need, human health is weak and is not able to tolerate cold floors, blowing drafts and the wild cold from the street. A frozen body is much more vulnerable to various viruses, so you should not skimp on your health. How to implement a warm balcony if on one side there is no permission, and on the other there is a fine?
Warm floor
A thrifty owner takes care of all heating, regardless of costs. Typically, heated floors are made using an electric heating tool, but you should not spend extra money if you have centralized heating. It’s really possible to make a warm floor with your own hands, and then enjoy it on long winter evenings, covered with a blanket, looking out the window. For a warm floor, you will need insulating material: cotton wool, padding polyester, foam rubber, ordinary unnecessary rags. A large number of wooden beams and cleanly planed boards. The strength of the floor and the coating as a whole depends on the wood chosen. Next is a matter of technology. Connect a separate pipe, install a distributor and run two parallel pipes in a zigzag pattern across the floor. Install wooden beams between the pipes, easing the severity and preventing the possibility of flooding. We lay insulation material between the beams, carefully fix it, or cover it with a moisture-resistant solution. Boards are laid on top of the beams and can be connected to each other. If desired, lay parquet, linoleum, carpet.
