Here you will learn:
- Design and types of fan heaters
- The use of homemade fan heaters
- General recommendations for creating devices
- DIY water fan heater
- Homemade gas heater
- Directional heat gun
- DIY fan heater made from trash + video
- Fan heater made of asbestos cement pipe
Household fan heaters are compact devices that can easily be installed in almost any suitable place. To operate the device, you need electricity: both for the fan and for the heating element.
Such devices are often used in apartments, garages, and even for heating workshops, greenhouses and other premises. It all depends on the power of the device.
Any fan heater model has three components:
- fan;
- a heating element;
- frame.
The fan drives a stream of air through the body, the spiral heats this air, and the warm air flows throughout the room.
If you add automatic control elements to the device, you can set an acceptable air temperature. The device will turn on and off without human intervention, which will save energy.
To make a homemade fan heater, a regular household fan, the dimensions of which correspond to the body of the device, is suitable. Sometimes the housing is made based on the size of the fan
When operating the fan heater, you must adhere to safety rules. Do not place any objects or materials directly on the fan heater body or too close to the protective grille.
If the device is equipped with an overheat protection system, it will simply turn off. But if this module was not installed during assembly, the device may overheat, break down, or even catch fire.
A self-made fan heater can be of almost any suitable size and power. As a housing, you can use a piece of asbestos-cement pipe, a metal pipe, a rolled sheet of metal, or even a housing from an old system unit.
Usually, a fan is first selected and a heating coil is made, and then the type of device housing is determined depending on its filling.
The most important point when creating this heating device is safety: fire and electrical.
The heating coil in homemade devices is most often of the open type; it is simply twisted from suitable wire. Direct contact with a heated coil can lead to fires, burns, etc.
To make a fan heater with your own hands, you will need the most common tools, as well as basic knowledge of installing household electrical equipment
Therefore, the spiral must be properly secured inside the case, and the outside of the device must be covered with a reliable grille. The installation of the device's power supply also requires attention.
- All contacts must be insulated; the base below is usually made of materials that do not conduct current: rubber, plywood, etc.;
- As a basis for the construction of a fan heater, it is worth taking an industrial model, the design of which will serve as a template;
- To assemble a fan heater, you will need a motor, a centrifugal or axial fan, wires and a housing; the components can be assembled from literal trash;
- At the stage of selecting suitable available means, it is worth immediately deciding on the type of heating element and the method of its fastening;
Design and types of fan heaters
To preliminarily estimate the amount of work and select the materials necessary for assembly, it is worth familiarizing yourself with the design of a factory-assembled fan heater. The elements present in the design of all models are:
- Protective housing made of plastic or metal.
- Electric motor.
- Impeller with blades.
- A heating element.
- Protective grille.
- Adjustment and control elements.
Depending on the chosen design and purpose of the device, additional components are selected. You can make almost all types of electric heaters with your own hands. For domestic needs, you can make a mini heat gun with your own hands to warm up and dry the room, a do-it-yourself electric fireplace will allow you to realize your own design ideas and give the room a cozy atmosphere, and a ducted air heater is built into the supply ventilation or air conditioning system.
Building a dream garage from scratch part 5 Fan heater
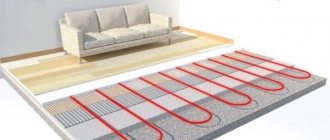
Hello everyone. We continue to build a large budget dream garage. Material for insulation has been purchased, but the weather does not yet allow them to work on it. While it was cold outside I decided to work on the heating system. Large garage 6*12 ceiling height in its pure form 3.20. And so the question arose of how to heat such a room. The main sources of heat will be underfloor heating and radiators. But it will take a long time for it to warm up. It will be the same story with radiators. It was decided to make a fan heater to quickly warm up the air, like volkano.
Full size
Found two copper heaters
Full size
The connection manifold was made from a regular profile pipe 50*50 wall 2
Full size
An automatic air vent is located in the upper part. And at the bottom there are 2 taps at 3/4.
Things were much more interesting with the fan. Initially I thought of installing a regular household fan. I was lying around idle, so I think this is where it will come in handy. I started making fastenings for it.
Full size Full size
And then finally the motor began to hum. This fan blows radiators 10-12 meters away. I started making a diffuser for it.
Full size Full size
Well, since it will stand under the ceiling, it would be nice to be able to regulate the direction of air flow. The simplest solution is to make rotating blinds.
Full size
Well, basically, all that remains is to paint it, which will happen in the warm season. But I hope the connection and testing will take place next weekend. I will be glad to hear questions, ideas on heating, or constructive criticism.
Full size Full size
Tags: fan heater, volkano, do it yourself, heating, heat gun, dream garage
The use of homemade fan heaters
Electric models can heat small areas, while their water counterpart is used to heat large spaces, but you may need several devices to distribute the heat evenly.
Homemade devices can be used for drying things, which is important in winter, as well as car seats after washing a car or small rugs.
If, upon arrival at the dacha, you need to immediately heat one of its rooms, then fan heaters will cope with this task faster than other heating devices. It can also be used for heating basements and ground floors, those rooms where there is high humidity. Homemade devices can significantly reduce its level and maintain a stable temperature in the room for the required period of time.
Wall mounting
2.1 Installation of such a device must be carried out in rooms where the temperature does not fall below 0°C; compliance with this recommendation is required so that
avoid water freezing
in the fan heater tubes, or use a liquid in the form of an antifreeze substance, for example (
propylene glycol
).
2.2 Before starting installation of the air heating device, you must carefully examine all parts for various defects. To connect the fan heater to the heating system, 3/4” pipes (male thread) are used.
2.3 The piping of this system, including
water fan heater
and its insertion into the heating system, installation of shut-off valves is a very simple process, but if you are not sure, then it is better to turn to specialists for the correct and high-quality installation of your system.
2.4 When using water as a coolant, the fan heater can operate effectively in an enclosed space. Antifreeze liquids can be used to install this equipment outside the building. Considering the availability and ease of installation, we can say that a water fan heater is the most effective option for heating a room.
3.1 The mounting console is supplied complete with the Volcano fan heater. To install the console to the fan heater, you need to cut holes in the top and bottom of the device as shown in Figure 1, and then install bushings into them. You need to slide the mounting console onto them. The next step is to tighten the screws (M10) into the lower and upper bushings, and also fix the position of the fan heater in relation to the console. When the device is in the desired position, you should then install the plugs on the holder.
- console (1 pc. type A or B)
- mounting holder (type A or B)
- M10 screws with washer and nut for installing holders (2 sets)
- M10 screw for attaching the console to the fan heater itself (2 pcs.)
- plugs (2 pcs.)
- mounting sleeves (1 pc.)
The maximum range of air flow in the vertical direction is 8-15 meters, depending on the size of the air heating device. The maximum range in the horizontal direction is 14-25 meters.
General recommendations for creating devices
In an effort to save on expenses, many owners, when choosing among heater options, are in no hurry to purchase ready-made factory models.
After all, if you have the desire and the appropriate skills, you can always construct a heating device on your own.
When choosing a DIY garage heater, many are guided by two parameters:
- The heating device should be easy to activate, quickly warming up the room.
- The device must have a simple design, devoid of complex parts and elements.
- Operation of the device must be carried out with minimal financial costs.
An original and at the same time safe heater can be constructed even from improvised means used on the farm
The safety of the device is also important. Therefore, regardless of the heating method in the garage, it is necessary to equip a ventilation system. After all, a decrease in the amount of oxygen and the accumulation of combustion products poses a risk to human life.
Advantages
The undoubted advantage of electric walk-behind tractors is their compactness. The unit is easy to store and does not take up much space. This point is no less important during transportation. Most models can be transported in the trunk of a car by first removing the handles.
Electric models are much easier to drive than gasoline or diesel cars. At the same time, as already noted, the units do not pollute the air and do not make noise. The price of most models is significantly lower than the cost of cars with an internal combustion engine or a diesel component. The payback of the unit should also be taken into account. An electric walk-behind tractor is cheaper to operate, does not require fuel and constant complex maintenance.
If the site is small (within 10 acres) and at the same time electrified, the choice seems obvious. It is worth purchasing an electric walk-behind tractor. In most cases, such a unit will satisfy the needs of the summer resident. And if it is planned to build greenhouses on the site (or they are already present), then such a machine will be simply irreplaceable.
DIY water fan heater
Before assembling it, you should study the device and principle of operation. The step-by-step assembly instructions consist of 4 stages: manufacturing the housing, heat exchanger, assembly and installation.
Material required to create a fan heater
To create a fan heater with a water heat source with your own hands, you will need:
- A sheet of galvanized metal, or preferably stainless steel, about 1 mm thick. The body will be made from it, so the thickness of the material ensures the strength of the body.
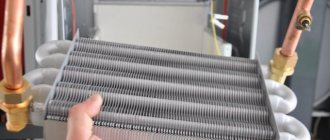
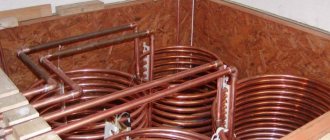
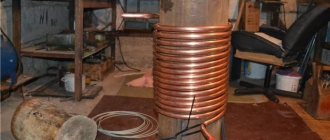
- Copper tube for heat exchanger. It's easiest if it's half an inch in diameter. You can also use a thin-walled metal pipe, but copper has much better heat transfer. The ideal heat exchanger option is a radiator from any small car. It can be purchased at car dismantling yards and scrap metal collection points.
- Two end valves with couplings for connecting the heat exchanger to the central heating system. Some experts recommend connecting the device and the heating system with flange connections. It is believed that such fastening is much more reliable than couplings.
- A fan, preferably a duct one, but you can use any model of suitable size. The main thing is that it generates sufficient power and is powered from a 220 V household power supply.
- Four springs for fan mounting. The springs should not be very stiff. They are vibration absorbers for the fan. Thanks to the spring mounting, your water heater will operate almost silently.
It would be very nice to purchase a Mayevsky tap to bleed air pockets, which the central heating system is so “rich in”.
Tools needed to create a heater
- A jigsaw with a metal file or a grinder with a cutting disc. The ideal option is both.
- Drill, set of metal drills, pliers, Phillips screwdriver, set of hardware (nuts, bolts, washers, etc.).
- Die for cutting threads on copper pipe. If the choice fell on a flange connection, then in this case you need a powerful soldering iron, flux for soldering copper and the metal flanges themselves, with a hole equal to the cross-section of the copper tube.
- Ruler, pencil, metal scissors.
Tip: It is much easier to couple the central heating system and your heat exchanger with half-inch couplings.
Build process
Creating a water fan heater with your own hands should be roughly divided into four stages: creating a housing, depending on the span of the fan blades, creating a heat exchanger, the dimensions of which will depend on the size of the housing, installation in the chosen location and connection to the heating system.
Stage 1
- We make markings. Using a jigsaw, grinder or metal snips, he cuts out a strip of metal to make an impromptu frame. The width of the strip will be equal to the width of the body of your device. The length of the strip will be equal to the length of the four sides of the device.
- Marks fold lines on the strip. The process of bending metal is quite labor-intensive and requires skills.
- We connect the opposite ends of the strip with bolts or rivets. To do this, you need to make a flange at the opposite ends of the strip, about 1-2 cm.
- The leftover material is used to make a front panel, in which many large holes should be made to allow hot air to escape.
- We attach it firmly to the front side of the frame.
Stage 2
- We fill the copper tube with clean and dry sand, plug one end and bend the heat exchanger. Sand is needed so that there are no creases in the bend areas. After that, we free the heat exchanger from sand and thoroughly blow it out.
- We drill two holes in the side of the housing to bring out the ends of the heat exchanger.
- At the ends of the heat exchanger we cut threads for connection to the couplings.
- We solder the Mayevsky tap into the top point of the heat exchanger.
Stage 3
- We assemble the device. First, a heat exchanger is installed in the finished housing. On both sides its ends are attached to the body with nuts. The remaining thread will be for screwing on the couplings.
- After this, a fan is installed behind the heat exchanger. To do this, small holes should be drilled in the corners of the body to attach the springs. The other side of each spring should be placed on the fan so that it is in the center of the device, like on guy wires.
Stage 4
- We mount the device on the wall so that there is a gap of at least 10 cm between the wall and the heater.
- We connect taps to the central heating pipes.
- Then, through couplings, we connect it to our fan.
Our water fan heater is ready. It is recommended to bleed air using a Mayevsky valve before starting
Part 10. Heating.
To be honest, I monitored the Internet for more than a year to see who was drowning with what and how. I understood one thing - the fastest heating is “air”, that is, when an air flow carries warm air throughout the room. This is much faster than heating a room with classic radiators/batteries. With batteries, until you warm up the entire volume of water/antifreeze in the system, until the batteries themselves warm up and begin to give off heat, a sufficient amount of time will pass.
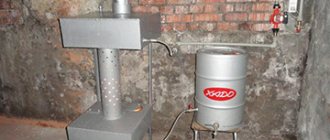
The most common heating in workshops, potbelly stoves based on waste, I crossed out from the list right away - because this waste itself accumulates a very small amount, and buying it, transporting it, refilling the tanks is a fuss, not a clean one, and it’s a little dangerous ( There are fireproof potbelly stoves, but still not my thing.).
Full size potbelly stove under development, the simplest option
In the same way, I immediately crossed out various types of gas and diesel guns from the list, since they burn oxygen in the room, and over time it becomes impossible to stay there. Electric guns were also not suitable, due to the fact that for a large room you need about 20 kW of electricity, and I only have
15 kW (maybe a little more) of energy. Yes, and it’s expensive if you pay by meter.
gas gun (a diesel one looks similar) electric fan heater
I also looked at different types of buleryan, and even bought in Ufa, on one ad site, the largest used buleryan with 16 pipes (firebox 110cm) for quick warming up of the workshop... in the end, when the transport company brought it to me, I realized that it was really huge and I’m tired of feeding it, plus it needs firewood and a place to store it... to install a pipe with a diameter of 180 mm to a 6-meter height... the smell of smoke... in general, I resold it with a plus.
Buleryan with 16 pipes and a 110cm firebox
Also, remembering the long-standing experience of heating a tire shop in winter, a frozen room from the night, where the room was warmed up in a fairly short time using IR heaters, I considered the location of these same IR heaters in the area of the work area... but they need such a quantity that the network could not withstand it, and the price was not particularly favorable to them. Of course, it was possible to use film heaters, but in this case the ceiling preparation would need to be close to ideal for fixing these films.
Full Size IR Heater Film IR Heaters
As a result, I came to the topic of a water-cooled fan heater, such as Volcano.
fan heater volcano
Its characteristics are quite tempting - the output is up to 60 kW of energy. In an hour it can drive more than 5000 cubic meters of air through itself. They are installed in all major shopping centers and car service centers, as well as in greenhouses... I was looking for a used VR1 model in the advertisements, it suited my requirements, but I accidentally came across a used VR2 model for the same money (the difference from VR1 is that of VR2 double heat exchanger, with all other parameters being the same)… again, delivered by a transport company from the Moscow region. The price with delivery is almost 60% of the price of a new one. 20tr.
The question remains: how to heat the coolant (water or antifreeze)?! Since I need to quickly warm up the workshop without unnecessary fuss (delivery and kindling of firewood, mining...) on the rare days when I want to appear there, the choice was between a gas or electric boiler. A gas boiler is more powerful and economical, but there is still a fuss in the form of replacing and transporting gas cylinders, plus, due to safety precautions, cylinders cannot be stored indoors...
I decided to try to install an electric boiler with 12 kW and 380 volts, realizing that for a fan heater that can easily “digest” 60 kW, these 12 kW will not be enough for it (a boiler of higher power does not allow installing a cable that is routed to the workshop). Trying is not torture. I chose an automatic electric boiler that is not afraid of power loss (the scourge of all garage companies) Warmos EPO-1-12 380V Evan, also used in excellent condition for 25% of the price of a new one. 9tr. I went to a hardware store to buy pipes and fittings and other “fittings,” and began soldering the heating system.
In the end, this is the picture we got, so far using ordinary water for testing. (I’ll add antifreeze coolant later)
Full size of the heating system wiring, the boiler is not yet covered by the front panel
I hung the fan heater, turned it and directed the air flow with the blinds into the work area...
Homemade gas heater
The main advantage of this model is that its production requires a minimum of parts, which can always be found in the household of any craftsman.
This economical source of heating is not too expensive; the costs of its production and maintenance are completely absorbed during operation
The only disadvantage of a gas heater is the need to provide sufficient ventilation.
Preparation of materials and components
To make a gas heater for the garage, you need to prepare in advance:
- burner with valve;
- tin sheet;
- metal scissors;
- drill with a thin drill bit;
- rivets;
- riveter.
To make the grille, you will need a piece of fine-mesh metal mesh. It’s great if you have a regular wire colander sieve on hand, it will act as a protective grid.
The main element of the device is a gas-filled collet cartridge with a capacity of 450 milliliters, used for refilling lighters
Collet cylinders are convenient because when using them, you don’t have to use up all the contents at once. The presence of shut-off valves allows the devices to be used repeatedly.
If desired, the heating structure can be made using not only disposable cans used for refilling lighters, but also using a small refilled cylinder.
Cutting blanks and assembling the structure
When making the structure, the first thing to do is fix the heater to the burner.
The selected household sieve of the appropriate diameter is applied to the galvanized sheet and outlined along the contour with a marker
Four rectangular ears are added in the direction of the four sides of the workpiece applied to the galvanized sheet. One of the ears should be made twice as long as the others. The blanks are cut along the intended contour, trying to make smooth, burr-free cuts.
The burner is screwed to the cut-out tin blank using bolts. The ears located on four sides of the workpiece are bent in the opposite direction and used to fix the strainer.
The strainer attached using the ears of a tin circle has a dome shape, thanks to which it will perfectly dissipate heat to the sides
To attach the second protective mesh, take another piece of sheet metal and cut out a circle of exactly the same size from it. Elongated ears are added to the workpiece, necessary for attaching the mesh.
Stepping back half a centimeter from the edge of the circle, drill 10 through holes along the circumference. A strip is cut from a piece of fine-mesh metal mesh, the length of which corresponds to the diameter of the cut tin blank.
The ears located on four sides are bent and used to fix the wide side of the fine mesh strip, the second piece is fixed on the opposite side
The bent ears of round tin blanks are fixed to opposite sides of the mesh strip using a riveter and rivets. When assembled, you should get a cylinder with mesh walls and tin ends.
The design, which includes two meshes, is advantageous in that it has an increased heating surface and is equipped with additional protection.
At the final stage, all that remains is to turn on the gas water heater and check its performance. The heat produced by this small device is enough to heat a small room or garage.
Difficult choice
To answer the question of which diesel engine preheater is best to purchase, you need to take into account various nuances. This includes the frequency of use of the vehicle, the characteristics of the vehicle itself, as well as the conditions of its operation and the service life of the engine.
If the climatic conditions are satisfactory, then there is no particular need for the device. Also, if the car is in a heated garage most of the time, then a heater is unlikely to be needed. It’s another matter if the car is operated in a harsh climate, where winters are usually long and frosty. Then the preheater will be truly in demand.
Naturally, a modern new car will easily start even in cold weather, but the wear of its engine parts will accelerate, since they are subjected to additional and heavy load. Therefore, those car enthusiasts who want their vehicle to last as long as possible should take care of it and purchase a diesel engine pre-heater.
Reviews from those who already use the device are mostly positive. Some people prefer domestically produced models, while others choose only imported ones. Both have their advantages and disadvantages.
Let's look at the brands that are most in demand among car enthusiasts.
Directional heat gun
Our own heat gun has enough power to easily heat a garage, utility room or office in the house
For assembly you will need:
- a piece of plywood 16 mm thick;
- fan (duct);
- temperature and speed controllers;
- PBEC heating element (2.2 kW);
- fasteners (clamp, bracket, studs, nuts, washers);
- wheels.
We cut out a rectangle of approximately 47 cm x 67 cm from plywood, sand the rough edges and corners.
The plywood base was not chosen in vain: it is light, flat, and most importantly, it does not conduct electric current, which is important in the event of force majeure circumstances
We connect two central parts with a coupling - the fan and the heating element. We fix the resulting structure on a plywood base using a bracket and a plumbing clamp.
We select fasteners in such a way that they firmly fix the elements of the device and do not cause them harm. For example, self-tapping screws are perfect - they do not destroy plywood
Self-tapping screws (16 mm) are suitable for fastening. We install a temperature sensor (for example, TG-K 330), which is necessary to control the temperature, next to it there are two more devices - for adjusting the speed and temperature.
When connecting the parts of the fan heater to each other, do not forget about the safety of the device: the connection points of wires and cables must be insulated
Pulsar 3.6 is suitable as a thermal regulator. After installing all the necessary devices and parts, we connect them according to the diagram.
Device control circuits can be found in specialized literature, instructions for devices such as an electric fan, or on specialized websites
For ease of use, we screw wheels to the plywood base.
Small rollers screwed on the bottom side make the homemade fan heater more convenient to move around the room, especially if it is heavy.
Well, that’s all - the homemade heat gun is ready.
Try to place the device parts in such a way that, if necessary, it is easy to disassemble each of them and replace failed elements
Like any homemade fan heater, this device has disadvantages. For example, when the device is stopped, the voltage on the heating element remains, and this is quite dangerous, since overheating occurs and an emergency situation is possible. The situation can be corrected by installing a relay to timely turn off the power supply to the temperature controller. Another disadvantage is inadequate heating of the room, but this is a disadvantage of almost all stationary fan heaters.
Fuel filter heater for diesel engine separator configuration
It is important to know
To manufacture a fuel filter heater for a separator configuration of a diesel engine, you will need a lathe.
Before installation, it should also be taken into account that the drain unit in diesel engines is used to remove liquid from the sump. Accordingly, if this device is to be removed, it is necessary to use only proven high-quality fuel.
What will you need?
Tools and materials required for installation:
- set of wrenches;
- a piece of metal pipe for making a bushing;
- wires for connection;
- a lathe that will be used to cut threads.
Algorithm of actions
You can install a diesel fuel filter heater of a separator configuration as follows:
- A metal sleeve of the required size is made. The outer circuit of the device must match the drain valve of the system.
- Using a drill, drill a central hole.
- Internal and external threads are cut. The outer pitch should correspond to the drain element, and the inner pitch should correspond to the thread for the glow plugs.
- The completed structure is assembled from candles. The resulting mechanism is screwed into the body of the separator device. The shape of the part itself needs to be corrected - a pin should be made on the hexagon. To do this, a screw or bolt is welded on the side.
- After installation, the wiring is laid. On the positive line you need to install a switch button and a four-pin relay. The entire electrical circuit must be protected by a safety device to prevent voltage surges and short circuits.
- After installation, it remains to connect two terminals. Grounding or “ground” goes to the bushing, and the positive contact must be connected to the glow plug. The installed device is being tested.
Video: features of the use of fuel heaters
Roman Romanov in his video spoke about the nuances of using heating devices for fuel filters of separator design.
DIY fan heater made from trash + video
In the video you will clearly see how a fan heater is made from various elements that may remain from components of household appliances that are no longer working.
For the fan heater model in question you will need:
- Cover with cooler from the power supply;
- Broken hair dryer;
- Plastic grille for ventilation;
- Iron cord with plug;
- Textolite;
- Pieces of plywood.
Step by step guide:
- Installation of the heating element. A frame is made from narrow strips of textolite, and a spiral, which was removed from a hair dryer, is wound onto it in a zigzag. Holes are prepared in the textolite structure and wire is inserted into them. A spiral is attached to it so that it does not touch the frame material. As a result, the spiral plays the role of a large variable resistor.
- Fan connection. On the created frame with a spiral, using a voltage meter, find the area with the lowest alternating voltage. You need to solder the diode to the plus, and connect the wiring from the cooler to the minus. This circuit completely replaces the power supply.
- Execution of the body. The side walls are screwed to the cooler lid, and a grille is inserted into the remaining empty wall and fixed with glue from a hot-melt gun.
The resulting device consumes little electricity, operates silently and can easily heat certain places in the room. For example, if your feet get cold while working in the workshop, you can install a fan heater under the table and it will warm them.
If you need to ensure high-quality heating of the room before turning on the central heating or after its completion, during a period when there are particularly cold days, then you can’t imagine a better homemade fan heater. It is compact, economical and productive, it can be created from available materials
How to make a USB fan
But the most convenient and simple fan is an old cooler, which can also be used. For example, put it on a table, and it will cool, but not the processor or video card, but a person.
The advantages of this design are obvious: the cooler is very reliable, because it is its job to constantly turn the impeller and cool something. And it’s easy to get coolers. It is enough to either find an old computer, or order a new fan or buy it in a store.
The cooler design is simple. This is a ready-made fan in a plastic case. There are two wires coming from it (usually red and black).
Regular computer cooler
Making a USB fan takes just a few minutes:
- The wires on the cooler are stripped 1-2 centimeters.
- Take a regular USB cable, at the end of which you also need to get rid of the insulation. The standard USB cable has four wires inside. Of these, you should choose black and red. Cut off the rest so as not to get in the way, and clean up the necessary ones.
- Connect the red wire of the cord to the red one on the cooler. Black - with black. Carefully insulate areas without winding. Ready.
- All that remains is to think about the holding device. Here the already familiar wire, which can take any shape, can come in handy. Even a cardboard box will do just fine for the fan housing, but if you spend a little more effort and time, you can even build a real designer object.
Design approach to fan design
It is very convenient when the fan turns on when the computer starts. In addition, modern units have several USB outputs. It turns out that such a device will not interfere.
Another point is that sometimes you want to turn on the fan regardless of the computer’s operation (especially since a device with a cooler turns out to be quite powerful, good and useful). Then you can use adapters. For example, today they make chargers for phones that easily turn into a USB cable when the connector with the plug is disconnected. Similar equipment can be used for a fan, making it universal: operating from the network and from the USB port of any computer. Another advantage of this design is the simplest electrical circuit. A cooler-based fan can even do without extra buttons: just a wire and a plug.
Principle of operation
Any, including a homemade electric heat gun, works on the same principle: a powerful fan drives air through the heating equipment - a heating element, which gives off heat to it, and the already heated air enters the heated zone.
Everything in the diagram is clear enough to get an idea of how such a unit will work.
There are only a few elements in the design:
- Unit housing
- Heating element
- Fan
- Control devices
- Wire for connecting to the electrical network
The speed and degree of heating of rooms heated by such heaters is determined by the number and power of heating elements installed in it. The more of them there are, the more actively the air mass passing through the gun will warm up.
In some models, it is possible to change the fan speed, and, accordingly, the amount of air passing through the unit.
Contrary to misconception, air flow speed does not affect the rate at which the heated area warms up. For a heat gun operating on this principle, it is much more important which heating element is installed and how great its power is.
The speed of the air flow in the device can only affect the uniformity of heating of the room - the larger it is, the more uniformly the room will heat up. And the heating element can either heat the air more strongly or less. This already depends on its power.
