Home/Articles/Why do you need a thermostat for a heating radiator, and which one to choose?
Any system requires control, including heating. A thermostat can handle this task. The main function of the device is to control the coolant supply level. It is mounted directly on the battery input line. A thermostat for a heating radiator is used to control the temperature level in the room. At the same time, you need to know how to choose the right device and how to install it correctly. This is what we will talk about in this review.
Thermostat
Purpose of installation and operating principle
Properly selected and correctly adjusted thermostatic valves help save money on energy costs and maintain a comfortable room temperature. Modern boilers can be equipped with similar devices. But in this case it will change, heating all the rooms at the same time.
Unlike sensors on boilers, thermostats allow you to set the required level of radiator heating for each room. This mechanism is indispensable for centralized systems.
The thermostatic valve regulates the amount of coolant entering the battery depending on the ambient temperature. The mechanism works to lower temperatures, but is not capable of increasing them. The heating is limited automatically; it is enough to adjust the mechanism after installation.
Device
The operating principle of a thermostatic valve may differ depending on the type of device.
But the design of any model is based on a thermal valve and a thermostatic head. A valve is a valve consisting of a seat and a shut-off cone. This part opens or closes the flow of coolant after reaching the user-set temperature in the room. The operation of the thermal valve is controlled by a thermostatic head, that is, a temperature sensor.
Any thermostat is equipped with an arrow that indicates the direction of coolant flow. When installing the device, its direction must coincide with the coolant circulation pattern in the system.
Conclusions and useful video on the topic
The video clearly shows how to set up a thermostat and implement it into the heating system. As an example, take the Living Eco automatic electronic controller from the Danfoss brand:
You can choose a thermostat based on your own wishes and financial capabilities. For domestic purposes, a mechanical and semi-electronic unit is ideal. Fans of smart technology may prefer functional electronic modifications. It is also possible to install devices without the involvement of specialists.
Do you have any questions about the topic proposed for consideration? Would you like to share your personal experience gained while installing or using a thermostat? Please write comments.
Kinds
Thermostats on the market differ in the way they are controlled.
Mechanical
Provide manual adjustment of coolant flow. These are inexpensive models, easy to set up and do not cause malfunctions. Mechanical thermostats consist of a gas or liquid bellows, an actuator and a regulator. The valves of such mechanisms have a scale indicating the degree of heating of the radiator.
The installation is carried out experimentally, by gradually turning the valve. When the valve is turned, the coolant enters the spool and affects the position of the rod, which, under the influence of pressure, blocks the coolant flow.
The disadvantage of such devices is the need for regular adjustments, depending on the ambient temperature.
Electronic (automatic)
Microprocessors are installed inside such thermostats, which are responsible for regulating the heating of the radiator. The mechanisms are equipped with sensors that allow them to measure the ambient temperature and, in accordance with it, regulate the supply of coolant to the radiators without human intervention. Automatic models are configured using the keypad.
The mechanical part of such a thermostat is no different from manual models. The bellows in them are cylindrical, and the walls are made in the form of corrugation. Inside the bellows there is a substance that reacts to the ambient temperature. When heated, it expands, and the pressure inside the device increases, affecting the position of the rod. It regulates the volume of coolant entering the radiator. When the temperature decreases, the reverse process occurs.
Expert opinion
Torsunov Pavel Maksimovich
Such a thermostat is very reliable, the bellows can withstand tens of thousands of compressions and expansions, its resource will last for more than 10 years.
Among electronic thermostats, two types of devices can be distinguished:
- Closed . They cannot determine the temperature automatically, so the user must make the settings independently. Its advantage over a manual device is only that you can set the temperature in degrees, and not like on a graduated scale of more or less.
- Open ones are complex electronic devices with programming capabilities. When the temperature rises or falls to a certain threshold, the device automatically changes its operating mode to the one set by the user.
Electronic thermostats operate from replaceable batteries – batteries. It does not consume much energy, so frequent replacement is not required: no more than 2 times during the entire heating season. There are models that have a battery with a charger.
All the benefits of thermostats
We are all different, one is constantly freezing, while the other is hot at +20 degrees. Therefore, when the temperature in the rooms is the same everywhere, some of the residents begin to experience constant discomfort. You must agree, it would be nice to set the optimal temperature in your room! Sometimes the temperature in rooms needs to be changed for other reasons, for example, you have plants there that need a certain air temperature, or you want to turn down the heating while you sleep so that you can sleep more comfortably and not wake up with headaches.
Such a compact, but such a useful device.
In general, the temperature requirements in different rooms differ. In the same bathroom, you should not lower it below 24 degrees, as moisture will not evaporate well, and the room will feel unpleasantly damp. In the kitchen, 19 degrees will be enough, since there are additionally other appliances there that cause the air to heat up. For children, the optimal temperature is 23-24 degrees.
In general, the essence is clear. Regulating the heating of the radiator is a completely necessary measure to make your home truly comfortable to live in. You do not need complex systems to implement such settings - just purchase a compact thermostat, which must be installed together with the battery. Here's what this device will give you:
- Saving boiler life - it works much more economically and consumes less fuel.
- Convenient temperature regulation in all rooms.
- There is no need for intervention to adjust the heating - everything happens automatically after the first installation.
- It works like a faucet and can completely shut off the coolant supply to the radiator.
In a special article we will examine in detail the question: what are the possible connection diagrams for heating radiators in a private house. Let's see what the advantages and disadvantages of certain options are. Let's see what technological techniques are used to optimize some circuits.
Thermostat at the battery outlet
Interesting to know! In fact, the thermostat is a step-down device, since it is not able to increase the heating efficiency of the battery, which is not surprising. However, this does not in any way affect its usefulness and ease of use.
Criterias of choice
When selecting a thermostat model, most users focus on price. Mechanical models are several times cheaper than electronic ones, but at the same time less convenient to operate. The most convenient are electronic devices with programming capabilities.
With their help, you can set the temperature for different time periods. Such thermostats are able to turn off the heating for the period when no one is in the apartment, and bring the temperature to comfortable values at the required time. You can also program day and night modes for heating the room.
Thermostats also differ in internal content:
- Devices with bellows filled with liquid are inexpensive, but their response to temperature changes in the environment is somewhat slower.
- Gas-filled thermal heads are very sensitive to any temperature fluctuations. They will “notice” if the air in the room becomes warmer because the sun is shining through the window and will close the valve, stopping the supply of media.
This criterion is important to consider when purchasing a specific model.
It is also important to take into account the following differences between gas and liquid thermostats:
- Gas-powered devices have a long service life. At the same time, the gas reacts smoothly to temperature changes, which does not cause excessive sudden loads on the device. Liquid ones operate quickly, which has a greater impact on the wear of working parts, but allows you to quickly respond to a drop or rise in temperature.
- In liquid thermostats, the sensor can be remote or built-in. If it is built-in, then the device is placed in a horizontal position to reduce the influence of convection currents from the radiator and pipes.
- It is advisable to install remote-type sensors when the device is covered with thick curtains that affect heat transfer, the thermostat is located vertically, the radiator is installed in a deep wall niche or too close to the window sill.
Operating principle of a heating radiator thermostat (video)
The use of heating radiator thermostats ensures a comfortable air temperature in each room. In addition, a correctly installed thermostat will help reduce heating costs, and thereby save part of the family budget. The device is easy to install yourself, but you can always entrust this work to professionals.
- Author: Victor Kaploukhiy
Thanks to my varied hobbies, I write on various topics, but my favorites are engineering, technology and construction. Perhaps because I know many nuances in these areas, not only theoretically, as a result of studying at a technical university and graduate school, but also from the practical side, since I try to do everything with my own hands. Rate this article:
Best models
Manufacturers offer customers various models of mechanical and automatic thermostats for radiators. The following devices received the greatest number of positive reviews.
Valtec corner 1⁄2
The Valtec brand has been trusted by plumbing experts for several decades. This thermostat model is an angle valve for installation in a system with a maximum temperature of up to 110 degrees and a pressure of no more than 10 bar.
Advantages of the model:
- compactness and ease of installation;
- durability (up to 30 years) and maintainability;
- combination of quality and low price.
The disadvantages of the model include:
- risk of flooding of the apartment if the pressure in the pipes rises to more than 10 bar.
Danfoss RA 2994
Model with gas filler, combined with the RA-G valve, which allows servicing single-pipe heating systems. The thermostat of this brand is designed for diameters from 15 to 25 mm. Danish-made equipment has been familiar to domestic specialists since the 70s of the last century. The devices are compatible with any heating boilers.
The clip connection of this model allows for simple and precise attachment of the thermocouple to the valve. Technical characteristics of RA type radiator thermostats comply with European standards EN 215–1 and Russian GOST 30815–2002.
Advantages of the model:
- easy installation and setup;
- possibility of precise temperature control;
- acceptable cost.
Many users consider the disadvantage:
- low maximum temperature threshold - only up to 26 degrees.
Techem HKR
Universal automatic mechanism with a large informative display.
Powered by batteries, which ensures autonomous operation. Equipped with an effective safety system and protection against lime deposits, freezing and jamming of valves. It is possible to program several modes. Users note the ease of control of the mechanism and simplicity of settings. Separately, it is worth noting the ability to set a certain temperature for several days in advance. This model has practically no drawbacks, other than the instructions being too small.
FIBARO. The Heat Controller for Apple Homekit
A smart device running Apple HomeKit to control room temperature using Bluetooth wireless technology. An advanced control algorithm and scheduled operation allows you to save up to 42% on heating bills.
The FIBARO thermostat works with 98% of radiators available on the market. The built-in battery, charged via USB, is enough for the entire heating season. Operating temperature: 0-40 degrees.
Advantages of a thermostat:
adaptation to weather and indoor conditions;- compatibility with different heating sources;
- schedule adjustment with the ability to make temporary changes;
- temperature adjustment depending on the geolocation of users;
- raising the temperature to an optimal level when motion is detected in the room;
- turning off the heating when an open window is detected;
- use voice commands to adjust temperature;
- child lock;
- the presence of an automatic descaling mode;
- Temperature measurement accuracy is up to 0.5 degrees.
Sibling Powerswitch-ZK
Smart thermostat with remote control: according to a set schedule, according to sunrise/sunset, set temperature or air humidity outside. Maintains the set temperature by controlling a conventional damper rod of a home radiator. It is possible to add a device via a gateway to a security system and other elements of a Sibling brand smart home. Operating temperature range – from 0 to + 40 degrees.
Zigbee Ya-HY368
The smart temperature controller is battery-powered, is a wireless device and is used in conjunction with the Ya-ZB1 multifunctional ZigBee gateway “I am Smart” controlled by the “I am Smart” mobile application. Easy to install, mounted in the same way as a traditional manual radiator temperature controller.
The screen and buttons provide intuitive operation. Using the Ya Smart application allows you to remotely set schedules, view and set the temperature. Equipped with built-in clock and calendar
Advantages of the model:
- schedule for a week in advance, energy saving modes;
- four independent time periods for setting temperatures throughout the day
- mode selection by pressing one button;
- control of several thermostats installed in different places (for example, in a country house, administrative buildings or office center) from one mobile application;
- control via the Internet without a subscription fee.
- local (from the controller display) and remote (from a mobile application) mode of monitoring and setting the temperature of the rooms or heated floor;
- the ability to work without connecting to ZigBee and the Internet; in the absence of a Wi-Fi network or the Internet, the controller operates according to the specified parameters. The schedule is stored in the thermostat's memory;
- creating various scenarios together with other “I am Smart” devices;
- automatic calibration and regular self-testing prevent valve sticking and lime deposits;
- safety: frost protection, child protection, automatic protection against valve clogging through independent actions without human intervention.
- automatic switching of heating to economical mode in the house when leaving home (based on geolocation or the presence of a phone in the home Wi-Fi network);
- setting a schedule for setting different operating temperatures throughout the day and week.
The only drawback is the high price.
Installation of automatic heating regulators
The instructions below will help you install the thermostat on both aluminum and bimetallic radiators.
If the radiator is connected to a working heating system, then the water should be drained from it. This can be done using a ball valve, shut-off valve or any other device that blocks the flow of water from the common riser.
After this, open the battery valve, located in the area where water enters the system, and turn off all taps.
After the water has been removed from the battery, it must be purged to remove air. This can also be done using a Mayevsky crane
The next step is to remove the adapter. Before the procedure, the floor is covered with material that absorbs moisture well (napkins, towels, soft paper, etc.).
The thermostatic valve body is fixed using an adjustable wrench. At the same time, use a second wrench to unscrew the nuts located on the pipe and the adapter, which is located in the battery itself. Next, unscrew the adapter from the body.
When unscrewing the adapter, you may need to use the valve located inside the battery
After dismantling the old adapter, a new one is installed. To do this, place an adapter in the structure, tighten the nuts and collar, and then thoroughly clean the internal threads using a clean material.
Next, the cleaned thread is wrapped several times with white plumbing tape (purchased separately in specialized stores), after which the adapter, as well as the radiator and corner nuts are tightly screwed on.
The thread must be wrapped with plumbing locking tape clockwise, making 5-6 turns. It is important that the tape lies flat, so it is necessary to smooth it out in a timely manner if necessary
Once the installation of the adapter is completed, you need to begin removing the old collar and installing the new collar. In some cases, it is difficult to remove the collar, so its parts are cut out with a screwdriver or a hacksaw, and then torn off from each other.
Next comes the installation of the thermostat itself. To do this, following the arrows shown on the body, it is installed on the collar, after which, fixing the valve with an adjustable wrench, tighten the nut, which is located between the regulator and the valve. At the same time, use a second wrench to tighten the nut tightly.
It is important not to damage the thread when installing the thermostat, and after tightening, check the strength of the connection in order to avoid leaks when turning on the water.
At the final stage, you need to open the valve, fill the battery with water, make sure the system is working, there are no leaks, and set a certain temperature. In a two-pipe system, you can install thermostats on the top supply.
Installation Rules
Thermostats are installed at the inlet or outlet of the radiator. Installation is standard - on linen winding or FUM tape. The process itself is also standard. The thermostat has a thread for which the appropriate fittings are selected. Or taps are used to cut internal threads on a metal pipe.
When choosing an installation location, consider the following:
- Recommended height. This item is indicated in the technical documentation for the device. Each device is calibrated at the factory to control temperature at a certain altitude. As a rule, this is the upper radiator manifold, approximately 60-80 cm.
- If the radiators only have a bottom saddle connection, there are three options: look for a device that can be installed at the bottom, install a model with a remote sensor, or reconfigure the thermal head. The procedure is simple; the description must be in the passport. You will need to have a thermometer and at certain moments turn the head in one direction, then in the other direction.
What thermostat is on your radiator?MechanicalElectronic
- An important point that those who want to install a thermostat for a heating radiator in apartment buildings should remember. If you have a single-pipe installation, they can only be installed if there is a bypass - a section of pipe that stands in front of the battery and connects the two pipes to each other. If you have a similar wiring (there may not be a pipe on the right), a bypass is required. The thermostat should be installed immediately behind the radiator. Otherwise, you will regulate the entire riser, and the neighbors will not like this. For such a violation, a very substantial fine can be issued. Therefore, it is better to install a bypass.
- In two-story buildings, the recommended location of the thermostat is on the second floors. This is where the warm air is directed, and the first floor invariably turns out colder.
- Thermostats with sensors are installed in rooms where air movement is not obstructed. The indicator is placed strictly horizontally so that it shows a reliable picture. It should be taken into account during installation that the thermostat valves are equipped with an external thread on one end, and oriented inward on the other.
- It is not allowed to place automatic thermostats behind thick fabric drapery or behind a decorative screen. If you do this, the system will begin to measure the heating inside the cavity that appears, and not in the room itself. The solution to the problem is either the use of a remote sensor, or placing the regulator on horizontal sections of the system, as close as possible to the entrance to the radiator.
If the heating system is not created from scratch, before installing the thermostat, all water should be drained from it before installation work begins. When the heating season ends, the thermostat is opened to avoid the accumulation of sediment inside the mechanism.
How to install a thermostat
Table 1. Set of materials and accessories for installation
| Photo | Description |
| adjustable wrench | The device has two connections, both of which are threaded. Therefore, you need to take a couple of wrenches, or even better, one should be an adjustable one and the other a gas one. The latter will help, if necessary, to hold round pipes. |
| An old proven remedy is plumbing tow. We use it to seal connections so that leaks do not appear on them over time. Some craftsmen prefer to use fum tape or thread, but they are not as reliable. |
| Silicone sealant helps make the connection even more airtight. It is applied over tow. This material calmly tolerates heating of the coolant without suffering from it. In addition to such a tube, you buy a mounting gun, the price of which is around 250 rubles. |
You may also need a flathead screwdriver and pipe tools if you need to shorten them to make the thermostat insert.
Now let's take a step-by-step look at how an electronic thermostat is installed on a radiator.
Step 1 - Installing Batteries
We unpack the thermostat, remove the battery compartment cover and install AA batteries, which can come with the device or be sold separately. Close the lid and check the serviceability of the device by test switching on. If everything blinks and he shows signs of life, then you can move on to further actions. Some models do not require turning on - they start automatically.
Installing batteries
Step 2 - Setting the Time
Next, you need to set the time, which will allow the device to operate based on the time of day. Setting up does not take much time, no different from setting up the most ordinary clock - we use the arrows and the “OK” button.
Setting the time
Next comes setting the date. It is not entirely clear why this is implemented, but perhaps for some this function will replace the calendar.
At the end of the settings, a flashing checkmark appears on the display - you need to press the “OK” button again to confirm the entered settings.
The device is ready for use
If you did everything correctly, you will see a flashing capital letter “M” on the screen, as shown in the photo. Now you can proceed to preparing the pipeline to include a thermostat.
Step 3 - removing the old thermostat
If you previously had a thermostat installed in your system, it must be removed. We first turn off the water supply tap to avoid leakage. The device is removed using a hexagon, which you need to unscrew a small lock.
Removing the old thermostat
Advice! You have the opportunity to combine the head of the new thermostat with the old valves, so as not to completely replace a still working device. To do this, you will need an appropriate adapter, which can be purchased separately.
Assortment of adapters for valves
Step 4 - installation of the RA adapter
Install the adapter onto the valve base. It is also secured using a hex socket wrench. The adapter has an external thread onto which you need to screw the thermostat head and tighten it well.
RA Adapter Installation
Step 5 - Setup
The letter “M” will flash on your screen again. Press the middle button and hold it until the function menu opens (3 sec). We press the middle button again, and an indicator of the current temperature setting will appear in front of us - using the up/down buttons we set the desired value.
If you do not change anything, the preinstalled programs will automatically launch. For example, the model from the photo will automatically cool the air at night to 17 degrees - P1. The P2 program will do the same during working hours, when it is assumed that no one is at home.
Settings
Somehow everything just worked out according to our instructions. Perhaps this is an ideal case where valve installation or replacement was not required. This type of work can be done by anyone, without any training or skills. But this is not always the case. More often you will have to do this.
Step 1 - drain the water from the radiator
We start by draining all the water from the radiator. You may have to wait a while after turning off the tap until the coolant cools down to avoid getting burned. To drain, you need to unscrew the nut or plug at the top and bottom of the radiator. Place a bucket underneath and wait until the flow stops.
Draining water from the radiator
Step 2 - removing the old adapter
Next, the old adapter or tap is removed. We use wrenches for this. Cover the floor with rags, as residual water will still flow from the system. To avoid damaging the pipes, the adapter body must be secured with a gas wrench or wrench.
Removing the old adapter
Step 3 - installation of a new adapter
We seal the threaded connections in a convenient way - you need to make at least 6 turns with fum tape. We first screw the new adapter onto the pipe, and then attach it to the heating radiator.
Installing a new adapter
The further procedure is already familiar to you - we screw in the thermostat head and perform its step-by-step adjustment. If you are using a mechanical device, this process will take you a long time. To speed things up, we recommend doing this.
- First, open the taps and bleed all the air from the radiator. As soon as the coolant current is restored, the battery will begin to heat up.
- Close all windows and doors in the room to avoid errors in heat loss through them.
- We open the valve fully and place a thermometer in the room to see if the scale corresponds to the air temperature.
- As soon as the temperature rise stops, turn the regulator lever in the opposite direction, to the minimum position.
- We wait until the thermometer drops to the level you need, start opening the regulator again until you hear water running through the pipes. Stop rotating and leave the device. Re-measure the air temperature after a few hours and make final adjustments if necessary. Now the device will maintain the desired heating in the room.
Adjusting the mechanical thermostat
How to set up the device
All thermostats have factory settings. But the specified values are standard and may not coincide with the desires and requirements of users. In automatic models, it is enough to set the temperature on the display. The situation is more complicated with mechanical thermostats. To adjust them you will need a thermometer.
To change settings, do the following:
- Close all windows, doors, turn off hoods. Set the thermostat head to the extreme left position - “open”.
- As soon as the room temperature begins to rise and reaches 5 - 6 degrees above the desired value, turn the knob to the right - “closed”.
- The radiator will begin to cool down. Once the temperature readings reach the desired values, slowly begin to turn the head to the left. When you hear the noise of the coolant, stop and remember the position of the valve. To achieve the desired temperature, you will need to install the head in this position.
There will be no universal position for the mechanical thermostat. During the heating season, it will need to be periodically reconfigured, depending on weather conditions.
FAQ
Are modern thermostats compatible with old cast iron radiators?
In principle, thermostats can be installed on any battery. But the effectiveness of working on cast iron radiators is questionable. Such batteries are massive, hold a large amount of coolant and are therefore inert. They will respond too slowly to automatic adjustment using thermal heads. On old-style radiators, it is preferable to install a valve on the supply and a balancing valve on the return.
Is it worth installing a thermostat if there is a ball valve on the radiator and you can use it to regulate the heating of the room?
The ball valve does not regulate temperature effectively because there are only two preset modes: open and closed. If you try an intermediate position, the coolant will quickly damage the working part and the faucet will fail.
If there are several radiators in the room, should a thermostat be installed on each one?
It is not advisable to install thermal heads on every heating device. Only those radiators whose total thermal power exceeds 50% of the generation in a particular room are subject to adjustment. When there are two radiators, set the thermostat to the one that is more powerful. If there is equality in this indicator, they focus on the device closest to the heat source.
Installing a thermostat on batteries is an easy way to ensure a comfortable room temperature and at the same time save on energy costs. By choosing an automatic model, you will completely ensure uninterrupted heating operation without daily monitoring.
Thermostat for a radiator: which one to choose and is it needed at all?
The importance of a device designed to regulate and/or shut off the flow of coolant in a radiator cannot be overestimated. First of all, this is a matter of convenience - this way you can regulate the degree of heating. Secondly, and no less important, is the issue of safety. If there is a valve, in an emergency you can simply disconnect the battery from the riser. It must be said that this is not provided for in old heating systems, and even in some new ones.
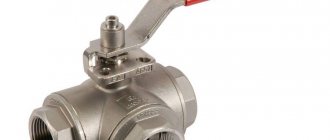
That's why owners install shut-off and control devices - this can be a cone valve, a ball valve or an automatic thermostat. The ball valve is not very good because it works exclusively on “open-close”. It is better not to place it in an intermediate position; this leads to wear of the ball itself and, as a result, loss of tightness.
The valve is preferable in this regard, but there is also a lot of hassle with it - remember to open it, remember to close it, and return it to the position in which it was originally... It’s easier to entrust the work to automation.
Design
An automatic thermostat for a heating radiator is a thermostatic valve that, without additional human effort, regulates the degree of heating of the room over a fairly large temperature range. It lowers it if it’s warm and sunny outside and gradually raises it when the outside temperature drops.
The design of the thermostat for the heating radiator depends on the type of heating system. There are two of them:
- single-pipe;
- two-pipe.


