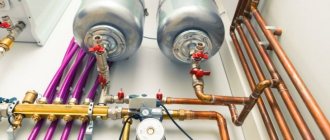
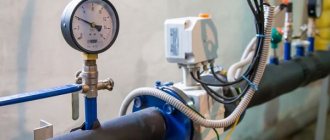
Hydraulic testing of heating system pipelines is mandatory when:
- Preparatory work for the new season.
- Installation of boilers and pipes.
- Replacement of individual sections.
The main purpose of the tests is to identify leaks and a number of local damage, connections without the proper level of tightness, as well as other problems due to which the functionality of the heating pipeline is lost during further operation.
Pressure testing of heating systems is the process of testing heating equipment and pipelines with test high pressure. The purpose of testing is to check: the strength of the housings and walls of the entire circuit (pipes, radiators, fittings, etc.); tightness of connections of all elements of the system; operability of taps, pressure gauges, valves and gate valves.
If we are talking about apartment buildings, then testing becomes the responsibility of housing and communal services employees. In private houses, the owners themselves become the organizers of the process, but here everything needs to be done either yourself, or you should turn to specialists with the appropriate skills.
Pneumatic heating test
Pneumatic heating test
In some cases, it is impossible to meet the basic conditions for carrying out a hydraulic test of a heating system. A similar situation may arise after repair work is carried out in winter, when the ambient temperature is below +5°C. Then you should draw up a pneumatic test report for the heating system.
Its essence is to create a pressure of 100 kPa in the heating lines. Moreover, within 10 minutes the level of its decrease should not exceed 10 kPa. To check this, you should use pressure gauges with an accuracy class of 2.5 and a division value of no more than 5 kPa. All characteristics of the equipment may be present in the pneumatic test report of the heating system.
It is not recommended to carry out such checks for polymer pipelines. However, the standards allow testing of air heating systems made of polypropylene or metal-plastic in the following cases:
- Technical conditions do not allow filling with liquid. Most often this is due to the use of antifreeze;
- Ambient temperature below 0;
- Temporarily there is no coolant in the required volume.
The main problem when testing a system by air is finding places where tightness is lost. If a sharp decrease in pressure was noticed during the procedure, it is recommended to perform a zonal check of the areas. This is the only way to determine the location of a possible leak. Therefore, they prefer the hydraulic method as it is more convenient.
Upon completion, a pneumatic test report of the heating system is drawn up, in which the results are entered.
What is the purpose of hydraulic testing?
Each heating system has a certain operating pressure. It is this parameter that determines the degree of heating in a particular room. The same applies to the quality of heat losses and coolant circulation. As a result, performance indicators are selected depending on many factors:
- Line quality.
- Number of storeys.
- Building type.
Various hydraulic processes occur in the pipeline while the coolant moves through it. Because of this, pressure drops sometimes occur, which are called “water hammer.”
Due to such loads, pipeline wear occurs at an accelerated rate. Therefore, during hydraulic tests, the pressure exceeds normal operating values.
Tests must be carried out in the following cases
- When a house is disconnected from the general system, a blind plug is used.
- Restoration of insulation layers on pipelines, replacement of worn materials.
- Strengthening the tightness of the system. For example, by using additional seals.
- Checks of valves and fittings that lock other elements.
The final stages of testing involve the use of drain valves.
The technology used for pressure testing involves supplying liquid to the heating pipeline, as a result of which it is assumed that moderate pressure is maintained, allowing the pipeline to be completely filled. It is only necessary to bleed off excess air from time to time.
Test pressure
According to SNIP 3-05-01-85, which was replaced in 2003, pressure testing must be carried out according to the rules. When carrying out work in apartment buildings, it is necessary to:
- The pressure was more than 1 mPa (that's 10 bar) - for hot water supply systems and heating circuits with heaters.
- At least 10 bar for panel and convector heating systems.
- At least 6 bar for circuits in which radiators made of stamped steel or cast iron are installed.
- The pressure for hot water supply must be greater than the working one and another 5 bar on top (but cannot exceed 10 bar).
If panel heating and heat exchangers are used, the pressure should not have a pressure greater than the maximum permissible for the devices. If you are testing air in a steam or panel heating system, you need to check the pipes that fit into the ventilation equipment. The air should have a pressure of 1 bar.
Hydrostatic method of testing pipelines
4.1. Upon completion of installation work, installation organizations must carry out:
testing heating systems, heat supply, internal cold and hot water supply and boiler rooms using the hydrostatic or manometric method with drawing up a report in accordance with mandatory Appendix 3, as well as flushing systems in accordance with the requirements of clause 3.10 of these rules;
testing of internal sewerage and drainage systems with drawing up a report in accordance with mandatory Appendix 4;
individual tests of installed equipment with drawing up a report in accordance with mandatory Appendix 1;
thermal testing of heating systems for uniform heating of heating devices.
Testing of systems using plastic pipelines should be carried out in compliance with the requirements of CH 478-80.
Tests must be carried out before finishing work begins.
Pressure gauges used for testing must be calibrated in accordance with GOST 8.002-71.
4.2. During individual testing of equipment, the following work must be performed:
checking the compliance of the installed equipment and the work performed with the working documentation and the requirements of these rules;
testing equipment at idle and under load for 4 hours of continuous operation. At the same time, the balancing of wheels and rotors in pump and smoke exhauster assemblies, the quality of the stuffing box packing, the serviceability of starting devices, the degree of heating of the electric motor, and compliance with the requirements for assembly and installation of equipment specified in the technical documentation of the manufacturers are checked.
Heating system testing equipment
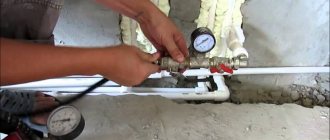
Most often, a pressure tester is used to perform a hydraulic test. It is connected to the circuit to regulate the pressure in the pipes.
A huge number of local heating networks in private buildings do not require high pressure, so a manual pressure tester will be sufficient. In other cases, it is better to use an electric pump.
Hand-held devices for testing heating systems develop a force of up to 60 bar or more. Moreover, this is enough to check the integrity of the system even in a five-story building.
The main advantages of hand pumps:
- Reasonable cost, which makes them accessible to many consumers;
- Light weight and dimensions of hand presses. Such devices are convenient to use not only for personal purposes, but also for professional use;
- Long service life without failures or breakdowns. The device is so simply designed that there is nothing to break in it;
- Suitable for medium and small heating equipment.
Branched and large circuits on large areas, multi-story buildings and production facilities are checked only with electrical devices. They are capable of pumping water under very high pressure, which is unattainable for manual devices. They are equipped with a self-priming pump.
Electric pumps develop a force of up to 500 bar. These units are usually built into the main line or connected to any opening. Basically, the hose is connected to a tap through which the pipe is filled with coolant.
Performing heating pressure testing is a very complex technological procedure. That’s why you shouldn’t do it yourself; it’s better to use the services of professional teams.
(2 votes, average: 5 out of 5)
Brief excerpts from regulatory documentation, rules and SNiP for heating pressure testing.
Analyzing the statistics of the questions you ask and understanding that many questions regarding pressure testing of the heating system for the majority of our audience remain incomprehensible to you, we decided to make a selection from the necessary points and Rules for pressure testing, approved by the Ministry of Fuel and Energy of the Russian Federation and SNiP.
All SNiPs and rules contain more than 100 pages of information, which are sometimes difficult to understand, so in order to make the task easier for you, so that you can look at and, if necessary, refer to the desired paragraph of a specific regulatory document, we have processed the applicable regulatory documents and in a brief form posted on the site. Explanations to the Rules and SNiP can be found in the article: “Norms and rules for performing pressure testing of a heating system”
Basic pressure testing methods
Today there are many methods for testing overpressure and flushing a heating system. To carry out the work correctly, there is a special document - SNiP, which indicates how to flush pipes in a specific room. This regulatory document defines technological schemes, as well as instructions for observing safety precautions. There are two universal test methods:
- Pressure testing with air or water;
- Chemical washing.
The hydropneumatic method of washing (air or water) has been tested for years. According to SNiP, to flush the pipeline and radiators with water it is necessary:
- Fill the system with water;
- Attach press;
- Check the device indicators.
As a result, under the influence of strong pressure, scale is peeled off, and when drained, it is removed from the system. The air flushing procedure is quite simple. It is carried out mainly in the winter season, in order to avoid freezing of communications. First, the compressor is connected and air is pumped in. Next, pressure indicators are monitored using a pressure gauge. The pressure during air pressure testing must correspond to the maximum limit at which the operation of this system is possible in accordance with SNiP. If the pressure remains at the same level for several hours and does not drop, then the system is sealed and there are no defects or leaks.
Pressure testing of the heating system
When performing air pressure testing, all connections must be lubricated with a soap solution to detect leaks.
Once the work has been checked, all air must be released. It should not remain in pipes and radiators, because air pockets reduce the level of heat transfer.
Next, the pipeline is filled with water or antifreeze, and a test run is carried out.
Chemical washing is carried out by pouring a special reagent into the system, which contains acid and alkali. After two hours of operation of the boiler, the liquid is drained and the pipes are filled with ordinary water. Heating flushing is carried out by utility workers or specially trained personnel from specialized companies.
Diagnostic methods
- Water testing is the main method by which all circuits are tested. In this case, water should be pumped into the lower part of the pipes through a tap. It is possible to pump liquid using both automatic and manual pressure testing pumps. The advantage of this method is that it is very simple to complete all the work, and the efficiency of leak detection is high. The fact is that traces of liquid will immediately appear on the pipes.
- Testing with air is not a very effective method, since it is quite difficult to detect leaks. But it is permissible to use this technique at subzero temperatures – the air will not freeze. A compressor is used to force air into the system. It is connected using an adapter to the pipeline. In order to find the leak, you need to listen. Once you find the approximate location of the leak, use a soap solution.
How does the crimping process work?
- Preparing the system before pressure testing. If the system is autonomous, then the heat generator is turned off first. If not, then taps are used to close off the area where inspection is required. The coolant must be drained.
- The system circuit is filled with water having a temperature of no higher than 45 C. The air is gradually released.
- The compressor is connected and air begins to flow into the pipes.
- At the beginning of the procedure, the pressure is brought to the working level and the area is visually inspected for violations. Then the pressure is gradually increased to the test level - this is maintained for at least 10 minutes.
- The area or the entire system is inspected for leaks at the connections. It is mandatory to visually inspect fittings, radiators and the entire length of pipe walls for fistulas. If deviations are detected, all defects and shifts are recorded. The operation of taps and valves is checked.
- Using pressure gauge readings, the drop in pressure level is determined. If it has not decreased, the system is in normal operating condition.
- Based on the results of the inspection, a report is drawn up.
What testing tool is needed?
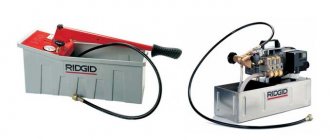
Now let's talk about what crimping equipment is used during the work. To perform hydraulic tests, you need to use specially designed pumps (they are called pressure testers). You can find two modifications - electric and manual.
Hand pumps are a cuvette in the shape of a rectangle; water is poured into it, which is then pumped into the heating system. A plunger-type pump is placed on its side, with a handle on top of it. It is with its help that the pump plunger is driven. There are pressure gauges on the body, with their help the pressure of the liquid pumped into the system is controlled. One shut-off valve allows water to be shut off after pumping into the pipes is completed. The second valve allows liquid to be drained from the tank.
Plunger pumps operate on the same principle as simple piston pumps, which are used to inflate bicycle or car inner tubes. But there is also a difference - the plunger pump design has a cylindrical steel piston that moves in the housing with minimal clearance. It is with this that it is possible to pump liquid into the heating system at a pressure of up to 60 bar.
The main disadvantage of manual mechanisms is that it takes a long time to carry out crimping work. Moreover, the test time depends on the length of the heating circuits. Sometimes it takes several hours to completely fill. Imagine how much strength you will expend to pull the handle.
It is with the aim of reducing costs and automating the process that electric pumps are used by specialists. They work on the same principle as manual ones, only muscle power is replaced by an electric drive. Automatic systems are good because you can set the required level of discharge pressure. Once it is reached, all equipment is turned off.
Automatic devices can pump liquid at a pressure of 40-100 bar. But there are also industrial designs that are capable of creating pressure up to 1000 bar.
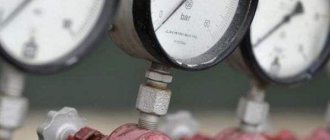
Please note that the Ministry of Energy sets requirements according to which it is necessary to use only spring-type pressure gauges for control; their accuracy class must be 1.5. The circumference of the body must be more than 160 mm
The scale must be designed to measure pressure, the value of which is at least 4/3 of the minimum, the division value is less than 0.1 bar.
Manometric and hydrostatic testing of pipelines
According to the requirements of SNiP, before starting the utility network, pressure tests of pipelines should be performed for leaks. Carrying out such a check allows you to identify in advance defective sections of the pipeline that can collapse if the operating pressure is exceeded. This significantly reduces the risk of emergency situations in the heating, plumbing or other engineering system.
Features of the technology
The procedure for testing pipes using the hydrostatic method is as follows:
- Pipeline structures are thoroughly cleaned and accumulated contaminants are removed from them. This is necessary to improve the accuracy of measurement results.
- Several pressure gauges independent of each other are connected to the water supply. The devices are used to determine the pressure in the circuit under test, as well as to determine leaks of the working medium.
- The system is filled with water, creating a pressure in the selected section of the pipeline that exceeds the operating norm by 20–25%.
- During the exposure time, specialists carefully monitor the readings of measuring instruments. If the pressure begins to drop, this is interpreted as a sign of insufficient tightness of the pipeline. If the pressure gauge readings remain unchanged during the holding time, this indicates the absence of leaks and the proper condition of the pipe.
- Based on the results of the hydraulic test, specialists draw up a report, which indicates the detected problems and provides recommendations for eliminating them. If necessary, defective sections of the heating or other mains are repaired or replaced.
Basic price of services for pressure testing (hydraulic testing) of pipelines of heating systems in St. Petersburg and Leningrad Region
| Services list | Unit | Price of services |
| Departure and work of a pressure testing team at the customer’s site using a hydrodynamic machine KO-514, KO-502b2 (pump capacity 170 l/min, pressure 0-160 atm, connecting fitting M39x2, at least 5 tons of tap water on board for filling into the system and testing , additional water from the customer or for an additional fee, reference monometer from the customer) | 1 unit | from 18,000 rub. |
| Departure and work of a pressure testing team at the customer’s site with an electric and manual pressure tester (pump capacity 6 l/min, pressure 0-40 atm, 1/2″ connecting fitting, water for filling the system and testing on the customer’s side, reference monometer with customer side) | 1 unit | from 16,000 rub. |
| Departure and work of a team to perform hydro-pneumatic flushing of the heating system (water for flushing from the customer or for a fee, removal of waste generated during flushing for disposal for a fee) | 1 unit | from 20,000 rub. |
| Departure and work of a team to perform chemical flushing of the heating system (selection and cost of chemicals in agreement with the customer, water for flushing from the customer or for a fee, removal of waste generated during flushing for disposal for a fee) | 1 unit | from 30,000 rub. |
| A set of works to prepare ITP for the heating season with delivery to the inspection body | 1 unit | from 80,000 rub. |
| Setting up a data transmission channel, diagnostics, verification (device + thermometer), maintenance of heat metering units (installation/dismantling is charged separately) | 1 unit | from 20,000 rub. |
| Chemical flushing of radiators (installation/dismantling is charged separately, lifting work is charged separately) | 1 unit | from 3000 rub. |
| Repair work on heating/heat supply networks, including emergency ones | 1 unit | from 30,000 rub. |
| Maintenance, diagnostics, repair of pumping equipment on heating networks, including electrics and automation | 1 unit | from 20,000 rub. |
| Additional and auxiliary work as agreed or based on the estimate | 1 unit | Negotiable |
Source: https://kc-spb.ru/manometricheskie-i-gidrostaticheskie-ispyitaniya-truboprovodov.html
SNiP crimping rules
The norms for pressure testing of the heating system are described in documents such as SNiP 41–01-2003, and also 3.05.01–85.
Air conditioning, ventilation and heating - SNiP 41-01-2003
Hydraulic checks of water heating systems can only be carried out at above-zero temperatures in the premises of the house. In addition, they must withstand water pressure of at least 0.6 MPa without damage to the seal and destruction.
During the test, the pressure value should not exceed the limit for the heating devices, pipelines and fittings installed in the system.
Internal sanitary systems - 3.05.01–85
According to this SNiP rule, it is necessary to check water heat supply and heating systems with the expansion vessels and boilers turned off using a hydrostatic pressure equal to 1.5 working pressure, but not less than 0.2 MPa in the lower part of the system.
The heating network is considered to have passed the test if it holds the test pressure for 5 minutes and does not drop by more than 0.02 MPa. In addition, there should be no leaks in heating equipment, welds, fittings, threaded connections and pipes.
Pressure testing - what is it?
Pressure testing of a finished water heating system is a test of tightness and assembly quality. Whether the system can be put into operation or not depends entirely on the results of such a check. This is the first procedure that needs to be carried out after installation and before turning on the heating.
At its core, it is control without destruction. Air or water is pumped into the system, thereby creating increased pressure. If there are no leaks, you can safely put the system into operation.
Pressure testing is also carried out when checking an already operating system. After all, leaks often appear at the places where parts are connected using fittings, soldering or welding. The pipes themselves may also suffer, for example, from mechanical stress or corrosion. High temperature and pressure also cause gradual wear of pipes and parts of the water heating system. To detect and eliminate the location of the flaw, crimping is required.
This is a set of measures through which not only the heating system, but also the hot water supply, sewage system, and pipes in the water well can be checked in a private home.
Pressure testing of a heated floor system
The crimping procedure includes:
- pipeline testing and flushing;
- checking and, if necessary, replacing parts;
- restoration of damaged insulation.
The following are tested under high pressure:
- strength of housings, as well as walls of pipes, radiators, heat exchangers and fittings;
- fastening when connecting the elements that make up the system;
- maintenance of taps, pressure gauges, as well as gate valves.
Test procedure
According to the rules for the technical operation of thermal appliances, tests should be carried out in the following sequence:
- The circuit is filled with water using a pressure tester. The temperature of the liquid should be about 45 degrees. The air must be vented through special vents.
- Next, water is pumped under pressure for at least 10 minutes. During this time, you need to visually inspect all seams, pipe joints, connections of all equipment, and fittings.
- Afterwards, the pressure can be brought to maximum pressure and maintained for 10 minutes. If the pipes are made of polymer materials, then the tests should be carried out for at least half an hour.
- If the pressure does not change during the tests, then we can judge that there are completely no defects.
You can complete the tests and begin directly operating the equipment.
Why is hydro testing necessary?
Hydrotesting – checking the integrity and tightness of the heating main. Testing allows you to timely detect leaks and gaps at the points of threaded connections of fittings and battery connections, which can lead to leakage and flooding. Hydraulic tests are a mandatory measure at the stage of preparing pipelines for commissioning.
Important! If there is no certificate of testing the system in the building, the heat supply organization has the right to refuse to supply heat to the system.
The companies operating the structure are informed about the period of testing. The process is carried out by specialized companies whose employees have the necessary qualifications. Preparation of heat supply systems includes pressure testing of the main line and flushing of pipelines.
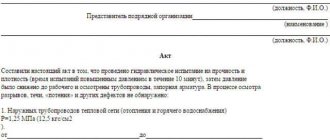
Heating system pressure test certificate
This document displays the following information:
- What type of crimping method was used?
- The project in accordance with which the circuit was installed;
- The date of the inspection, the address where it was carried out, as well as the names of the citizens who sign the act. This is mainly the owner of the house, representatives of the repair and maintenance organization and heating networks;
- How the identified faults were eliminated;
- Test results;
- Are there any signs of leakage or reliability of threaded and welded connections? In addition, it is indicated whether there are drops on the surface of the fittings and pipes.
Methods for flushing heating networks
When the coolant circulates through pipes and radiators, it interacts with the metal, which leads to the appearance of chemical processes in the structural elements of the heating network. As a result, deposits in the form of magnesium and iron oxide, calcium, zinc and sulfur are formed on internal surfaces. The occurrence of precipitation on the walls of pipes and heating devices is also facilitated by the poor quality of the working environment in apartment buildings. Welding scale, large sand particles and other contaminants settle on internal surfaces and cause silting of communications.
Crimping procedure
This method of checking the heating system involves performing hydraulic tests:
- Heat exchangers;
- Boilers;
- Pipe
This makes it possible to identify leaks that indicate depressurization of the network.
Before testing the heating system with plugs, you should isolate the heating system from the water supply, visually assess the reliability of all connections, and also check the functionality and condition of the shut-off valves.
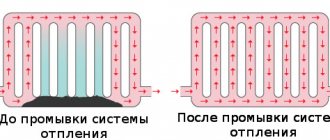
After this, the expansion tank and boiler are turned off to flush the radiators and pipelines from various deposits, debris and dust.
During the hydraulic test, the heating system is filled with water, but during air tests this is not done, but simply a compressor is connected to the drain valve. Then the pressure is increased to the required value, and its indicators are monitored with a pressure gauge. If there are no changes, then the tightness is good, therefore the system can be put into operation.
When the pressure begins to decrease beyond the permissible value, it means that defects are present. Leaks in a filled system are not difficult to find. But in order to identify damage during an air test, a soap solution should be applied to all joints and joints.
Air pressure testing takes at least 20 hours, and hydraulic testing takes 1 hour.
Having corrected the identified defects, the procedure is repeated again, and this must be done until a good seal is achieved. After carrying out this work, pressure testing certificates for heating systems are filled out.
Checking the heating network with air is usually carried out if it is impossible to fill it with water, or when working in low temperature conditions, because the liquid can simply freeze.
Air crimping
Unlike hydraulic testing, air testing involves filling the system and testing it under pressure using air.
It is performed at the same stage as in the previous case, but with some differences, namely:
- Instead of a hydraulic press, an ordinary automobile pump is used. Both electric and hand (foot) tools can be used. In this case, you will need to independently assemble the device from several elements - a fitting with a fitting for connecting the pump hose, a fitting with a check valve or valve to prevent air from escaping back into the pump hose, and, if necessary, a fitting with a pressure gauge to control the pressure level.
- The assembled structure is connected to the heating system and, by analogy with the previous method, the circuit is sealed from the external supply/exhaust pipes and all valves inside the system are open.
- Using a pump, air is pumped into the system until a pressure of 2 atmospheres is reached (about 2 bar) and left in this state for a day. A drop in pressure after a day is allowed up to 0.5 atmospheres, since temperature fluctuations in the volume of air in the system occur, as well as expansion and contraction of plastic pipes. If the drop is greater, you will need to find a leak.
Finding the area with the leak
- A leak can be detected by pressurizing the system again. The problem area can often be determined by ear by checking the entire length of the heating main. If it is not possible to determine it by ear, prepare a soap solution, which is used to coat the joints of the system elements - as a rule, these are the most problematic areas in the circuit. The leak site will begin to bubble and, if it turns out to be a joint, it is disassembled, a few words of fum tape are added, the system is reassembled and tested again.
Thus, we have described two ways to perform pressure testing of a heating system with your own hands, and indicated what tools you need to use for this. If you need to test your water supply, you can do this in a similar way. Read about installation and repair of the heating system in our following articles.
Where to start installing the system
An important parameter in heating design and self-installation is the pressure under which the coolant is supplied. A lot depends on this indicator. For example, how warm the room will be directly depends on this characteristic, as well as the force of supply and movement of the coolant in the pipes.
Heating system pressure measurement
The more floors in the house, the higher the pressure should be. Also, during the movement of the coolant along the route, various hydraulic processes can occur, which it is also advisable to take into account. The result of these processes can be water hammer in the system. Their blood pressure may increase. It is for this reason that hydraulic tests of heating system pipelines are carried out at elevated pressure. The pressure is increased by approximately forty percent.
When carrying out preparatory work, take into account the following:
- They check all the valves of the heating system, conduct an inventory of fittings;
- If necessary, add various silicone insulation;
- Check the integrity and, if damaged, restore the pipe insulation;
- They check the functionality of the blind plug in order to cut off the building from the heating network at the right time.
There must be a tap on the return line for draining. Before starting the heating, it must be tested, since all components are filled with it.
Basic Rules
Without hydraulic tests, it is impossible to ensure comfortable living conditions in the house. Elements in the heating system, after a certain period of operation, have the ability to wear out. Checks help prevent serious damage.
Hydraulic calculations in the heating system are performed before installing individual elements. In this case, factors such as the internal diameter of the pipeline and the material from which it is made must be taken into account.
The diameter of the shaped products is calculated along with fittings. Heating efficiency is significantly reduced if at least one of the elements is calculated incorrectly. Because of this, the service life is reduced several times.
The cross-section of heating pipes is calculated using the following formula.
D = √354∙(0.86∙Q:Δt):V
V is the speed at which the coolant moves.
Δt – temperature difference between the return and falling pipes.
Q is the magnitude of the load in a particular area that requires calculation.
D – designation of pipe diameter.
After this calculation, it becomes possible to determine the average diameter for one pipe included in the heating pipeline. There is significantly more data if the calculations are carried out by real professionals.
What is pressure testing of a heating system?
Sizing does not only take place on each of the individual pipes. This includes other parameters - such as the distance between pipelines, the diameter in areas with narrowed parts, and so on.
Conditions for performing crimping
Test work is carried out correctly if all necessary requirements have been met. For example, outside work cannot be carried out on the tested object, and the testing must be supervised by the shift supervisor.
Pressure testing is carried out only according to a program approved by the company’s chief engineer. It defines: the procedure for employees and the technological sequence of verification. They also outline safety measures for ongoing and current work performed at adjacent facilities.
There should be no strangers during pressure testing of the heating system; there should be no turning on or off of testing devices; only employees taking part in the test remain on site.
When work is carried out in adjacent areas, it is imperative to provide reliable fencing and turn off the testing equipment.
Inspection of heating appliances and pipes is permitted only at operating pressure values. When the heating system is pressure tested, reports are filled out to confirm the tightness.
Air crimping
Not everywhere and not always is it possible to rent a crimping machine, just as it is not possible to buy one. For example, you need to test the heating in your dacha. The equipment is specific and the chances that someone you know has it is very low. In this case, pressure testing of the heating system is carried out with air. To pump it, you can use any compressor, even a car one. The pressure is monitored using a connected pressure gauge.
This type of crimping is less convenient and not entirely correct. Heating and plumbing are designed to transport liquids, which are much denser than air. Where water will not even ooze out, air will escape. Therefore, we can say with a high degree of confidence that you will have an air leak - somewhere there will be a loose connection. Moreover, it is difficult to determine the location of the leak during such testing. For this purpose, use a soap solution, which coats all joints and connections, all places where air can escape. Bubbles appear at the leak site. Sometimes you have to search for a long time. This is precisely why such pressure testing of the heating system is not very popular.
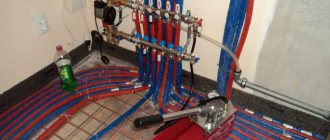
Pressure testing of a heated floor has its own characteristics - you must first check the comb and all the devices attached to it. To do this, close all the supply and return valves of the loops, filling only the heated floor manifold, and check it by raising the pressure. Having reset it to normal, the heated floor loops are filled one by one, and only then is excess pressure created. The process is described in more detail in the video.
Preparation for hydrotesting
4.1.1. Products and their elements subject to hydrotesting must be accepted by the quality control service based on the results of external inspection and non-destructive testing.
The test pressure value for the product should not exceed the maximum permissible pressure value for which the hydraulic stand is designed.
4.1.2. Fasteners and seals used during hydrotesting must be made of materials specified in the working drawings for the product.
4.1.3. Instrumentation, safety devices, fittings, plugs, fasteners, gaskets, etc. must be selected according to the marking for a pressure not lower than the test pressure.
4.1.4. When installing the test product on a hydraulic stand on standard or technological supports, its stable position, free access for inspection and the location of drainage holes (“air vents”) must be ensured at its highest point.
The hydraulic testing scheme, technological process and equipment must ensure complete removal of air when the test product is filled with working fluid.
4.1.5. Installation of communications, installation of the required fittings, instrumentation must be carried out in full accordance with the approved hydrotesting scheme.
All free openings of the product under test must be plugged.
Installation, equipment and inspection of the product at a height of more than 1.5 m should be carried out from special platforms (scaffolding).
4.1.6. When installing flange connections, the threaded elements must be tightened evenly, alternately tightening diametrically opposite ones (“crosswise”), maintaining parallelism of the flanges.
It is prohibited to use wrenches that do not match the size of the nut, non-standard ones and/or with an extension of the handle, as well as a hammer or sledgehammer.
4.1.7. When preparing a working fluid using phosphors, preservatives, as well as when applying indicator coatings to the controlled surfaces of the test product, a general supply and exhaust ventilation system must be turned on at the hydrotesting site.
