In some cases, it becomes necessary to remove the thermostat from the heating radiator. For what? If the riser passing through your apartment heats up normally, but the radiators remain completely cold, then first you should try to bleed out the air (perhaps it is because of the airlock that this problem arose).
If bleeding the air does not help, there is nothing left to do but remove the thermostat from the battery: there is a high probability that the problem lies with it.
The fact is that if the thermostat has an electronic head, then it carries out “decalcification” once a week. But thermostats with a regular head cannot perform this procedure, and, as a result of contamination of the water used as a coolant, the valve gradually becomes “overgrown” with scale and sediment. Over time, it simply stops opening normally.
The thermostat on the heating radiator has broken off. What can be done?
I have it too - I threw the needle all the way out and it warms
Well, you have a nut in the photo, of course you can. Only if you don’t know how to do it yourself, don’t do it, the pressure is high there, you’ll get scalded!
I’m not an expert, but judging by the picture, I’m also in favor of a complete replacement. And I can’t do this on my own! If only because it is necessary to completely drain the water from the main line. So there is only one way out - through local technicians!
You can unscrew it, the nut is right there!! Having unscrewed it, remove the rest of the thermostat, in this case call a plumber, turn off the riser, in case the taps don’t hold))
>is it possible to unscrew what remains screwed in? Are you interested in theory or practice? In theory, everything that is screwed can be unscrewed. But in practice, to do this, you first need to turn off the heating in a good way and drain the water from the entire riser, otherwise it will be oh. If The battery is too hot, before the plumbers arrive, you can press this little thing with something, like a clamp.
We installed a new one for ourselves after the same problem https://www.obi.ru/radiatory-otopleniya-i-prinadlezhnosti/radiator-bimetallicheskii-royal-thermo-biliner-500-bianco-traffico-12-sekcii/p/3828126 , since it is not very expensive. And calling the experts is half the cost of the radiator itself.
Yes, this can be turned off without any problems using a pliers, and as for the new thermostat, you can purchase it from a specialized company such as https://55m.ru/shop/avtomatika/termoregulyatory/eberle-rtr-e-3563/
Jerk off, your hands are only meant for dick.
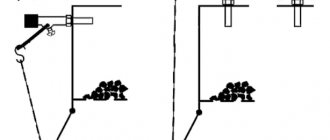
Device diagram
The device is used both in systems of one and two pipes. Regardless, it includes:
- valve;
- static element (thermal head);
- sensitive component;
- spool;
- stock;
- compensator;
- retainer;
- scale.
also several fasteners, a drive and a regulator . The device is filled with working fluid or gas, as desired.
Photo 1. Diagram of a thermostat for radiators. Arrows indicate the components of the structure.
The design and principle of operation of the thermostat
Any automatic radiator valve consists of 2 parts:
- Thermostatic valve with an actuator for shutting off the coolant flow.
- Thermal head with a control element that responds to changes in air temperature.
The valve, made of brass, has a traditional mechanism with a working cone that fits into the seat and thus reduces its flow area. The difference from a conventional manual tap is that the cone is attached to a pressure rod with a spring that extends outward. Pressing on the end of the rod is carried out by the second element - the thermal head. The stronger the pressure, the smaller the flow area. The diagram below shows the assembly of the heating battery regulator:
Where is the device installed?
The operation of the device is influenced by 4 factors:
- exposure to sunlight on the body;
- temperature outside the room;
- air circulation in the room;
- additional heating sources.
In apartment buildings, thermostats are placed high up, near the roof , as heat rises. This helps balance the temperature differences in the building. In single-story ones, on the contrary, they are mounted near the heater.
Photo 2. Electronic thermostat installed on the heating radiator. The device is connected to the coolant supply circuit.
It is considered most favorable to place a highly sensitive device on the feed. This principle has a limitation: the strapping elements should not be covered with anything. The thermostat is placed in front of the battery, after the branch from the main line. This allows it to regulate the temperature of the room without affecting the neighbors below.
Important! Otherwise, you must use a device with a remote sensor.
Typical questions
How to insulate a heating radiator so that it does not overheat?
To reduce the level of heating of the room from a radiator without adjustment devices, you should use thermal insulation materials. First you need to prevent air circulation near the heated surfaces of the heating radiators. For this purpose, you can use ordinary foil and wrap it around the radiator. A layer of heat-insulating material must be laid on top of the foil covering.
In residential premises, you should not use materials such as asbestos fabric and asbestos sheets, mineral wool and fiberglass, as they emit toxic substances into the air that can be harmful to health.
For thermal insulation, it is advisable to use woolen fabric with good heat resistance.
Which thermostats are better?
You should choose a thermostat taking into account the type of heating system, personal preferences and the allocated budget.
This device has sensors that analyze the temperature and automatically adjust the heating level of the heating radiator based on the set settings. A more budget-friendly option is to install a control valve, with which you will have to manually regulate the heating temperature.
How to properly install a thermostat on a battery with your own hands
No special skills are required to place the device. The most difficult part of the process is installing a bypass in a system with metal pipes. If problems arise with the latter, you should invite a specialist to help assemble the device.
To work you will need:
- the device itself;
- shut-off valves;
- pipeline cutting, fasteners or welding for its installation ;
- bypass;
- a set of keys;
- tow or any other sealant .
Before starting work, be sure to drain the coolant. To do this, just close the valve located after the branch pipe from the main to the radiator.
It should be taken into account that the bottom tap, if any, must be opened, otherwise the liquid will become stuck in the battery.
Attention! The thermostat should be installed in the warm season . For example, in the summer, before the start of the heating season.
After draining the coolant, proceed to installing the taps. A vertical cut is made in the pipe section near the radiator, disconnecting the line. Then do the following:
- If the thermostat is metal, then the bypass is simply welded. If electronic, then place a jumper between sections of the pipe.
- Remove the nuts and shank from the shut-off valves . The same is done with the device. The resulting parts are screwed into the radiator plugs.
- and temperature control device are installed one by one
- The pipeline is assembled by tightening the fasteners or by welding.
- The system is filled with working fluid and a test run is carried out.
After carrying out the initial check , they inspect the piping for leaks or defects. The former are eliminated with a sealant, the latter by repeated heat treatment.
Before installation, when choosing a location, it is recommended to consider access to the device in case of repair. To do this, you will need to choose a place in the free space and correctly direct the head of the device.
Sometimes it becomes necessary to adjust the temperature in each specific room. This can be done by installing a thermostat for the heating radiator. This is a small device that regulates the heat transfer of a heating battery. Can be used with all types of radiators, except cast iron. One important point is that the device can lower the initial temperature, but if there is not enough heating power, it cannot increase it.
Danfoss products
Danfoss is particularly popular among manufacturers.
The most popular Danfoss models
It is worth noting that some RA series and RTD series devices have been converted to RTR series.
Therefore, if you are looking for a specific model, for example to replace an old thermostat with a similar one, it is worth visiting the official Danfoss website, where you can find complete correspondence tables. We will present only the most popular models.
Thermocouple correspondence table
Valve correspondence table
It is worth remembering: in order for the thermostat to last for a long period of time, it is recommended to clean the equipment and remove the thermal head after each heating season.
Design of thermostats for heating radiators
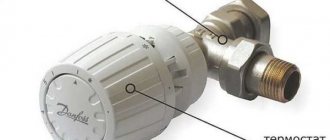
The thermostat for a heating radiator consists of two parts - a valve (thermovalve) and a thermostatic head (thermostatic element, temperature regulator). These products are produced for different pipe sizes and different types of heating systems. The thermostatic head is removable; regulators of different types and even from different manufacturers can be installed on the same valve - the seat is standardized.
The thermostat for a heating radiator consists of two parts - a special valve (valve) and a thermostatic head (regulator)
There are different valves and regulators, so before installing a thermostat for a heating radiator, you will have to become at least a little familiar with its structure, functions and types.
Removal Features
The temperature regulator consists of two parts: a valve and a thermostatic element.
Removing the thermostatic element itself does not present any problems: it is easy to do by hand, and if it is clamped a little tighter, you will have to use pliers.
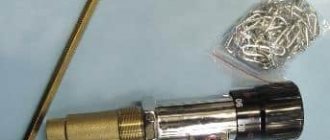
Once the head is removed you will be able to see the stem. It should be moved back and forth several times, and then left wrung out for a while.
In most cases, the battery will begin to warm up normally. Once it has warmed up, you can put the regulator head back in place.
If this does not help, you need to remove and replace the thermostat valve itself.
The thermostat valve is more complicated.
In most forums devoted to this topic, when asked “how to remove a thermostat from a battery,” a recommendation is given to contact a plumber. If for some reason you cannot do this, then you will have to disconnect the radiator from the system.
How to turn off a heating radiator with a thermostat? This can be done if there is an additional shut-off valve. However, most apartment buildings simply do not install it. If there is no shut-off valve, you will have to drain the heating system.
We hope that the article was useful to you. Share it on social networks with your friends, please.
Have a nice day!
Thermal valve - structure, purpose, types
The valve in the thermostat is very similar in structure to a regular valve. There is a seat and a shut-off cone that opens/closes the gap for coolant flow. The temperature of the heating radiator is regulated in this way: by the amount of coolant passing through the radiator.
Sectional view of thermostatic valve
The valves are installed differently for one-pipe and two-pipe wiring. The hydraulic resistance of a valve for a one-pipe system is much lower (at least two times) - this is the only way to balance it. You can't mix up the valves - it won't heat. For systems with natural circulation, valves for single-pipe systems are suitable. When installing them, the hydraulic resistance, of course, increases, but the system will be able to work.
Manual temperature controllers for radiators
This type of regulator is the simplest and is a valve mechanism with a rotatable cover, which, when rotated, leads to the raising or lowering of the valve and thereby reducing or increasing the fluid supply.
Therefore, without human manipulation, manual temperature controllers for radiators will not work. When the temperature decreases or increases, it needs to be adjusted. But such a regulator has a universal valve, which, if desired, can be replaced with an automatic one.
Thermostatic heads
There are three types of thermostatic elements for heating thermostats - manual, mechanical and electronic. They all perform the same functions, but in different ways, provide different levels of comfort, and have different capabilities.
Manual
Manual thermostatic heads work like a regular faucet - you turn the regulator in one direction or another, allowing more or less coolant to flow through. The cheapest and most reliable, but not the most convenient devices. To change the heat transfer, you must manually turn the valve.
Manual thermal head - the simplest and most reliable option
These devices are quite inexpensive, they can be installed at the inlet and outlet of a heating radiator instead of ball valves. Any of them can be adjusted.
Mechanical
A more complex device that maintains the set temperature automatically. The basis of this type of thermostatic head is a bellows. This is a small elastic cylinder that is filled with a temperature agent. A temperature agent is a gas or liquid that has a high coefficient of expansion - when heated, it greatly increases in volume.
Thermostat device for a heating radiator with a mechanical thermostatic head
The bellows supports the rod, which blocks the flow area of the valve. Until the substance in the bellows heats up, the rod is raised. As the temperature rises, the cylinder begins to increase in size (gas or liquid expands), it puts pressure on the rod, which increasingly blocks the flow area. Less and less coolant passes through the radiator, and it gradually cools down. The substance in the bellows also cools down, due to which the cylinder decreases in size, the rod rises, more coolant passes through the radiator, and it begins to warm up a little. Then the cycle repeats.
Gas or liquid
With such a device, the room temperature is fairly maintained at exactly +- 1°C, but in general the delta depends on how inert the substance in the bellows is. It can be filled with some kind of gas or liquid. Gases react faster to temperature changes, but are technologically more difficult to produce.
Liquid or gas bellows - not much difference
Liquids change volumes a little more slowly, but are easier to produce. In general, the difference in the accuracy of temperature maintenance is about half a degree, which is almost impossible to notice. As a result, most of the presented thermostats for heating radiators are equipped with thermal heads with liquid bellows.
With remote sensor
The mechanical thermostatic head should be installed so that it faces the room. This way the temperature is measured more accurately. Since they are quite large in size, this installation method is not always possible. For these cases, you can install a thermostat for the heating radiator with a remote sensor. The temperature sensor is connected to the head using a capillary tube. You can place it at any point where you prefer to measure air temperature.
With remote sensor
All changes in heat transfer from the radiator will occur depending on the air temperature in the room. The only disadvantage of this solution is the high cost of such models. But the temperature is maintained more accurately.
| Name/Company | Setting range | Operating temperature range | Control type | Functions/purpose | Connection type | Price |
| Danfoss living eco | from 6°C to 28°C | from 0°C to 40°C | Electronic | Programmable | RA AND M30X1.5 | 70$ |
| Danfoss RA 2994 with gas bellows | from 6°C to 26°C | from 0°C to 40°C | Mechanical | For any radiators | clip-on | 20$ |
| Danfoss RAW-K with liquid sponge | from 8°C to 28°C | from 0°C to 40°C | Mechanical | For steel panel radiators | M30x1.5 | 20$ |
| Danfoss RAX with liquid sponge | from 8°C to 28°C | from 0°C to 40°C | Mechanical | For design radiators white, black, chrome | M30x1.5 | 25$ |
| HERZ H 1 7260 98 with liquid sponge | from 6°C to 28°C | Mechanical | M 30 x 1.5 | 11$ | ||
| Oventrop "Uni XH" with liquid sponge | from 7°C to 28°C | Mechanical | with zero mark | M 30 x 1.5 | 18$ | |
| Oventrop "Uni CH" with liquid sponge | from 7°C to 28°C | Mechanical | without zero mark | M 30 x 1.5 | 20$ |
Installation and configuration
Before you buy and install a thermostat on a battery, you need to make sure that your heating device is not equipped with a valve from the factory. This applies to steel panel radiators from some manufacturers, for example KERMI or HEIMEIER. For them, you only need to purchase the thermostatic head itself with a suitable thread and screw it into the appropriate socket.
Setting up and installing a thermostat on batteries with your own hands should not cause you much difficulty. Here are some recommendations:
- The valve is always installed only on the supply pipeline.
- Observe the flow direction indicated in the product data sheet.
- When installing, use American ones so that the assembly can always be disassembled.
- The position of the valve and head, as well as the distances to the nearest structures are indicated in the diagram:
If the thermostat does not provide a function for mechanically blocking the coolant flow, then to service the radiator you will have to install an additional ball valve in front of the valve, as shown in the diagram:
Installation of thermal head
The element is fastened to the valve body in two ways - on a thread or by simple snapping, as on DANFOSS products. In any case, you first need to remove the protective cap from the valve axle box, then turn the head handle to the “max” position and insert it into the socket until it clicks, or lightly tighten it with a wrench (when the connection is threaded). If the thermostat head rotates normally, the installation is successful.
Valves from some manufacturers, as well as all heads, have a presetting function. This is an advance limitation of the temperature control range, which is implemented differently in different models. For example, the HERZ ARMATUREN thermostat is limited using special pins; other products include a key that locks the head in a certain position.
The operational setting of the battery thermostat is carried out using a handle with a printed scale and numbers (designations). As a rule, the range of smooth adjustments is 16-28 °C, and in the “*” position the valve will maintain the air temperature at 6-7 °C to prevent defrosting.
In conclusion, a few words about the compatibility of thermostats with cast iron heating appliances. In principle, there are no contraindications to installation, but there are doubts about the effectiveness of the thermostats. Cast iron batteries are massive and hold a lot of water, and therefore are inertial and will respond to automatic regulation with a delay. So here it is preferable to install a regular tap on the supply and a balancing tap on the return.
Before you begin installing a thermostat on a heating radiator, you should purchase them in the required quantity; for this, I recommend paying attention to trusted companies.
The list of leading manufacturing companies includes battery-powered devices:
- Danfoss;
- Far;
- Herz;
- Honeywell;
- Kermi;
- Luxor;
- Prado;
- Purmo;
- Sira.
Reviews from consumers are mostly positive, which is why I can safely recommend purchasing products from these manufacturers.
How to install correctly
They install a thermostat for a heating radiator at the inlet or outlet of the heating device - there is no difference, they work with equal success in both positions. How to choose a place to install?
According to the recommended installation height. There is such a clause in the technical specifications. Each device is configured at the factory - they are calibrated to control the temperature at a certain height and usually this is the upper radiator manifold. In this case, the heat regulator is installed at a height of 60-80 cm; it is convenient to adjust it manually if necessary.
Installation diagrams for heat regulators for radiators
If you have a bottom saddle connection (pipes fit only from the bottom), there are three options - look for a device that can be installed at the bottom, install a model with a remote sensor, or reconfigure the thermal head. The procedure is simple; the description must be in the passport. All you need is to have a thermometer and at certain moments turn the head in one direction, then in the other direction.
Installation is standard - on fum tape or linen winding with packaging paste
The installation process itself is standard. The valve has a thread. The appropriate fittings are selected for it or a matching thread is cut on the metal pipe.
One important point that those who want to install a thermostat for a heating radiator in apartment buildings should remember. If you have a single-pipe installation, they can only be installed if there is a bypass - a section of pipe that stands in front of the battery and connects the two pipes to each other.
If you have a similar wiring (there may not be a pipe on the right), a bypass is required. The thermostat should be installed immediately behind the radiator
Otherwise, you will regulate the entire riser, which your neighbors will definitely not like. For such a violation, a very substantial fine can be issued. Therefore, it is better to install a bypass (if not).
How to remove a Danfoss thermostat from a heating device?
It clicks into place, but where and what should I press now?
Unscrew the nut under the head and remove
Paletsky wrote: Unscrew the nut
What kind of nut? After all, it was installed without a nut.
eded wrote: What kind of nut is that?
Each head is equipped with a large iron nut with which it (the head) is fixed to the valve
Instead of a red cap, a thermostat is snapped onto the RTD-N valve. No nuts. » >
eded wrote: Instead of a red cap, a thermostat is snapped onto the RTD-N valve. No nuts.
..shiert papieri! I can clearly see the nut in the picture" >
The diagram provided on the resource is not very helpful. I started looking for the nut and accidentally removed the thermostat. It turned out that part of it at the bottom is spring-loaded and rotates 90 degrees, as if unscrewing a nut, while the clamps are released and the assembly comes off.
How to adjust (reconfigure)
All thermostats are factory adjusted. But their settings are standard and may not match your desired parameters. If you are not satisfied with something in the work - you want it to be warmer/colder, you can reconfigure the thermostat for the heating radiator. This must be done with the heating running. You will need a thermometer. You hang it at the point where you will control the state of the atmosphere.
- Close the doors, put the thermostat head in the extreme left position - completely open. The room temperature will begin to rise. When it becomes 5-6 degrees higher than what you want, turn the regulator all the way to the right.
- The radiator begins to cool down. When the temperature drops to a value that you consider comfortable, begin to slowly turn the knob to the right and listen. When you hear the coolant making noise and the radiator starting to warm up, stop. Remember what number is on the handle. It will need to be set to achieve the required temperature.
Adjusting the thermostat for a radiator is not difficult at all. And you can repeat this action several times, changing the settings.
Regulating the heating operating temperature is an important task both from the point of view of ensuring a comfortable temperature in the room and in terms of fuel economy. Excessive overheating of the air leads to increased fuel consumption and uncomfortable sensations for the inhabitants of the home. There are several ways and stages of adjusting the operation of the heating complex. Thermostatic temperature control of heating devices is considered the most effective. It is implemented using temperature control devices. How to install a thermostat on a heating radiator - the material in this article will answer this question.
Classification of thermal valves for heating radiators
The part at the bottom of the thermostatic valve is a valve or valve that is selected depending on the heating system used. It must be said that for a variety of systems, manufacturers produce different adjustment devices. For example, two-pipe systems are characterized by balancing due to a decrease in pressure on the valves. Due to this, the devices in this case have a small flow area and are characterized by high hydraulic resistance.
Installing regulators on heating radiators in single-pipe systems will not give a good effect and the room will be much colder. In this situation, you can install devices whose throughput is of great importance, at least 3.
There are also models that are designed for systems with real movement of the coolant. They have a much lower hydraulic resistance, which makes the use of the listed modifications permissible for single-pipe systems.
Therefore, you need to very carefully study all the characteristics of control devices.
Depending on the method of pipe installation, axial, angular or direct temperature regulators for heating radiators are distinguished. The choice of model in this case is determined by the type of connection of the heating systems. For example, with a lateral approach to pipes, it is more convenient to install a straight valve, but with a bottom connection it is better to use an angle element.
Various materials can also be used for the production of thermal valves. Very often, manufacturers give preference to metals characterized by high corrosion resistance. For good reliability, some of them have an additional layer of protection on the surface.
The key materials for the production of a temperature controller for heating batteries are the following:
- Stainless steel
. This is a pretty good option, but the price of such valves is very high, and they are rarely found in the retail chain. - Brass
, a material with a nickel layer can be used. - Bronze
can also be chrome-plated or nickel-plated.
Is a thermostat needed in a heating system?
The use of temperature control is caused by the need to provide comfortable conditions in rooms according to individual requests. Temperature adjustment directly affects fuel consumption during autonomous heating. In the absence of regulation and monitoring, the room will be hot and there will be a need for constant ventilation. High temperatures contribute to increased humidity and the occurrence of fungal diseases.
There are several stages of temperature control:
- Control on the boiler (in autonomous heating version);
- Control on the distribution manifold or individual branches of the heating system;
- Adjustment on heating devices.
The batteries in the apartment do not heat well: causes of non-working radiators, troubleshooting
A prominent representative of the control valves of heating systems is a thermostat for the battery, otherwise known as a radiator valve or thermostatic valve.
Like other innovations in the field of heating, it came to us from Europe, and almost immediately it was included in state building codes as a mandatory element of any water heating system.
Accordingly, the purpose of this article is to reveal the principle of operation of the thermostat and tell users how to select, install and configure it in a home heating system.
Types of thermostats
Thermostatic regulators have a general design principle and various actuators. The overall design consists of a body, stem, seals, valve and connecting threads. The body is made of brass or stainless steel. The housing is equipped with threads for the inlet and outlet of the working medium. The direction of movement is marked on the surface of the valve with an arrow. At the water outlet, instead of a thread, for ease of installation and assembly, an “American” type fitting is usually installed. On the top of the housing there is a connecting terminal with a rod. The output has a thread or special clamps for installing a thermal head.
The rod is equipped with a spring and is in the raised position without applying force to it from the control mechanism (thermal head or handle). At the lower end of the rod there is an actuator - a valve with a rubber (or fluoroplastic) lining. Under the influence of the drive force, the rod lowers and the valve closes (or opens) the coolant flow channel.
This device is called a thermostatic valve. Based on the control mechanism acting on the rod, the following types of thermostats are distinguished:
- Mechanical;
- Electronic;
- Liquid and gas-filled;
- Thermostatic mixers.
Thermostatic mixers are a special type of thermostatic fittings. They are the basis of the operating principle of water heated floors. They set the water temperature in the heating circuits (usually does not exceed 50 degrees Celsius). To reduce the temperature of the coolant supplied from the boiler, the mixer mixes cooled water from the return pipeline of the underfloor heating circuits into the flow.
Mechanical thermostats
Mechanical thermostats are the basic model of thermostatic control valves. A detailed description of the thermostatic valve is given in the previous section. The main feature of a mechanical thermostat is manual control of the valve. This is done with a plastic handle that comes with the product. Manual adjustment does not allow achieving the required accuracy in controlling the heating device. In addition, the durability of the plastic cap leaves much to be desired. Connecting mechanical thermostats to the battery is the first step towards quality control.
Electronic thermostats
An electronic thermostat is a thermostatic valve with a servo-driven stem. The servo drive, based on sensor data, moves the valve stem and regulates the flow rate. There are different layouts of electronic thermostats:
- Thermostat with built-in sensor, display and key control;
- Device with a remote sensor;
- Thermostat with remote control.
The first model is installed directly on the thermostatic valve. The model with a remote sensor has an actuator and control device installed on the valve and a remote temperature sensor. The sensor is installed at a distance from the radiator in order to objectively assess the air temperature in the room. It can also be installed outside the building - adjustment takes place depending on the ambient air temperature.
An electronic thermostat with remote control has a common unit that integrates the control of a group of thermostats using a remote principle.
Liquid and gas-filled thermostats
Temperature regulators of this type are the most popular. They are cheaper than electronic ones and are not inferior to them in reliability. The principle of their operation is based on the use of the thermophysical properties of certain liquids and gases.
The housing contains a flexible vessel filled with a liquid or gas with certain properties. When the air heats up, the working medium of the tank expands and the vessel puts pressure on the valve stem - the valve begins to close. When cooling, everything happens in the reverse order - the vessel narrows, the spring lifts the stem with the valve.
Description of thermostats and operating principle
The design of the devices that change the temperature of the heating device looks like this:
- Thermal valve. This part is a traditional valve, which consists of a metal body with a through hole, a seat and a cone. Essentially, the cone is considered a locking type mechanism, the lowering and raising of which acts on the valve's ability to flow.
- The thermostatic component is considered to be the means for driving the closure cone. The thermoelement is made in the form of a small sealed cylinder, in the middle of which there is a thermal agent. The cylinder is called a “bellows”; gas or liquid is used as a thermal agent, the volume of which strongly depends on temperature.
The working principle of an external water thermostat is as follows: as soon as the temperature increases, the volume of the thermal agent increases, which leads to the stretching of the cylinder. For its part, it presses on the piston, which moves the locking cone. As a result, the flow of the coolant is blocked, and the thermal agent begins to cool. Here you can see the opposite reaction: the agent substance decreases in volume, and the cylinder contracts. Based on this, the piston returns to its initial position, the shut-off cone opens the movement of the coolant and the head heats up again. This way the set temperature in the room is maintained with the greatest accuracy.
However, different devices have different accuracy, which is explained by their properties. Heating and cooling occurs in stages, therefore, the bellows contracts and becomes wider slowly. Thanks to this, the coolant supply opens and closes also slowly. This suggests that a cone cannot be maximally closed or open.
For each thermal there is gestesis - an indicator characterizing the amount of inaccuracy. The minimum value of this indicator indicates a faster response of the device to temperature changes.
When deciding to install a regulator on a heating radiator, you need to understand one more characteristic: in this case, the heating device will not heat up completely and equally. To understand that such a condition is not considered the basis for the formation of air pockets or blockages, it is necessary to remove the thermal head. A working heating device should heat up equally.
Disabling radiators without fittings
It is no secret that in most apartments to this day there are old cast iron radiators or steel convectors without any shut-off fittings, which makes it impossible to shut them off during the heating season. Moreover, according to the old heating scheme, convectors in high-rise buildings are connected to risers without straight sections - bypasses. Therefore, if an accident occurs with a coolant leak, you must act as follows:
- Try to provide some kind of container to collect hot water. If the stream flows to the side, wrap a thick cloth over the break site so that the water flows along it into a bucket.
- Call the dispatch service of your heating energy supply company and report the accident.
- While the service personnel are getting there, provide them with access to the basement, find the keys, open the door, and so on.
- Try to block the riser yourself.
While your water is flowing onto the floor, your neighbors below have a suspended ceiling turning into a bubble.
A few words about how to properly turn off the heating riser. Find in the basement the heating point of your entrance and vertical pipes embedded in a large-diameter main or into a common collector. Follow where they go to determine the emergency riser, and turn it off with a tap. Contact by cell phone someone in the household who can confirm that the geyser eruption in the apartment has stopped. If you couldn’t find your pipe, close all the valves one by one until you find the one you need.
Attention! Don't try to force yourself on basement valves that are stuck due to rust. When they cannot be closed manually, it is better to wait for a team of plumbers; they will find a way to stop the flow of coolant. Otherwise, a very awkward situation will arise when you also break the main fittings, leaving the apartment building without heat during repairs.
It is also worth considering the question of how to shut off the battery if it is hot in the apartment due to the service provider’s failure to comply with the temperature schedule of the boiler room. It would seem that if there are shut-off valves, the problem is solved by manually closing the taps. But after the temperature in the rooms drops, the valves will have to be opened again. This way you will get tired of turning the taps long before the end of the heating season, so you need to think about how you can adjust the heat output of the radiators. The options are:
- if possible, install a thermostatic valve on each radiator, limiting the flow of coolant and automatically maintaining the set temperature in the room;
- It is nice to cover the heating device with a blank screen with small holes if there are no shut-off valves on the connections.
Important. The ball valve is not a means of adjustment; it is intended only to completely cut off or open the passage of the coolant. In the “half closed” mode it will not give the desired effect and will fail much earlier.
Thanks to worn-out pipelines, district heating systems are notorious for dirty water that quickly clogs small passages. Therefore, ordinary valves with thermal heads will not last long here; you need to buy special valves with increased capacity, which are produced by the well-known brands Danfoss and Herz. How to install them on the connection to the radiator is shown below in the diagram and described in this material.
