Gas water heaters with instantaneous water heaters, regardless of the manufacturer and model, are no different from each other in terms of operation. The difference lies only in the appearance, design and set of additional options, for example, automatic ignition of the burner, an error in maintaining the set temperature of the heated water, the presence of a digital display for setting and indicating the water temperature.
The gas water heater works as follows. Water flows through a heat exchanger, which is a copper tube with fins. The gas burns, which heats the heat exchanger and as a result the water heats up. Depending on the set water heating temperature and its pressure in the water supply system, the gas unit adjustment system associated with the water unit ensures safe operation. If there is no water pressure or draft, the protection system automatically shuts off the gas supply.
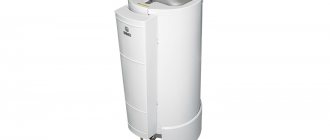
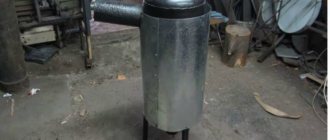
In October 2006, I bought a NEVA LUX-5013 geyser (pictured above) manufactured by Gazapparat OJSC, St. Petersburg. I didn’t want to buy an imported manufacturer; sooner or later everything breaks down, and problems with spare parts become an insurmountable obstacle.
The previously installed model Neva-3208 served for 6 years (continues to work in another place now). The only drawback of this model is that it was necessary to change the rubber membrane in the water unit every year. Over time, it became deformed, because of this, the amount of gas supplied to the burner decreased and the water began to not warm up enough. Over time, the gas supply stopped completely.
I accidentally saw a silicone membrane in a gas equipment store. I replaced the rubber membrane in the water unit, after which there were no problems with the gas water heater.
I was persuaded to choose NEVA LUX-5013 by its high reliability (as I thought), compatibility of supply pipes, water-gas regulator (Germany), availability of all types of protection, stainless steel casing.
For three years (warranty period), the geyser worked perfectly, but as soon as the warranty expired, water began to drip from it. The first thing I thought was that one of the rubber gaskets had worn out, I would replace it and everything would be fine. But everything turned out to be much more complicated than I expected, and the repair turned out to be difficult. Opening the gas water heater revealed the presence of a fistula in the heat exchanger, from which a thin stream of water was gushing.
A separate page of the site is devoted to the repair of heat exchangers and boilers of flow-type gas heaters. Do-it-yourself repair of a gas water heater heat exchanger.
How to disassemble and reassemble the NEVA LUX geyser
Before starting repairs, be sure to turn off the gas and water supply taps.
To remove the casing of the gas water heater, you first need to unscrew the two screws located in the right and left corners of the lower part of the rear wall using a Phillips screwdriver from below, from the side of the pipe inlet.
The left knob for piezoelectric ignition of the igniter and rough adjustment of the gas supply cannot be removed. The right handle for fine adjustment of gas supply is held only by the casing with two clamps. You don't have to take it off either. But I usually remove it before removing the casing. In addition, so that the handle rotates easily when adjusting the temperature, I filed it along with the clamps in a circle where the handle touches the casing. Now it no longer clings to the casing and rotates easily.
Next, you should pull the casing towards you until the handles are recessed and, when the casing does not touch them, move it up. The upper slots of the casing will come out of the hooks located on the base of the gas column, and it will easily separate.
The geyser casing is installed in place in the reverse order. First, put it on the upper hooks with the slots, for which you will have to stand on a raised platform, then get the hole onto the adjustment handle and at the same time make sure that the holes located above the holes for fastening with self-tapping screws hit the guides. Screw the two screws into place.
The photo shows the appearance of the NEVA LUX-5013 geyser without a casing with a new heat exchanger.
Troubleshooting geyser
The gas in the igniter goes out
This malfunction is typical only for geysers with an automatic protection system. The gas in the igniter should always burn, regardless of the position of the handles or valves of taps and water supply mixers. The simplest automatic protection system for a geyser consists of only three elements: an electromagnetic valve, a thermocouple and a thermal fuse. The geyser may go out during operation if the protection elements are triggered or the elements themselves malfunction.
Electrical circuit for protecting the NEVA LUX geyser
Evidence of failure of the automation elements is the extinguishing of gas in the igniter after the gas control knob is no longer held. To repair an automatic protection system, you need to understand how its components work.
A thermocouple is two conductors welded together from different metals (I assume chromel and alumel), operating on the Seebeck effect and generating an EMF of about 30 mV when heated. Serves to power the solenoid valve. It fails only after many years of operation. The bottleneck is the loose center conductor coming out of the housing. Although it is insulated, the insulation can wear out over time, and the conductor can short-circuit to the body, and the geyser will go out.
If the contact at the welding site of the thermocouple is broken, then it is unacceptable to restore it by soldering, since the junction point in the thermocouple is a current generator, and not a simple eclectic connection of wires. The thermocouple should be replaced with a working one or repaired.
The electromagnetic valve is a coil of copper wire, inside of which there is a metal cylinder (solenoid), mechanically connected to the valve for shutting off the gas supply to the gas column burner. When the thermocouple is heated, it produces an electrical current which, when flowing through the coil, creates a constant magnetic field that draws the solenoid into the coil.
Since the solenoid is mechanically connected to the valve, the valve moves and gas enters the burner. If the gas in the wick does not burn, the thermocouple cools down and does not produce current, the spring-loaded solenoid returns to its original state and the gas supply to the burner stops. This simple method ensures safe operation of the gas water heater.
The thermal fuse is a bimetallic plate, which, when the temperature reaches 90˚C at the installation site of the thermal fuse, bends so much that it breaks the power supply circuit of the solenoid through the rod. In addition, the thermal fuse itself is connected to the circuit mechanically, using terminals. Due to the complexity of the design and operating conditions, it sometimes fails. I had to replace it once because the gas water heater was going out randomly.
Checking the thermal fuse
You need to check the thermal fuse if the column goes out, despite good draft in the gas exhaust ventilation and sufficient air flow. If in the room where the gas water heater is installed, the plastic windows are tightly closed, and in addition the exhaust hood above the gas stove is turned on, then even with good draft there will be no air flow. The geyser will begin to overheat, the heating will trip the fuse and open the voltage supply circuit to the solenoid valve. After cooling, the fuse will close the circuit again.
To check the thermal fuse of the geyser (installed in its upper part and accessible without removing the casing), you need to remove the terminals from it (pink in the photo) and short them together with any metal object, such as a paper clip.
If the geyser starts to work normally without overheating, then the cause of the malfunction has been found. Temporarily, until you purchase a new thermal fuse for replacement, you can leave a paperclip, but you just need to make sure that it does not touch the metal parts of the gas water heater, and do not leave the working water heater unattended. The thermal fuse is attached to the heat-resistant plastic adapter with two screws. The adapter on the geyser body is secured with a latch.
Checking the solenoid valve of the geyser
If the paper clip does not help, then you need to check the functionality of the solenoid valve. It has a resistance of about 0.2 Ohm and in operating mode consumes a current of about 100 mA. You can check it by applying a voltage of 20-30 mV to the winding at a current of 100 mA. This mode can be easily created using any AA battery or accumulator and a 10 Ohm resistor. The battery must be fresh.
The connection is made as follows. The negative terminal of the battery is connected to the column body (for the valve and thermocouple, one terminal is connected to the housing, in the diagram there is a blue wire), and the positive terminal through a 10 Ohm resistor to the thermal fuse terminal (the terminals from the thermal fuse must first be removed), the wire from which does not go to thermocouple (left red wire in the diagram). Light the wick and immediately remove your hand from the gas control knob. The wick should continue to burn. If you disconnect the battery, the flame should go out immediately. If everything is so, the solenoid valve is working. Therefore, the thermocouple is faulty. If an external inspection fails to find bad contacts or a short circuit in the wires, the thermocouple will have to be replaced. It is sold complete with wires and terminals.
The geyser goes out during operation
No traction
One of the most common cases with the arrival of autumn is a tightly closed sealed plastic window in the room where the gas water heater is installed. There is no air flow - the column overheats and the bimetallic relay for thermal protection of the column from overheating (self-resetting thermal fuse) is triggered. If after 10–15 minutes the column lights up normally and does not go out again when the window is slightly open, then the reason is precisely the column overheating. If immediately after the gas goes out you can light the wick, and it will continue to burn after you stop holding the gas control knob, then the draft is good.
The draft may also be insufficient due to clogging with soot or foreign objects entering the ventilation duct, such as bricks, from which the duct is made. To check the draft, you need to remove the gas exhaust pipe coming from the gas water heater from the channel, and with the window open, close the channel with a sheet of paper. If the paper holds, it means there is enough traction. You can bring a lit lighter and if the flame deviates to a horizontal position or even goes out, then there is sufficient draft in the channel. Otherwise, the canal needs to be cleaned.
Water unit is faulty
Also, the burners in the column, both with and without automation, may go out due to insufficient water pressure in the water supply or a malfunction of the water unit.
If the pressure of cold water has not changed, and the pressure of water coming from the water column has become weak, it means that the mesh filter at the inlet of the water unit is clogged. This often happens after the water is turned off and supplied again. To clean, simply unscrew one union nut on the water supply side, remove and clean the mesh and pressure difference calibration hole.
If a water unit is installed in the gas water heater as in the photo, and the water pressure has not visually changed, then it is necessary to check the condition of the rubber membrane in it. To do this, you need to unscrew the two union nuts from the water unit, then unscrew the three screws that hold the water unit in the gas unit by the cone. Disassemble the water assembly by unscrewing the eight screws. When you disconnect the halves of the assembly from each other, you will see a rubber membrane.
If the rubber band is not flat, but deformed, with bends, then it is the problem and needs to be replaced. At the same time, you should clean the filter mesh and the cavities of the water unit from dirt. I advise you to install a silicone membrane, it will last for many years. When assembling the water assembly, first tighten the screws until they stop, and then tighten them diagonally to ensure even clamping of the rubber.
In the old days, when I lived in an apartment on the top floor, where the water pressure was a sluggish trickle of water from the tap, I had to work magic with the water regulator to wash myself. Using a round file, I increased the diameter of the calibration hole to 2 mm, removed the filter mesh and annealed the conical spring of the gas unit. If I missed the size of the hole, I inserted a copper wire into it to make it smaller. Of course, this is a gross violation and the working column had to be constantly monitored, but there was simply no other way out. But there was always hot water.
How to eliminate leaks in gas water heater connections
The left pipe serves to supply water to the gas water heater; a tap is always installed on it to shut off the water supply to the water heater. This pipe is connected by a pipe to the water-gas regulator. From the regulator, water is supplied to the heat exchanger on the right side. The middle pipe of the geyser carries hot water into the water supply system, and it is connected through a pipe directly to the heat exchanger on the left side. The right pipe in the gas water heater serves to supply gas and is connected through a copper tube to the water-gas regulator. A gas shut-off valve must also be installed on it.
Water connections in the gas water heater are made using union nuts (American) sealed with rubber or plastic gaskets. Over time, due to temperature changes, the gaskets lose their elasticity, become hard, crack, and water leaks occur. To replace the gasket, use a 24 key to unscrew the union nut, remove the worn one and install a new one. It happens that one gasket is not enough, the union nut is tightened all the way, but water still oozes out. Then you need to additionally install another gasket. Currently, silicone gaskets have appeared. They are more expensive, but last longer and are more reliable.
How to replace a copper water supply pipe to a heat exchanger
When connecting the copper pipe through which water is supplied from the water supply to the heat exchanger, I encountered a water leak from under the union nut. Repeatedly replacing the gasket only made the water leak worse.
Upon careful examination of the pipe at the point of contact of the flange with the gasket and sanding the surface with sandpaper, a crack was discovered, which increased when reattached. Repair by soldering cannot be used in this case, since when tightening the union nut a lot of force is applied, and the solder is soft, and the crack will appear again.
There was no such pipe in the gas equipment store; it turned out that this item was in short supply. The seller offered to replace the cracked pipe with a corrugated stainless steel hose designed for gas, claiming that it was no less reliable. Since there was no choice, I had to take his advice. These hoses are available in different lengths and can be selected for any replacement situation.
The gas tube, adjusted to its length, was installed without difficulty. Thanks to the corrugation, it bent well. When checking the gas water heater, it turned out that the water, passing through the new tube, made a loud, unpleasant sound. I had to tie the tube to the base of the speaker with wire (as in the photo in the middle), and the unpleasant sound disappeared.
A year later, water started dripping from the gas water heater. It turned out that the stainless gas tube recommended by the seller had rusted at the junction of the tube and the flange, and a fistula had formed in it. Once again the task of finding a suitable replacement tube arose.
The idea arose to try using a flexible water line instead of a copper pipe. In terms of technical characteristics, it was quite suitable. It could withstand operating pressure up to 10 atmospheres and temperatures up to 90°C. True, the internal diameter was smaller and amounted to 9 mm, but there was no other replacement option.
A flexible water line 40 cm long perfectly took the place of the copper pipe. The smaller internal diameter did not noticeably affect the water pressure from the tap. And it shouldn’t have, because water is supplied to the mixer using a flexible hose with an internal diameter of 9 mm.
How to remove and clean the igniter of a NEVA LUX gas water heater
Sometimes it becomes necessary to remove the igniter assembly, for example, to clean dirt. Over time, the igniter nozzle in the gas column becomes clogged with soot, and the wick flame becomes insufficient to instantly ignite the gas coming out of the burners when the water is turned on. Gas accumulates, and when a larger volume of gas ignites than expected, an explosion occurs, accompanied by a loud bang. This is dangerous and the pilot burner must be cleaned as a matter of urgency.
It happens that the pilot burner does not burn with a pure blue flame, but half yellow. Yellowness appears when gas is incompletely burned due to a lack of oxygen in the mixture. This releases soot, which is deposited on the heat exchanger. It is necessary to clean the air supply holes in the burner from dirt.
The photo above is a view of the igniter from below. The igniter assembly consists of three parts mounted on one strip - an igniter, a thermocouple and an ignition electrode. A thermocouple is installed on the left side. On the right side of the igniter there is an electrode for piezoelectric ignition of gas.
When turning and pressing the left handle counterclockwise, the valve for forced gas supply to the igniter opens and the trigger mechanism for squeezing the piezoelectric element is activated, which in turn generates a high voltage, about 15,000 volts. A spark jumps from the electrode to the igniter, and the gas coming out of the igniter ignites.
This photo shows the top view of the igniter with the casing and heat exchanger removed. To remove the igniter for cleaning, you need to unscrew the nut securing the gas supply tube (pictured in the center), then unscrew the outer two screws. Pull the bar towards you and lift it up. The jet is clamped in the igniter by the gas supply tube and falls out when it is released. Make sure you don't lose it. All that remains is to clean the nozzle with a thin wire and the air supply holes.
Some models of geysers are equipped with an automatic electric gas ignition system. As soon as the hot water tap opens, the gas in the burner is automatically ignited. But such models have significant drawbacks: they work unstably with low water pressure in the water supply and require periodic replacement of electric batteries.
If the batteries are not replaced in a timely manner, it will be impossible to light the gas water heater. The last drawback can be eliminated by connecting an adapter instead of batteries that converts the household power supply voltage into a constant voltage of the required value, equal to the number of batteries multiplied by 1.5 V. For example, when replacing two batteries, you will need an adapter with an output voltage of 3 V.
Cleaning the heat exchanger, descaling
One of the common malfunctions of geysers is insufficient water heating
. As a rule, the reason for this is the formation of a layer of scale inside the heat exchanger tube, which prevents the water from warming up to the set temperature and reduces the water pressure at the outlet, which ultimately leads to increased gas consumption by the geyser. Scale is a poor conductor of heat and, covering the heat exchanger tube from the inside, forms a kind of thermal insulation. The gas is open to full speed, but the water does not warm up.
Scale forms when tap water is more hard. You can easily find out what kind of water you have in your tap water by looking into the electric kettle. If the bottom of the electric kettle is covered with a white coating, it means that the water in the water supply is hard, and the heat exchanger is also covered with scale from the inside. Therefore, it is necessary to periodically remove scale from the heat exchanger.
There are special devices on sale for removing scale and rust in hot water systems, for example, Cillit KalkEx Mobile and flushing fluids. But they are very expensive and are not available for home use. The operating principle of the purifiers is simple. There is a container in which a pump is mounted, like in a washing machine, to pump water out of the tank. Two tubes from the descaling device are connected to the tubes of the geyser heat exchanger. The flushing agent is heated and pumped through the heat exchanger tube, even without removing it. The scale dissolves in the reagent and the heat exchanger tubes are removed with it.
To clean the heat exchanger from scale without using automation equipment, you need to remove it and blow out the tube so that no water remains in it. Anti-scale agent, ordinary vinegar or citric acid can serve as a cleaning reagent (100 grams of citric acid powder is dissolved in 500 ml of hot water). The heat exchanger is placed in a container with water. It is enough that only a third of it is immersed in water. Using a funnel or thin tube, completely fill the heat exchanger tube with the reagent. You need to pour it into the heat exchanger tube from the end that leads to the bottom turn so that the reagent displaces all the air.
Place the container on the gas stove and bring the water to a boil, boil for ten minutes, turn off the gas and let the water cool. Next, the heat exchanger is installed in the gas water heater and connected only to the water supply pipe. A hose is put on the outlet pipe of the heat exchanger, and its second end is lowered into the sewer or any container. The water supply tap to the column opens; the water will displace the reagent with the scale dissolved in it. If there is no large container for boiling, then you can simply pour the heated reagent into the heat exchanger and let it sit for several hours. If there is a thick layer of scale, the cleaning operation may need to be repeated several times to completely remove it.
How to determine power
First of all, you need to decide on the power or performance of the gas water heater. These are two interrelated characteristics that simply reflect different characteristics of the unit. Performance is how many liters of water a column can heat per minute, and power is how much heat it can release. Some manufacturers indicate power, others indicate performance, so you need to understand exactly what you need.
Let's first figure out what kind of performance you need from your geyser. This depends on the number of consumers who need to be provided with warm water. There are consumption standards for different types of equipment:
- kitchen sink, washbasin - 4 l/min;
- shower - 7-10 l/min.
The higher the power, the larger the size
If you have a kitchen sink, shower and washbasin connected to hot water, so that all three points work simultaneously and the water temperature does not drop, you need a capacity of 4 + 4 + 10 = 18 l/min. This is a lot, the price tag will be substantial. If you think about it, you will realize that all three devices are almost never turned on at the same time. There are situations when the shower and one of the taps work together. To provide them with hot water, the capacity must be 14 l/min. This is a little more modest, but quite enough for a comfortable stay. Look for the found value in the technical specifications; it should not be less.
Now let's look at power. Gas water heaters can allocate from 6 kW to 40 kW of heat for heating water. Here the division is:
- a gas water heater with a capacity of up to 19 kW is suitable for heating water for one water collection point;
- for two points the power should be from 20 kW to 28 kW;
- three require more than 29 kW.
Now, you can definitely say which geyser is better in terms of power in relation to your needs.
The gas makes a loud noise when burning in the wick.
After installing the Neva-3208 gas water heater, an unpleasant phenomenon appeared that did not affect the quality of the water heater. When the gas burned in the wick in standby mode, it produced a rather loud sound, which was unpleasant to the ear and created discomfort. After some thought and experimentation, I managed to get rid of the noise in a simple way. He assumed that a stream of gas in the burner under pressure, escaping from the nozzle and hitting the wall at the bend of the burner, creates conditions for noisy combustion.
To test this assumption, I inserted a strip of tin approximately 3 cm long and 5 mm wide into the burner, the main thing being that it fit inside the burner. The noise disappeared. If your gas water heater is also noisy, then you can take any metal strip, for example, cut it from a tin can, make a hole in it at the edge, put the strip on a straightened paperclip bent at the end and put it into the burner. The result will be something like a fishing lure. The paperclip is needed so that you can remove the strip of metal back from the burner if the noise does not disappear, although if it burns normally, you don’t have to remove it. This experiment can be carried out without even removing the casing from the gas water heater.
Tools
To perform the work, prepare the following set of materials and tools:
- the certified unit itself with instructions
- drill
- Adjustable wrench
- open-end wrench - 27/30, 32/36
- FUM tape or tow
- PVC water pipes or hoses, with an internal diameter of 13 mm and a length of no more than 2.5 m
- metal-plastic pipes for gas
- gas hose
- fittings - “American” and for metal-plastic
- mounting clips
- gas taps
- water tap
- pipe cutter
- soldering iron
- filters - magnetic and salt
- Mayevsky crane
- dowels
When venting combustion products through a chimney, purchase:
- corrugated or galvanized pipe with a thickness of 1 mm, the diameter must match the diameter of the boiler inlet on the column (see the exact parameters in the instructions)
- rosette ring for decorating the chimney (the dimensions must match the dimensions of the corrugation).
The water coming out of the tap is very hot
In the warm season, when the water in the water supply is warm and its pressure is low, a problem arises, seemingly associated with a malfunction of the gas water heater. When you set the gas supply knob to the minimum water heating position, the water from the column still comes out very hot. This is not a malfunction, it’s just that this model of geyser is not designed for this mode of operation. The operating instructions usually indicate the minimum water pressure at which the gas water heater ensures normal operation.
Solving the problem is very simple: it is enough to limit the gas supply by slightly turning off the gas supply valve installed on the gas pipe in front of the entrance to the gas water heater.
Combustion chamber type
Regardless of the method of gas ignition, in all columns the combustion chambers can be of two types: open or closed.
If the design of the combustion chamber is open, then air enters it directly from the room, and all combustion products are removed using an ordinary hood. Such devices have several advantages:
- simple design;
- makes virtually no noise during operation;
- Most often they do not need electricity.
However, such cameras have one significant drawback. When the hood does not work properly, air pollution in the room can occur.
Closed combustion chambers are typical for gas water heaters with a turbine. The design of such chambers, with the exception of pipes for air supply and exhaust, is completely sealed. Air is supplied using built-in fans and removed through a chimney.
The closed combustion chamber in the column is completely sealed
The closed design of the combustion chamber is characteristic of more modern models of dispensers with automatic operation. Due to the presence of various sensors, such models are considered the safest.