Start of work on testing (pressure testing) of water heated floors
Pressure testing is a hydraulic or pneumatic test for the absence of leaks in a pipeline, its connection points (fittings) and other equipment operating under pressure.
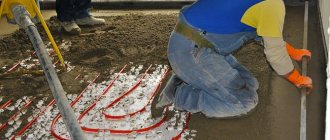
Pressure testing is performed immediately before closing the heat pipes for further laying of the finished floor. With a concrete water heated floor system, testing (pressure testing) is carried out before pouring the concrete screed. With a polystyrene water floor system and with a wooden heated floor system, crimping must be done before covering the heat pipes with sheets of gypsum fiber board or plywood.
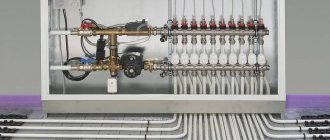
Checking (pressure testing) of a water heated floor is carried out after connecting all heating circuits to the distribution manifold of the heated floor. Let me remind you that the distribution manifold cabinet is installed before the start of all work on installing a water heated floor.
Heating circuits are checked separately. Each circuit is filled with water until the air is completely displaced. For this to happen, the thermostat and control valves must be opened and closed. Instead of valves, you can open and close the flow meters after the air has escaped.
What is crimping and its significance
The installation of a water heated floor cannot be considered completely complete unless quality control measures, which are called pressure testing, have been carried out. It is performed according to a certain algorithm under excess pressure and allows you to verify the tightness of the connections and the absence of hidden defects in the pipes. Therefore, you should approach doing it yourself responsibly.
Do-it-yourself crimping of heated floors
After performing the pressure test, it becomes possible to correct the identified problems and verify the efficiency of the water circuit even before starting the screed.
Depending on the conditions, three methods are used to check the functionality of the installed system:
- switching the water circuit to operating mode with hot water for several days;
- testing at elevated system pressure with cold coolant;
- air pressure testing. The compressor supplies compressed air and opens the drain pipe
Types and principles of operation of pumps for pressure testing the heating system
Kinds
The classification of crimping devices is represented by the following main types:
- manual pump;
- electric pump.
The hand pump is a completely mechanical device. The big advantage of such a device is its low cost, as well as ease of operation and not pickiness. Typically, mechanical devices contain all the necessary components at once - hoses, a pressure gauge and a tank. Among the negative aspects, it is worth noting the low level of productivity. If you use this device yourself, you will have to make great efforts to perform high-quality work to check the system.
Based on the description of the manual pump, the following positive aspects can be identified:
- low cost;
- ease of use;
- high mobility;
- does not require power supplies.
Although electrically driven devices are more expensive and more cumbersome, the effort required to use them is kept to a minimum. Such a hydraulic pump can provide almost any level of pressure in the system. In many cases, these electrical devices are used by professionals when crimping work needs to be carried out frequently and on large objects. Electrical instruments allow you to check heating equipment, sanitary standards of technical devices, cooling and pneumatic devices.
The disadvantages of such equipment include the high cost, although there are many more advantages:
- full automation;
- Possibility of use on large objects;
- saving time and effort;
- high level of productivity.
How to choose?
When choosing a pump for pressure testing, you should consider two main factors:
- the capacity of the heating system in which the pump will be used;
- How often will pressure testing be carried out?
If the system check will take place in a small residential area and the frequency of checks will be rare, then it is not at all necessary to spend money on an electric pump. In this case, a hand pump will do just fine. But if the test involves pressure testing the system in a large room, then the power of a manual device may not be enough, so it is advisable to purchase an electric compression pump. Quite a lot of positive reviews are received by models not with a plastic case, but with an iron one, most often made of steel. And also in many devices there is a special valve that does not allow high pressure in the system during work. This aspect must also be taken into account when choosing a pump.
Connection
Before carrying out work to check the system, as well as connecting the pumping station to it, it is recommended to carefully read the connection diagram and take into account the design of the heating system itself. First, the system must be filled with water at a temperature above 5 degrees
Then a crimping device is connected to it using a hose. Typically a threaded connection is used. Under no circumstances should defects be repaired in a system with the crimping machine running. And also for safety reasons, it is not recommended to set the pressure too high, which can negatively affect the heating system and lead to its breakdown.
Models
Modern manufacturers offer a wide variety of models of pressure testing pumps.
Among the most famous, there are several options.
- NIR-25. This model of pressure testing compression pump is intended for pressure testing and hydrotesting of heating systems. This device is manually driven and is recommended for use with small objects. The pump is compact and light weight. This device is perfect for personal use when conducting tests in a private home.
- Compact-50. This model is made in Italy. Its advantages are contained in the name itself - it has small dimensions and light weight. This pump is equipped with a tank with a capacity of up to 12 liters, hoses and a pressure gauge.
- UGI-1. Another one of the most commonly used models of pressure testing pumps. Such a device allows for high-quality testing of the heating system and is suitable for performing various tasks. UGI-1 is equipped with a 20-liter tank.
Adviсe
Even in a new apartment building with a newly commissioned system, about 10% of effective heating is lost during the first months.
Sludge and corrosion appear in the connecting nodes, which causes scale and sediment to appear. Settling dirt reduces the efficiency of systems. The scale layer can be so massive that it interferes with heat transfer. Because of this, the elements wear out. The first sign of scale deposits is uneven heating of the pipes. Usually in this case the bottom of the batteries is cold. You can also tell about the presence of scale by the characteristic crackling sound of the batteries. This effect occurs due to water vapor that enters the scale. At the same time, the power of boiler equipment decreases, and fuel costs increase.
The system is descaled using a chemical or physical method. Physical methods involve the use of special equipment - compressors. The chemical method is carried out using special preparations. In both cases, cleaning costs will be less than they would be if the node connections were replaced.
In a private apartment, flushing the heating system is possible using improvised means, for example, citric acid. Home craftsmen advise adding detergent with citric acid to the system. The aqueous solution with the products should be left in the system for a day. The soapy water from the system should then be drained, and the system itself should be flushed with a product like Calgon. You can also consider ready-made compositions offered in stores for flushing heating. Purchased funds can be used according to the method described above.
Flushing radiators separately from the system is possible if special taps are installed on them. The device includes a ball valve and a battery plug. A hose is connected to the device, the free end of which is discharged into the sewer. In addition to cleaning the system itself, sometimes it may be necessary to clean the boiler itself if we are talking about heating in a private apartment. When flushing equipment, water must be supplied in the opposite direction from the coolant flow.
In the case of equipment, mechanical or chemical methods can also be used. Boilers must be flushed separately from pipe systems. During cleaning, the equipment must be completely disconnected from the pipes. If the work is done correctly, most of the impurities will be removed. The heating system will operate at its full efficiency. There are no ways to completely eliminate corrosion of metal pipes, because the metal will in any case turn into rusty dust if the system is left without washing and cleaning.
Tests for tightness and strength are required regardless of the installation conditions of the system and the technologies used. When testing modern systems, this technology involves releasing the supplied pressure to the operating value while checking for possible leaks. If defects are found, they are eliminated and the test procedures are repeated again.
Modern techniques make it possible to find even small leaks. However, any problems require a visual inspection. Therefore, specialists checking systems in apartment buildings must have access to the apartments. To clarify the timing of work in your homes, you should contact the relevant housing and communal services service.
See below for tips on performing pressure testing of an air heating system.
Concrete installation system for warm water floors
There are some features of installing warm water floors that need to be studied before starting the process itself.
Worth remembering:
- Re-equipping the heating of your home must begin with preparing the floor. The old floor covering is removed and if there is an earthen floor underneath, then a concrete screed must be poured. If there is an old screed, then it is advisable to check the level differences - a difference of up to five millimeters is allowed, otherwise air pockets may form. If an excess of the permissible error is detected, the surface must be leveled.
- Then follows the insulation of the floor using dense polystyrene foam or penoplex with a thickness of at least thirty millimeters - the colder the insulated floor, the thicker the thermal insulation layer is needed. A damper tape is laid along the perimeter of the wall, which compensates for temperature deformations of the screed and prevents cracking and destruction of concrete. For the purpose of waterproofing, it is imperative to lay a plastic film over the insulation.
- For laying and fastening pipes, there are special mats with clamps that allow you to position the pipeline neatly, with a given pitch and without the use of additional fasteners.
But this option requires significant investment, so it is much more economical to use reinforcement mesh, which will also strengthen the structure. The pipe is laid on the mesh using the chosen method and secured with plastic disposable clamps. A corrugated tube is used to protect expansion joints.
- Each circuit uses a single piece of pipe, since joining sections inside the circuit is strictly prohibited. The coolant can be arranged in a snake or double snake, in a regular spiral or in a spiral with an offset center; the choice directly depends on the temperature characteristics that need to be achieved. The distance between adjacent tubes ranges from seventy to three hundred millimeters. Closer to the outer walls, it is recommended to reduce the step, because along the outer walls the temperature is much lower. It should be remembered that the radius of the loop is not allowed to be less than five pipe diameters, otherwise the pipe wall may crack at the bend.
- An area of one square meter requires about five meters of pipe with an average laying step of twenty centimeters. After the heating system is finally installed, it is subject to mandatory pressure testing under operating pressure within 24 hours to identify possible damage and leaks.
Please note: pipes can be laid in a “snail” or “snake” pattern, or you can choose a combined option for enhanced heating. The “snake” scheme allows you to vary the heating temperature of individual zones in the room, the “snail” ensures uniform heating of the surface over the entire installation area
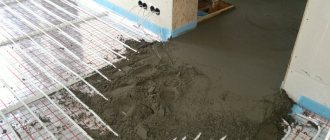
- Only after making sure that the pipeline is intact and in good condition can you begin to fill the screed with sand concrete. The thickness of the screed varies from three to five centimeters, depending on what floor covering is planned to be used for finishing. For ceramic tiles, a screed of five centimeters is quite appropriate; for laminate or linoleum, it is advisable to reduce the thickness to a minimum, reinforcing the structure with reinforcing mesh over the pipes and not using a heat-insulating substrate. During pouring, the pressure in the water supply is not released, so that when the concrete hardens, the pipe is in a state of maximum expansion . It is allowed to carry out finishing work no earlier than twenty-eight days - after this time the screed will reach maximum strength.
Pipe distribution
Installation of a warm water floor
When distributing pipes, it is necessary to create a laying route. Passing through the pipes, the water heated in the boiler cools, and this circumstance must be taken into account when determining the route for laying the pipe circuits. You should remember several rules, the violation of which can later affect the quality of heating and the inconvenience of operating the entire heating system. What are these rules?
- Laying pipes should begin from the coldest areas of the area - from windows, balconies and external cold walls.
- If the hot water inlet does not come from a cold external wall, the part of the pipe between the inlet and the wall must be carefully insulated, wrapped in waterproofing material.
- The water should be hotter near the outer walls, and as the pipe moves towards the warm center, the temperature should gradually decrease. In order to ensure this effect, the pipes are laid in a “snake” pattern.
- In rooms with internal walls (dressing rooms, corridors, bathrooms), pipes are usually laid in the form of a spiral leading to the center of the room. A double step is taken between the turns of the spirally curved pipe. In the center of the room, the pipe is bent, turning back, and the reverse installation occurs - to the outlet (to the outlet and to the control manifold).
- Hydraulic resistance must be taken into account. The longer the pipe, the more turns it has during installation, the more intense the resistance. It is advisable to ensure that the resistance is uniform where the separate collector is located. To do this, long pipes (100 meters or more) must be divided into parts, but you need to buy one pipe for one room, in a single piece.
- You cannot use various devices, couplings, joints on pipes laid in a screed; this will complicate repairs and lead to deterioration of heating. Therefore, pipes are purchased after preliminary and final calculation of the laying route.
- You should not use a single circuit in several rooms. That is why the calculation of the length of the contours must be done separately.
- Loggias, attics, balconies, and verandas are also laid separately. It is impossible to combine one pipe circuit with adjacent rooms due to different degrees of heat transfer. If you break this rule, then, for example, more heat will be spent heating the veranda, and the adjacent room will be poorly heated.
Why do you need to remove air?
The formation of voids reduces the efficiency of the heating system. Pumping equipment, like other components, operates less efficiently. To ensure comfortable indoor temperature conditions for users, more resources have to be spent.
As such voids increase, the pressure gradually decreases. After reaching the maximum minimum level, the corresponding signal is sent to the boiler control unit. In addition to electronic devices, mechanical means for similar purposes are used. This is an emergency situation, so the automation turns off the supply of gas or other fuel.
To turn it on again, you have to manually increase the pressure. But there are a lot of gaseous inclusions in fresh water, so negative processes are accelerated. The equipment will turn off more often.
It should be remembered that oxidation, which destroys metals, occurs in the presence of water and oxygen. Adding a new coolant activates the corresponding negative processes. In this operating mode, the durability of heating equipment is reduced.
It is necessary to exclude the appearance of air “plugs” in the heat exchange units of boilers. These parts are exposed to very high temperatures.
If heating is not uniform enough, the heat exchanger will be damaged beyond repair.
The reasons listed above are enough to understand the need for preventive measures. Carrying them out will prevent complex breakdowns and costs associated with restoration work.
What is a multimeter?
A multimeter is a multifunctional electrical measuring instrument that can be used to measure the characteristics of an electrical signal. Having a relatively small size, it performs the functions of an ohmmeter, voltmeter, ammeter and a number of other devices. The device belongs to the standard category and has become quite widespread.
The multimeter can also be used to diagnose a warm home heating system. It is used to determine the resistance value of the heating cable.
Air removal algorithm
As the coolant moves through the system, gas accumulates at the highest points. For a heated floor system, this is a manifold distributor (comb). Mayevsky taps or automatic air exhaust devices are screwed into them during installation.
Might be interesting
Below is the standard sequence of correct actions:
- Many modern pumps of this type are equipped with a step speed controller. It is set to position “1”, which corresponds to minimum performance. It will take more time, but the removal of gases will be accurate.
- Overlap all contours except one. Further, similar operations are performed sequentially in other areas.
- The screw of the Mayevsky primary circuit valve is turned with a slotted screwdriver in a counterclockwise direction. Before this, the polymer insert is turned with the hole down, and a suitable container is placed to collect the liquid.
- After the air has escaped, the screw is turned in the opposite direction until the tap is completely closed.
- Despite the fact that the minimum engine speed is set, the circuit will have to be pumped repeatedly. After the first release of gases, the pump is turned off. Wait for air to accumulate in the tap, open the tap. Next, power is supplied to the electric drive again, and the coolant is circulated at low speed for several minutes.
- This procedure is repeated 3-4 times. Afterwards, turn off this circuit with a tap and move on to the next one.
Typical pump with red shaft speed control knob
After completing the entire set of work actions, the pressure will need to be raised to the nominal level. It should be understood that during this procedure air will again enter the system. Therefore, it is possible that we will have to release it again.
Description
The structure must be filled with water through the coolant fluid supply. To close all return valves, you need to determine their color - they are blue. In order for the supply manifold to enter, the valve must be opened. If hissing sounds are heard, this indicates that the system has begun to fill with water. The sound occurs due to the release of air from the Mayevsky tap. If another device is installed - an automatic air vent, it will work at this stage.
Then each of the valves in the opposite manifold is opened and air is pumped. At the end of its output, shut off the shut-off valve and switch to the next one. The procedure should be repeated at all stages. Close the tap to the manifold that supplied it, and then open it to the one that supplies it.
When the system is completely filled and the air has been removed, you need to leave it under pressure, check all circuits and make sure there are no leaks. If it is not detected, this stage of water pressure testing can be considered completed. And, having discovered a leak, you need to move on to fixing the problem.
Pressure testing of pipes using water
What else will need to be taken into account in the process of designing a heated floor?
In the process of developing a project for a heated floor system, it is recommended to make a schematic drawing indicating the laying of pipes, main dimensions, distances and indentations, and furniture placement.
Collector group
At the design stage, the type of coolant is determined: in 70% of cases water is used, since it is the most accessible and cheapest substance. Its only drawback is its reaction to temperature changes, which result in a change in the physical properties of water.
Floor pie with pipes in screed
Antifreeze based on ethylene glycol or propylene glycol with special additives that reduce the chemical and physical activity of liquids is often used as a coolant for underfloor heating. In any case, the type of coolant must be taken into account at the design stage, since its properties form the basis for hydraulic calculations.
Antifreeze as a coolant
You will also need to take into account the following nuances:
One circuit is installed per room. To place the collector, choose the center of the house. If this is not possible, then to regulate the uniformity of coolant flow through circuits of different lengths, flow meters are used, which are installed on the collector. The number of circuits connected to one collector depends on their length
So, with a circuit length of 90 m or more, no more than 9 circuits can be connected to one collector, and with a circuit length of 60 - 80 m - up to 11 loops. If there are several collectors, each has its own pump. When choosing a mixing unit (mixing module), it is important to take into account the length of the circuit pipe. A more accurate calculation would be based not only on data on heat loss in the room, but also on information on heat influx from household equipment and equipment, from the ceiling, if a heated floor is also installed on the upper floor. This is relevant when calculating for a multi-storey building, which is built from the upper floors to the lower ones. For the first and ground floors, the thickness of the insulation is taken to be at least 5 cm, for higher floors - at least 3 cm
Insulation on the second floor is used to prevent heat loss through the concrete base. If the pressure loss in the circuit exceeds 15 kPa, and the optimal value is 13 kPa, it is necessary to change the coolant flow towards a decrease. You can lay several smaller contours in the room. The minimum permissible coolant flow rate in one loop is 28-30 l/hour. If this value is higher, then the loops are combined. Low coolant flow leads to the fact that it cools down without passing the entire length of the circuit, which indicates the inoperability of the system. To fix the minimum value of coolant flow in each loop, use a flow meter (control valve) installed on the manifold.
Connecting pipes to the collector
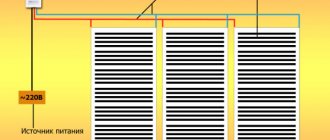
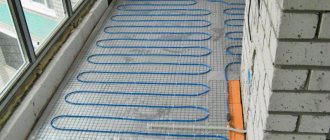
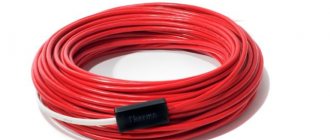
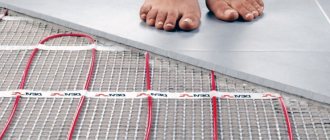
How to start an electric heated floor with your own hands
H2_2
Setting up this floor has some features:
- It is prohibited to install furniture in places where cables bend: this section of the floor will warm up more slowly and its durability will decrease. For a tiled floor, this condition is less important than for a parquet floor, since the latter has lower thermal conductivity.
- The space under the cables must be filled with foamed foil insulation, laying the coating with the foil layer inside: as a result, faster heating is achieved. This is an important factor if the coating is not parquet, but tiles, which have a lower thermal capacity.
- It is necessary to turn on the electric heated floor through the thermostat, having first adjusted it to the required heating temperature. If after 6-8 hours of testing the temperature of the external surface of the cables is within 60 °C, then you can cover the floor with a screed or install tiles.
- Filling is carried out after all the connecting elements are hidden in the baseboards or other insulating elements of the coating. The startup time of this heating system is highly dependent on voltage fluctuations in the network.
You can begin using any heated floor laid in a screed 28 days after completion of installation.
You may be interested in: What should the temperature of the heated floor be?
Types of water heated floors
Nowadays, such heating is presented in several versions, from which everyone can choose the one that suits them. A modern heated floor design can be:
- Concrete
. This water-heated floor is assembled under tiles and other coverings. - Flooring
. This type is used under laminate or other wood covering.
Concrete water heated floor
In this system, heating elements are mounted under a monolithic screed. The technology is associated with “wet” work, which requires large physical and time expenditures. Water heated flooring under laminate of this type can only be done with special skills and knowledge. The laying technology consists of the following steps:
- Expanded polystyrene is laid on the base; its purpose is to save heat in the room so that it does not escape through the ceilings in the lower floors.
- Then a damper tape is laid, which is responsible for compensating for the expansion of the screed during heating.
- Next, a mesh of reinforcement is laid, into which pipes are subsequently placed.
- After laying the pipes, the system is tested.
- The finishing coat can be applied after the concrete has completely dried. On average, this period can take up to 28 days.
Water heated floor system
The main difference of this option is that there is no need to use a solution. In dry water heated floor technology, heat distribution occurs thanks to aluminum plates into which the pipes are laid. They are covered on top with cardboard, polyethylene foam or gypsum fiber sheet. The final layer is the selected coating. It is laid on top of the structure without using a screed. This type has the following advantages:
- quick installation;
- can be used immediately.
How to fill coolant
Before pouring the heated floor, you need to close all the valves of the manifold assembly and connect the hose to the inlet tip. If you are planning to flush the system, then it is also better to attach a hose to the outlet tip, the second end of which should be led into a sewer, container or drain hole.
Start pouring with one loop. The valves on this circuit open (all others are closed), it fills, air is released (bleeder valves hiss). Turn on the pump for a short time. The air vents begin to hiss again, the pump is turned off. We waited until all the air came out and turned on the pump again. Repeat until air stops escaping, then proceed to fill the next loop.
The coolant must be poured into the underfloor heating system through the corresponding collector inlet.
Before filling another circuit, the valves of the filled circuit are closed. The process is repeated until all the loops of the heated floor are filled. Then all the valves (input and output) of the working circuits are opened, water (or other coolant) is pumped until the air is completely removed. The system is ready for testing or launch.
Method of performing pressure testing using water
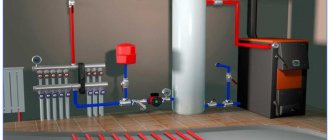
Before performing pressure testing yourself, you need to install the collector box at the selected location and connect the mounted heating water circuits.
Installation of the manifold cabinet
Then the circuits are filled with water from the supply. To do this, close the caps on the return manifold, and open the tap on the supply. The water entering the pipes begins to displace air from them with a clearly audible hiss through an automatic air vent.
After this, the return valve opens to also bleed off the air. If there are several circuits, then the actions are repeated with each of them until all the air has left the system. After this, you should close the valve located on the supply at the inlet to the manifold.
The next action is to open the valve located in front of the return line.
The process of crimping a heated floor
- If a control check method is chosen in the form of setting operating temperatures, then this should be done gradually. The initial temperature of the coolant in the circuit should be 20°C. After waiting several hours, it is raised another 5°C, carefully monitoring the condition of the joints, external surfaces of pipes, and connections.
- If leaks appear, the water is drained from the system and corrective measures are taken. After this, the coolant is supplied again and when the design temperature is reached, the system remains for two to three days. Having determined after a visual inspection that there are no malfunctions, the temperature is reduced so that the water in the system is cool, and the screed is poured.
Collector diagram
- The second method is based on creating excess pressure. In this case, after the system is completely filled with cold coolant, a pressure is created that should be 1.5–2 times greater than the working one. The water circuit remains in this state throughout the day. During this time, places are identified where water leaks due to defects in the pipes themselves or loose connections. Troubleshooting is carried out after draining the coolant, and then the tests are repeated.
Features of hydraulic testing depending on the type of pipes
Water underfloor heating can be installed using different types of pipes:
- Metal-plastic pipes. When constructing warm hydrofloors from metal-plastic pipes, it is recommended to carry out pressure testing by injecting cold water. In this case, the maximum permissible pressure should be 6 bar. Testing is carried out within one day.
If the pressure remains unchanged, then everything is normal, you can proceed to the construction of the screed, but it must be taken into account that filling is carried out when there is pressure in the system. In addition, if the test is carried out at a pressure above 4 bar, the air vents must be tightened, otherwise water may pass through them.
- The cross-linked polyethylene pipeline is produced using modern technology that allows cross-linking of molecules. When testing with such a pipeline, increased pressure is created (minimum 6 Bar). After 30 minutes, if the pressure drops, it must be restored and the system tested for another thirty minutes. Then the procedure must be repeated, the warm floor should work in this mode for another 24 hours. If, after this period, the pressure has decreased by a maximum of 1.5 Bar, then the test is considered to have been successful.
It happens that after testing with cold water, it is recommended to test with hot coolant. In this case, it takes several days to check all joints and connections. If the pressure level is normal, then after the system has cooled down, you can fill in the screed.
The nuances of filling the system with coolant
First of all, before starting the heating of the floor covering for the first time, you should organize the circulation of liquid through the heating circuits and remove any air pockets.
The method in which the coolant will be supplied depends on the design features of a particular system. If you plan to use tap water, then a tap is specially installed for this purpose, which opens its supply.
When you need to fill in other liquids, then use the tip with a shut-off valve located in the manifold, in its supply part. Pressure testing equipment is connected to it, which is used, among other things, to fill the working medium into the system. Such devices are produced in manual and automatic types.
You don’t have to purchase a crimping machine, but rent it from a specialized store. But when the coolant is water, it must be used for a heated floor system annually before the start of the heating season in order to replace the working medium. Perhaps then it is better to purchase this device. To start the equipment, there must be a special tap on the output manifold.
Before filling the underfloor heating system with coolant, it is washed with running water. After completion of the installation work, lubricant and other materials from which the elements of the heat supply structure were made remain inside it. Often small shavings and construction debris get into pipes when they are laid.
For this reason, flushing is a must. For this purpose, the system is filled several times with water and then drained. Once the liquid becomes clear, the flushing is complete.
In addition to the first launch of a warm water floor, this procedure must be performed before each coolant replacement. When using soft or distilled water, this activity is carried out annually.
Which type of crimping is preferable?
It is preferable to pressurize the system with air. Why? If you pressurize the system with water in the summer and it will remain under pressure until the cold weather, and you cannot start the system in a timely manner for some reason, then with the onset of cold weather there is an obvious risk of defrosting the heating system. It doesn't matter whether it's underfloor heating or radiators. With air there is no danger: you can press it and forget it. This especially applies to heated floors, because if water can be drained from the radiator system at any time and quickly without problems, then it will not be possible to drain it from the heated floor.
Crimping options
Taking into account the existing conditions, you can organize crimping of a heated floor with your own hands, using one of three methods:
- bring the water circuit of the underfloor heating pipeline to operating mode using hot water. Hot fluid testing of water pipes is carried out over several days;
- perform testing by pouring cold coolant and creating increased pressure;
- carry out pressure testing of the warm air supply.
Using water
Before the inspection is carried out, a manifold cabinet is installed at the selected location, and heating pipes are connected through which water will move.
Now the water supply tap opens and the system is completely filled. At the same time, the caps on the return line are closed. The incoming liquid displaces the air; the characteristic hiss emitted by the automatic drain will remind us of this.
Then you should open the return valve to bleed out any remaining air. If the system is arranged in several circuits, such operations are performed for each one in turn. The water supply stops and the valve is closed.
The next working stage is opening the valve installed before the return.
If you choose the method of crimping a heated floor system in the form of setting operating temperature conditions, then this is done gradually. Initially, the water temperature in the pipes should be about twenty degrees. After a few hours, the mode rises by five degrees, while the joints and external contours of the pipes are under close supervision.
If a leak occurs, water is drained from the system and the fault is repaired. Then the coolant is re-supplied until the design temperature is reached. The heating system remains in this state for several days. Having visually determined that everything is in order with the pipes, the water is gradually cooled, and you can begin arranging the screed.
Pressure testing of heated floors with water
The second test option involves creating pressure by air masses to the required number of atmospheres. In this case, pressure testing begins when the floor heating system is filled with cold water. The pressure created must exceed the operating limit by one and a half to two times, and this state of the circuit is maintained for 24 hours. This will be enough to identify any weak spots where water can leak through. To eliminate malfunctions, the water is drained, then the checks are carried out again.
Air crimping
After installing the heated floor, it can be pressurized with air. This method is used if it is not possible to check the pipes by filling them with water.
Actions to pressurize a heated floor system with air are performed in the following sequence:
- First, the tightness of closed taps is checked. If your system has an automatic air vent, it must be removed and a temporary plug installed;
- a device that creates pressure is connected. To pressurize a heated floor with air yourself, you can use a car pump with a pressure gauge or a compressor unit. A hose is connected through the fitting, and a tap is installed after the connection point. When pressing the pipes of a heated floor system, the pressure is created to exceed the operating limit several times. There is an important feature here. Increased pressure must be created exclusively in the pipes, and the section from the boiler to the collector is not checked in this way, so as not to cause damage to the heating equipment, which may not be intended for such overloads;
- after the required air pressure has been created in the system, the tap is turned off, and the pipe circuit remains in this state for twenty-four hours. During this time, the pressure level should be monitored - it should remain unchanged;
- To detect leaky connections, the joining areas are covered with a soap solution. Bubbles that appear mean that repairs need to be made in this area.
Air pressure testing of heated floors
If the pressure testing of the heated floor before pouring water is completed successfully, then the system remains with air until the screed is filled.
Recommendations from experts
When filling heated floors with water at high pressure, there is a real danger of pipes jumping out of their seats. This usually happens in places where mounting tape was used. To avoid such situations, it is necessary to first install the beacons for the screed, securing them with small piles of mortar to be sure. This will allow you to acquire an additional holding frame after the mixture has hardened. If the contour was attached to the mesh, then there is no need for additional strengthening measures. Before laying the solution, it is recommended to rinse the pipes to remove possible contamination with clean running water. It is better to repeat the washing several times: the signal to stop the procedure is that the water coming out will be completely clean.
