Warmth in a private house or city apartment is an important component of a comfortable life. A heat-reflecting screen for the radiator will help you save a few degrees in the cold winter (and at the same time save a little on heating costs). I will tell you how I built such reflectors in each room of my cottage, and even hint at how much you can save with the help of this simple device.
Design features of decorative screens
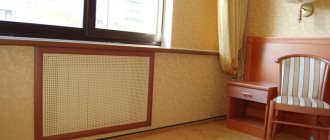
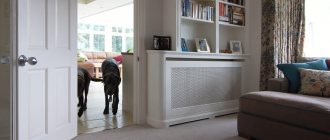
The main function of a decorative screen for a battery is to hide its unaesthetic appearance and support the design style of the room. At the same time, there are no large costs, as if you had to change radiators.
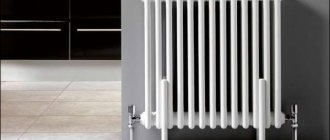
- Cast iron batteries often have to be refined.
- Therefore, it is important to ensure that access to the valves on the supply lines remains.
- They regulate the heating temperature of the radiator depending on weather conditions.
- And when starting the heating system, sometimes you have to drain the water on the upper floors if air gets into the system.
- Access will simply be necessary if one of the sections leaks in order to disconnect the battery.
- All these issues will be easily solved if the screen on the battery has an open end or it will not be difficult to remove it.
To ensure that such radiator decor does not reduce the output of thermal energy, its surface must be minimal.
The battery can be located either in a niche or protruding. Therefore, different screens are produced: the niche is decorated with a screen-panel, and the protruding radiators are hidden with a screen-box.
Wooden, metal and glass battery screens are in greater demand than others. Manufacturers offer models made from medium or high density fiberboard, plastic and rattan.
Today, the screen can be selected not only by the material it is made of, but also by color, pattern, and forged elements. It all depends on desire.
Kinds
Battery sheathings are made in several types:
- Flat, designed for installation in niches.
- Wall mounted ones without a cover hide batteries that do not protrude beyond the edge of the window sill.
- Wall-mounted ones, which have a removable lid on top, are used for radiators that protrude beyond the window sill.
Frame, which is a box that completely hides the placement of the radiator.
Glass screens
For the decoration of old batteries, screens made of tempered glass with 8 mm thickness are offered. It is very difficult to break such glass. The edges of the structure are polished, which makes it safe to use and gives it greater strength.
- Caring for a glass screen is not difficult. It can be washed with regular detergent and water. The glass is coated with a special substance that is not afraid of this procedure.
- The decor for the glass battery does not interfere with thermal radiation: cold air comes from below, and the warm flow goes upward. The material transmits the sun's rays well. The structure is easily dismantled.
- Decorative screens are also produced from acrylic glass with a thickness of up to 2.5 cm. They weigh significantly less. This glass can be easily transformed into any shape, and there is also a large selection of colors.
If you choose a screen based on heat transfer, then the glass structure will have the maximum heat transfer. Any old battery with such decor will look modern.
Manufacturers offer models with photo printing, different colors, tinting, deep etching, and decorated with LED backlighting. Glass can be transparent or frosted. One photo print on the screen can be replaced with another over time. Choosing the necessary decor to match the style of the room is not at all difficult.
The price of a radiator screen depends on its size, the thickness of the material, what decorative elements were used, and the method of installation of the structure.
- Thus, screens made of transparent glass cost from 8 thousand rubles. for 1 m2;
- With matte material – start from 10 thousand rubles;
- For a color screen, the price starts from 11 thousand rubles;
- A model with a sandblasted design costs at least 13 thousand rubles;
- For choosing decor with photo printing, you can pay at least 15 thousand rubles.
Branded or homemade?
And this is up to anyone. My good friend, Kulibin from God, made himself a whole set of universal nets, which he adjusted to his Chevrolet. But he is a hands-on fan with a lot of free time. He tried both rigidly fixed and removable structures, securing his crafts with screws or clips. Material: aluminum or plastic. Aluminum is light and durable, but a friend says that over time it quickly fades. Plastic is easy to process, but its strength is not so great. That's why his latest craft is made entirely of stainless steel! It looks decent, but it’s better not to ask about the cost and fuss...
As for the type of fastening, the removable screens are easy to remove for cleaning, but on the road they like to rattle obnoxiously. On the contrary, the tightly fixed structure does not make any sounds when driving, but, frankly, it is inconvenient to clean it.
Metal screens
Metal decorative screens for radiators are made from steel or aluminum mesh, which does not interfere with heat transfer. The larger the holes, the better the heat passes through. Because it does not linger in a closed space.
Despite the fact that the thermal conductivity of the metal is good, the thermal power has dropped due to the small surface of the structure.
The metal screen is easy to install. Different colors and patterns on it will satisfy any needs. They come in flat form and in a box with an openwork lattice.
The price is influenced primarily by the screen size. The largest height of the hanging screen can be 850 mm, and the length up to 2000 mm.
- If a large structure is needed, it is made of several parts.
- A screen with a height of 800 mm, with a length from 700 mm to 1500 mm costs from 2 thousand rubles. up to 4.3 thousand rubles;
- A height of 600 mm with the same height parameters costs from 1.8 thousand rubles. up to 3.9 thousand rubles;
- And a height of 400 mm costs 1.7 thousand. rub. – 3.6 thousand rubles.
Size calculation
Making your own pipe heating device is not very difficult. But there is one important point here - to correctly calculate the dimensions of the device. After all, such an indicator as heat transfer will depend on them.
Required indicators
The calculation is not easy, because it requires some criteria for the premises itself. For example: glazing area, number of entrance doors, what windows are installed, whether the floor, walls and ceiling are thermally insulated.
It’s difficult to take all this into account, so there is a simpler option that takes into account only two indicators:
The heating radiator is selected based on the heat transfer per 10 m² equal to 1 kW of thermal energy. The ceiling height should not exceed 2.8 m.
How can this help when assembling a homemade heating device? To do this, you will have to compare it with a conventional cast iron radiator of the MS-140-500 brand. The heat output of one section is 160 W, volume is 1.45 liters. What does this give us?
You can determine exactly how many sections will be needed if you use a cast iron device. The total volume of coolant that will fit in one battery is determined from the number of sections. And knowing this number, you can approximately determine the volume of the pipe radiator.
The thing is that the thermal conductivity of steel is 54 W/m*K, and that of cast iron is 46 W/m*K. That is, a small downward error will not have any effect on the quality of heat transfer.
Calculation example
Conventionally, we will assume that an eight-section cast-iron heating device corresponds to the above-described ratio. Its volume is 8x1.45=11.6 liters.
Now we can calculate the length of a pipe with a diameter of 100 mm, which we will use to assemble a homemade battery. The standard cross-sectional area of the pipes is 708.5 mm². We divide the volume by the cross-section, we get the length (we convert liters to mm³): 116000:708.5= 1640 mm. Or 1.64 m.
A slight deviation in both directions will not greatly affect the heat transfer. Therefore, you can choose either 1.6 or 1.7 m.
Wood screens
Wooden battery screens are made from beech and oak. They are said to be reliable and durable decorative structures. Screens are optionally painted, enameled or tinted.
For better heat transfer, they are raised above the floor, and holes are made on the box, which increases air circulation.
- In children's institutions, this is the most common decorative option for radiators.
- A model made of slatted material will be cheaper, and the function of heat exchange and protection against burns will be just as good.
- With a rail thickness of 28 mm, the price of the screen starts from 1.4 thousand rubles. per linear meter.
- The cost increases to 1.6 thousand rubles. for 1 linear meter, if the slats are varnished.
The designer robot models look very nice. But the price for them will increase significantly. If you wish, you can try and find where to buy a screen for a radiator made of MDF with imitation of valuable wood.
This model looks impressive, but the price is much lower than that made from natural wood. So screen size 55 - 70 mm perforated HDF panels cost 1.2 - 5.5 thousand rubles. taking into account the size of the structure. If the grille is made of rattan, then the screen will cost from 2.0 thousand rubles. up to 5.5 thousand rubles.
Manufacturing
You can make a battery grid yourself, following the step-by-step instructions.
- First you need to make markings. To do this, you need to take the battery parameters as a basis, add 50mm to the height, and 100mm to the width. This will give you the dimensions of the front panel, which can be made from metal mesh.
- The sides can be made from MDF. They will be the same in height as the front part, and the depth is equal to the thickness of the battery plus 30-35mm.
- The lid can be marked according to the obtained parameters for the width and depth of the product, but it is better to make it with 15mm protrusions on each side.
- Cut out all the parts according to the markings and smooth their edges.
- Treat the wooden blocks with an antiseptic, prime them and build a frame from them.
- Cover the front and sides of the frame with prepared parts using self-tapping screws.
- Attach the cover to the rear upper beam using a piano hinge.
- Paint the resulting structure in the desired color or varnish it.
- Cover the wall behind the battery with foil and install the product.
- For greater stability, the grille can be fixed using brackets or suitable fasteners.
- Screw the adjustable feet from the bottom.
The decorative protective radiator trim is ready!
Having received the above information, you can take a more rational approach to choosing a protective grille model suitable for a particular interior. A decorative product will help disguise the unaesthetic appearance of the battery, protect the radiator from all kinds of contaminants, and relieve parents from constant supervision of children.
Plastic as a screen material
Plastic does not have the same thermal conductivity as aluminum or steel. To increase the strength of the material, you need to increase its thickness, which further increases heat loss.
- Plastic screens are not installed in children's institutions.
- Because when heated, they begin to emit toxic fumes.
- These designs are recommended for non-residential premises and offices.
The big advantage of plastic screens is their resistance to wet environments, resistance to corrosion, and low weight of the structure. The price of such a grill is about 200 rubles.
The grille is selected with a minimum surface area and installed at a distance from the floor, and then it will not only decorate the room, but also preserve the microclimate of the room.
Design and Physics
Let's remember from school: a completely black body emits and absorbs radiation best. The external shield should absorb the IR from the battery and then radiate it into the room. To do this, firstly, it must have good thermal conductivity so that the absorbed IR does not return back. Secondly, the darker it is, the better. How to decorate the outside of a battery is primarily a matter of taste; but the back of the screen should be painted black in any case.
Let's explain with an example: Let's say the screen is black; IR absorption coefficient k = 0.8. It absorbs radiation on one side and emits on both sides. The thermal conductivity of the screen material is also not infinite. The reverse radiation will additionally heat up the battery and it will begin to emit stronger radiation. The exact calculation is quite complex, requiring knowledge of advanced mathematics, but the end result is simple: 1 divided by the square root of 2, multiplied by the square of k. That is, 0.707x0.64 = 0.453 of the standard IR flow will go into the room.
This is already less than what an aluminum radiator with profiled channels will “pull” with deteriorated convection. With a bright screen, heat transfer to the room will further worsen. Where does unused heat go? It goes into the return pipe, and you still pay for it. Is it possible to improve the matter? Yes, you can. First of all, additional thermal shielding from the wall.
Photo of the screen on the heating battery
Installation of the outer grille element - metal frame
Window grilles are made both with and without an element such as a metal frame.
To produce a similar version of a window grille without a frame, use only:
- steel strip;
- reinforcing rod.
If you need to install bars on the windows of a country house, then welding and forging elements are unlikely to be needed. Especially if the house is simple, wooden. In this option, the vertical parts are located at a considerable distance from each other, so that natural light will not be obscured.
Grille without external metal frame
Step one. A metal strip 4 mm thick and 40 mm wide is used. But the length depends on the following factors:
- how wide is the window opening;
- how many crossbars are there in the lattice?
You will also need smooth reinforcement Ø 14 mm. The length of the reinforcing bar will depend on:
- on the required number of vertical elements;
- from the height of the window.
In addition, you will need to have a threaded rod Ø 10-12 mm.
To create the main grille (horizontal), you will need to stock up on two metal strips of sufficient length. Their size should be 5 mm less than the width of the window opening. The strips will need to be secured in the lower and upper areas of the grille.
The third strip will be installed in the middle part of the structure. This strip will become the connecting link between several middle or all reinforcement bars.
Step two. An auxiliary reinforcing bridge will need to be welded into the central part of the grille.
Step three. Now you need to process the metal strips, cut according to the required dimensions. The edges of the strips are rotated 90 degrees.
Step four. The edges of the strips are highlighted - approximately 10-12 cm. The edge is laid on the table and securely fastened to the metal tabletop. Through a gasket strip made of metal, that is, quite strong, this element is tightened with two clamps. You can clamp the strip in a large vice.
Tightening metal strips with two clamps
A gas wrench is used to grab the free edge of the strip and slowly turn it at a right angle. Such actions are carried out with each long side of the strip.
Step five. When the strips are prepared, markings are made on them in order to drill a hole, the diameter of which is 1-2 mm larger than the same parameter of the reinforcement bars. A hole Ø 15-16 mm is drilled.
Now the strip can be moved to make another hole at the same distance from the previous one. Such actions will be carried out until the last hole is drilled.
Step six. The holes are drilled, you can insert reinforcement rods into them. The grille elements are assembled into a common structure and fastened together by welding.
Step seven. When bending the edges, the mounting areas of the strips are highlighted. Markings are made on them to weld the threaded rods. Each of the pins should have a length equal to the thickness of the window block with an addition of 3 cm (1-2 cm should be removed from the edge). These additional 3 centimeters will be required to screw the locking nuts from inside the room.
Step eight. You need to weld the studs to the side of the strip that will press against the window frame. Welding should be a continuous seam. After welding, a nut will be immediately screwed onto the stud.
Assembling a grille with two transverse stripes
Step nine. To clean the grate from rust, use an iron brush. After this, each grille element is wiped with a degreasing solution. You need to wait until the solvent evaporates and the grate dries.
Step ten. Next, the window frame is marked and holes are drilled in the designated areas. Then the grille will be attached to the window block through welded pins inserted into the holes.
Step eleven. You can lift the grille and press it against the window block with the ends of the pins. Then there will be points on the frame that have the meaning of marks. Holes are subsequently drilled through these marks.
Welding studs
It is advisable to drill holes using a wood drill. Its diameter should be 2-2.5 mm wider than the diameter of the stud. Then the pin will fit freely but tightly into the “socket”. The drill must have a length that exceeds the thickness of the window block by at least 1 cm.
Step twelve. The grille is mounted on the frame. For this purpose, you will need to insert pins into the holes of the window block. From the inside, put washers of sufficient width on and tighten the nuts.
Video: How to make window bars with your own hands:
Plasterboard finishing
Using drywall you can easily hide an unsightly battery. You must have minimal skills in repair and construction work. The method allows you to completely close the radiator and niche. To disguise the battery, you need to make a plasterboard box attached to metal profiles. It is attached to the wall, all holes from the screwdriver are carefully puttied and sanded. The structure is covered with a primer, and then with a layer of paint. It is necessary to leave windows for ventilation, thanks to which warm air will circulate in the room.
