Insulating a house without vapor barrier work with modern life and new types of insulation reduces after some time the effect of the work done to almost zero. The reason is the water appearing inside the insulation.
Skeptics may argue that no one bothered with vapor barrier before, and houses have stood and are standing for tens, or even hundreds of years. All this is true. But before, in private houses they did not dry washed clothes, there were no baths with toilets, etc. And this is a huge amount of steam inside the room, which is looking for a way out. There were no modern insulation and waterproofing materials - more and more glassine and roofing felt, which easily let steam molecules pass through them.
Therefore, many home craftsmen who carry out repair work on their own are faced with difficulties: why do they need a protective barrier against steam, what material to use, how to lay it correctly. We will devote this work to the problem of how to properly install a vapor barrier.
Why do you need a vapor barrier?
There is probably no person living in a region with a variable climate who would not encounter condensation on windows during the cold season (an explanation of the physical processes occurring is given in the work “Why do plastic windows fog up and what to do about it?”). The same processes occur in any other structural elements of the building. However, condensation does not form on their surface, because at the design stage the so-called “dew point” is hidden inside the wall, floor, and ceiling.
Calculated “dew point” at a wall without insulation.
When thermally insulating a house or apartment, the owner violates the calculated temperature distribution schedule inside the insulated structure. As a result, the “dew point”, at which steam molecules condense into a wet film or drops of water appears either inside the insulation or on the surface of the insulated structure. In both cases, there is nothing good: the thermal insulation properties of insulating materials are reduced, and a base appears for the growth of colonies of microorganisms: mold, fungus.
Insulating the wall from the outside changed the thermal balance in the thickness of the wall, moving the dew point into the insulation layer.
At the same time, it makes no difference on which side the insulation is carried out. In any case, the same processes occur.
It seems that a layer of insulation from the inside is a very bad solution, leading to a constantly wet wall.
The solution to the problem was suggested by heating engineers. Their argument is simple: steam turns into water at a certain ratio of humidity and temperature. If the access of steam molecules to the “dew point” is limited, then there will be no condensation. The builders instantly turned the theoretical hint into a practical solution. This is how vapor barrier materials appeared, the main function of which is to put a barrier to the movement of water in a vapor state.
Installation features
It is important not only to install the vapor barrier correctly, but also to ensure a ventilation gap between the vapor-proof layer and the cladding of the structure for finishing, for which purpose counter-battens are placed along the sheathing
. Moisture settling on the rough side of the laid vapor barrier sheets will evaporate naturally without damaging the finish.
Scheme of an insulated roof with a ventilation gap
If the vapor barrier is installed correctly, the insulation is reliably protected from moisture. Almost half of the problems associated with freezing and damage to structures are associated with defects in the installation of the vapor barrier
.
Operating principle of vapor barrier
In the warm season, the air temperature and humidity outside and in the house are close in value. In this case, no negative processes occur inside or on the surface of the building’s structural elements.
The situation looks completely different in winter. When it’s cold outside, the humidity is much lower (if it rises, it will settle in the form of frost), but in an apartment (house) it’s much higher, as a result of which the partial pressure inside the room increases. When there is a pressure difference, the air always tends to where the pressure is lower. With it, steam molecules are released through the building structures to the street.
Passing through the walls, floor, and ceiling, the vapor cools down. At a certain point in the structure, a situation arises when humidity and temperature come into such a relationship that the process of transition of steam into a liquid state begins. This conditional place in the building rules (SP 50.13330) is called the “plane of maximum moisture”, and popularly – the “dew point”.
For information: if the calculations of the wall thickness are incorrect (underestimated), the dew point is as close as possible to the surface of the facade on the street side. The result is not long in coming: the wall freezes.
You can protect building structures from the harmful effects of humidified warm air with a barrier to steam molecules. This can be any material (metal, glass, plastic, etc.) that does not allow moisture to pass through. But air is not only vapor molecules, but also oxygen, nitrogen, carbon dioxide, etc. As a result, in a tightly clogged apartment or house, poorly functioning ventilation is not able to provide normal air exchange - mustiness appears.
But there is one nuance here - the vapor molecules in the air are among the largest. Therefore, in its path it is possible to place such protection that vaporous moisture does not pass through, but other components of the air freely penetrate through it.
This protective system is called a vapor barrier. This leads to another conclusion: vapor barrier is not a vapor barrier film, but the functional purpose of a protective layer.
Differences between vapor barrier films and waterproofing films
With the advent of new types of materials, not only “home craftsmen”, but also professional builders began to confuse the concepts of vapor barrier and waterproofing. To understand the difference between them, let's look at the terms in more detail.
Vapor barrier involves creating a barrier against water in any state of aggregation, liquid or vapor. This means that the vapor barrier material is also waterproofing.
The main task of waterproofing is to combat moisture, for which a large number of types of materials are used. Among them, a new product has appeared: diffusion membranes with microperforation, through which steam passes along with air.
In many cases, these membranes began to be used for other purposes: instead of vapor barriers. Laying films with changing attachment locations leads to a gross violation of the rules of operation of the building, which over time can lead to serious problems.
In order not to make a mistake with the place of installation of each type of film, you should remember that when insulating the roof and facade, the waterproofing membrane is always laid on the street side, and the vapor barrier film on the attic and wall side.
What is the danger of the term vapor and waterproofing?
The danger lies precisely in the fact that under this term, as a rule, two materials are mixed, with different purposes and with different characteristics.
As a result, confusion begins. Vapor barrier can be installed on both sides. But the most common type of error, especially in roofs and the most terrible in terms of consequences, is when the result is the opposite - a vapor barrier is installed on the outside, and a vapor-permeable membrane is installed on the inside. That is, we calmly let steam into the structure, in unlimited quantities, but do not let it escape. This is where the situation shown in the popular video comes into play.
Moreover, this can happen both with the ceiling, and with the wall or roof.
Conclusion: never mix the concepts of vapor-permeable waterproofing membranes and vapor barriers - this is the right path to construction mistakes that have very serious consequences.
Types of vapor barrier films
Vapor barrier materials differ in the material from which they are made and the principle of operation, which must be taken into account when determining the location of attachment and the side facing the insulation.
According to the operating principle
According to the principle of action, all vapor barrier materials fall into four types:
- type A (some manufacturers put a different marking - “AM”) - allows steam to pass through only one side. They are used to remove moisture from the heat-insulating layer that has broken through the first barrier. Use only on vertical or inclined surfaces. Lay the smooth side against the insulation;
- type B is a classic type of vapor barrier material that does not allow steam to pass through on both sides. It consists of two layers: one blocks the passage of steam, the other prevents the formation of condensation. This type of film is always laid with the smooth side facing the insulation;
- type C - high-strength vapor barrier film with functions similar to type B;
- Type D is a particularly durable polypropylene fabric with one side laminated. Withstands significant loads. Used as a reflective type of vapor barrier (steam rooms in baths, saunas).
By type of material
Manufacturers offer different types of vapor barrier materials. Among them:
- films - refer to blind vapor barriers that do not allow water to pass in both directions in any state of aggregation. They can be single-layer or two-layer (the second, rough layer accumulates condensation and allows it to slowly evaporate, which prevents the wall from getting wet) - smooth on the inside and rough on the outside;
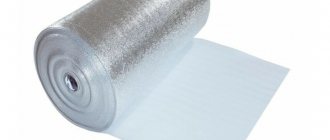
- vapor barrier membrane with foil applied on one side. Used primarily as a reflective vapor barrier;
- diffusion membrane with one-way throughput.
Types of materials offered
Which side to place the vapor barrier against the insulation is an important question. But first you need to understand what types of this material are:
- A – cannot be used as a vapor barrier; it removes water from one side.
- B - double-sided, are a complete vapor barrier, two-layer.
- C – increased density, thickness and protection, two-layer, more durable.
Vapor barrier for flat roofs Source edvans.com.ua
- D - used for heavy loads, modern high-strength fabric with lamination is used in production, can withstand heavy loads, is used for insulation and waterproofing.
The material can be one- or two-sided, in other words, it can be laid only on a certain side or on any of them. Many manufacturers produce films with an anti-condensation side - this is a fleecy layer that absorbs some of the moisture and retains it until it evaporates. It is this layer that should be directed towards the room.
See also: Catalog of three-story house projects
Which side to lay the vapor barrier on?
After installation of insulation is completed, vapor barrier work is carried out. Surprisingly, not all builders know which side to lay the vapor barrier film against the insulation. What can we say about “home craftsmen” in this situation? There is a general rule - the film is always laid with the smooth side towards the insulating layer, and the rough side - inside the room (attic) or outside.
But you don’t have to bother at all - large manufacturers always supply each roll with instructions. And to make it clear which side is which, they put pictograms. The problem only arises if the film has already been cut from the roll and the instructions have fallen out. But there is a simple solution: take a photo of the instructions from another similar roll on your smartphone.
How to distinguish the inside from the outside
Experienced specialists use other tips:
- the outer side is fleecy, the inner side is smooth. Easily identified tactilely, by touch;
- if the sides are of different colors, the lighter one is placed next to the insulation;
- when rolling out a roll, the inner side always faces the floor;
- the logo is always at the top;
- foil materials are laid with foil facing towards themselves.
If there are no marks at all on the roll, then it is a vapor barrier film, not a membrane. It doesn't matter which way you lay it, as it creates a barrier to steam in both directions equally.
How to check which film you purchased
When purchasing several types of film, sometimes it becomes necessary to find out what type it is. To do this, cut off a piece of material and take two glasses (two mugs). Boiling water is poured into one. The second glass is placed on top of the first, with hot water, previously covered with film. If condensation does not appear on the walls, turn the film over and place the glass again.
A dry surface indicates type B - the classic type of vapor barrier. If the walls of the container got wet only once - type A, one-sided membrane. The appearance of condensation twice indicates that the film is a waterproofing material and has nothing to do with vapor barrier.
Features of laying specific vapor barrier materials
Theoretical recommendations for vapor protection devices are discussed above. Many site visitors are interested in which side to lay vapor barriers of different classes or specific manufacturers:
- “Izospan AM” - laid with the brown (dark) side out, the white side facing the insulation;
- “Izospan B” - the smooth side should fit tightly to the insulation, the rough coating should face the inside of the room;
- polyethylene film is laid on either side;
- foil reflective vapor barrier (“Penofol”) is mounted with the metallized side inside the room (baths, steam rooms, saunas);
- membranes are laid in accordance with the pictogram printed on their reverse side;
- polypropylene with one-sided lavsan coating, the smooth side is laid against the insulation, the wicker side is laid inside the room;
- foil films in rooms with standard temperature conditions are laid with the metallized side facing the insulation.
What happens if you lay it on the wrong side?
Among experts to this day there is no single point of view on the processes occurring inside the insulation when laying vapor barrier material on the wrong side.
Some believe that condensation will begin to form not on the outside of the film, but in the insulation, causing destructive processes in it, while others believe that nothing bad happened and there is no point in rushing to redo the thermal insulation if a mistake was made.
There is generally an original explanation for the rough side - this is the result of joining two strips of vapor barrier film during the production process. It is easier to glue to such a surface, but additionally sanding the second side costs money. To explain this technological technique to customers, a fairy tale was invented about different sides of the film with different functions.
If we take anti-condensation protection as a basis, then those who claim that nothing bad will happen are right. But here the debating parties are missing one important point. The film is called windproof. And here there is a very big difference in how it is laid.
To make it easier to understand what we are talking about, you need to conduct a simple experiment: take a fabric with a pile on one side and alternately on each side, placing it tightly to your mouth, and blow through it. From a smooth side there will be practically no resistance, since the fibers flutter freely in the wind. From the pile side, everything is not so simple. You will have to make an effort, since the villi, pressing against the fabric, clog the pores through which air passes.
A simple experiment shows that it is still worth following the manufacturers' recommendations.
How to avoid mistakes with films in a wall or roof?
Fear has big eyes; in fact, with films in a wall or roof, everything is quite simple. The main thing to remember is to follow the following rules:
- In cold climates (most of Russia), vapor barrier is always installed only on the inner, “warm” side - be it a roof or a wall
- Vapor barrier is always done as tightly as possible - joints, openings of communication penetrations are taped. In this case, special adhesive tape is often required (usually with a butyl rubber adhesive base), since simple tape can come off over time.
- The most effective and cheapest vapor barrier is 200 micron polyethylene film. Preferably, the “primary” one is transparent; it is easiest to glue the joints on it with ordinary double-sided tape. Purchasing “branded” vapor barriers is usually unjustified.
- Vapor-permeable membranes (super-diffusion, windproof) are always installed on the outer, cold side of the structure.
- Before installing the membrane, pay attention to the instructions for it, since some types of membranes are recommended to be installed with a gap from the material to which it is adjacent.
- Instructions can be found on the manufacturer's website or on the roll of the film itself.
- Usually, in order to avoid mistakes with “which side” to mount the film, manufacturers roll the roll so that when “rolling” it from the outside along the structure, you will automatically mount it on the correct side. For other uses, before starting installation, think about which side to place the material on.
- When choosing a vapor-permeable membrane, you should give preference to high-quality ones - Tyvek, Tekton, Delta, Corotop, Juta, Eltete, etc. As a rule, these are European and American brands. Membranes - Izospan, Nanoizol, Megaizol and other “isols”, “brains”, etc. as a rule, they are much inferior in quality, and most of them are of unknown Chinese origin with the brand of a trading company stamped on the film.
- If you have any doubts about using the film, go to the manufacturer’s website and read the instructions or recommendations for use. Do not trust the advice of “sales consultants”. Refers mainly to “first and second echelon” materials. There are often a large number of errors in the instructions of third-tier manufacturers, since in fact they only sell films, without producing them or engaging in any development, so the instructions are written “on the knee”
PS If you are interested in a little more information about the differences in vapor-permeable waterproofing membranes, I recommend reading this short document
(Visited 140 580 times, 1 visits today)
How to lay a vapor barrier
There are different technologies for installing vapor barriers on various building structures. However, they all require the implementation of several simple rules, without which the desired effect cannot be achieved.
General installation rules
Regardless of what type of vapor barrier and on what structures it is installed, the following nuances must be taken into account:
- The film or membrane must always be overlapped. Overlapping each other at least 15 cm;
- connecting seams are glued, preferably with the material specified by the manufacturer, since by saving on small things you can eliminate all costs for thermal insulation;
- all through damage (punctures, cuts) are sealed with the same material used to seal the seams;
- for all types of vapor barrier films it is necessary to leave (arrange) a ventilation gap;
- When applying film to an adjacent structure, for example, from the floor to the walls, you need to make small folds of 3-4 cm so that the film does not tear when stretched and does not leave air pockets in the corners.
Disadvantages of internal thermal insulation
This method has its drawbacks, which is why it has many opponents.
Problems with internal thermal insulation of walls arise as follows:
- with external thermal insulation, the walls of the building are protected from the cold, which cannot be achieved with insulation from the inside. The base is in contact with the environment and cracks may appear on it;
- the occurrence of condensation. With internal heat conservation, the dew point moves behind the supporting structure and forms between the insulator and the surface. The result may be the development of fungal formations that will be difficult to notice;
- reduction in area. Modern heat insulators have excellent characteristics, but have not yet come up with a material that would take up little space. At the moment, with insulation work, the room will become 10 cm smaller on each side.
Before making a decision on internal insulation, it is worth weighing all the disadvantages and considering the advantages; this is the only way to avoid errors and shortcomings during installation.
Instructions for attaching vapor barrier
For each structural element of a building: floor, walls inside and outside, interfloor ceiling (ceiling), roof, balcony, attic, there is its own technology for laying vapor barrier film. You need to know which side to attach the vapor barrier in a frame house.
Floor
Floor insulation is carried out in several ways: under a “floating screed”, “floating floor” and along joists. Consequently, there are different vapor barrier schemes.
According to the lags. There are two ways to protect a wooden floor from steam.
- If the logs have not yet been installed, the film (type C) is simply rolled out over the base of the floor, overlapping, overlapping the walls. It is attached with tape only to the walls. The logs will be rigidly fixed below. The joints are sealed with self-adhesive tape.
- When the joists are installed, the film not only covers the base of the floor, but also wraps the joists, leaving a small fold near each of them, so that when laying the insulation, the film does not stretch or tear. As in the first case, climbing the walls is mandatory. It is attached to the joists with brackets with a leg of 8-10 mm and a pitch of 50 cm. The attachment points are sealed with tape.
Under the screed. Protection of floor coverings from steam is not always carried out. So under ceramic tiles, waterproofing work is sufficient.
Under the laminate, a substrate made of:
- expanded polystyrene (trademark "Penoplex");
- polyethylene foam;
- bitumen-cork material (trade mark “TUPLEX”).
If the substrate is coniferous or cork, then a simple plastic film is placed under it. Double vapor barrier using polyethylene is gaining popularity: between the base of the floor and the screed, and additionally between the screed and the laminate.
Frame house
When insulating walls in a frame house, vapor barrier is carried out on both sides: from the inside of the building with a film with complete vapor impermeability (type C), on the outside - with a windproof membrane (type A). From the inside, the film is attached with staples to a wooden frame, from the street side - with a counter-lattice. This fastening allows you to solve several problems simultaneously:
- secure the windproof membrane;
- create a ventilation gap;
- serve as a lathing for facing material.
Facade
The facade vapor barrier scheme does not depend on whether the house is wooden, brick or concrete. The membrane is always laid over a thermal insulation layer. It is attached with a counter-lattice, which allows you to create a ventilation gap.
An exception to the rule is the “wet” method of insulation. No vapor barrier work is carried out here.
Wall from inside the room
When insulating a wall from the inside, regardless of the type of wall material, the vapor barrier is made of a vapor barrier film (type B). It is attached to the sheathing with a stapler, but the best solution is with counter-straps (then it is convenient to attach drywall to them). Place the smooth side against the insulation. The fastening points are sealed with tape.
Sometimes you can find recommendations to lay vapor barrier membranes between the wall and the insulation. In the opinion of the editors of the StroyGuru website, such a proposal is absurd. Let's try to explain.
- If the membrane has one-way conductivity, then there is no point in installing it for one simple reason: the higher partial pressure inside the room directs the flow of vapor molecules outward. Nothing should interfere with the removal of steam from the insulation.
- If you attach a type B film, the air flow from the room will reach the wall surface and condense there.
- Installing vapor barrier films on the outside of the insulation and between the walls stops the steam inside the thermal layer - it will break through into the insulation material in any case.
Attic
When insulating an attic from the inside, it is best to use a vapor-proof film (type B), and from the outside - type A membranes. They are laid on the insulation with the smooth side. Attached to the rafter system and beams with a stapler. The staples are sealed with construction tape.
The foil material is laid with aluminum coating inside. Fastened with wide-headed nails or a stapler. The fastening points are sealed with metallized self-adhesive film. A ventilation gap must be installed outside.
Balcony
When insulating a balcony with basalt wool, experts recommend abandoning vapor barrier. The use of other types of insulation requires the installation of a vapor barrier material using the technology used to insulate walls from the inside of a room.
Principle of internal insulation
Insulating walls indoors means making your home comfortable and cozy for living. This type of heat saving is non-traditional; insulation is usually used on the outside. But there are situations when there is no other way out.
This option can also be considered in an apartment building, when insulating the internal walls is the only way to thermally insulate the room. This process will help prevent the formation of fungus in the room.
Is there a need for an air gap at the membrane?
You should always leave it on. A special gap up to 50 mm wide is arranged on the bottom side of the films. This will prevent condensation from appearing on the walls, floors and insulation. It is important to avoid contact of surface cladding with the membrane. By using diffusion film for floors, walls or ceilings, you save yourself from many problems, since it can be fixed directly to thermal insulation, OSB or moisture-resistant plywood. A ventilation layer will be required on the outside of the membrane. In the version with an antioxidant component, the air gap should be within 40-60 mm on both sides.
Organization of a ventilation gap when laying vapor barrier
If everything is clear with the walls and floor, then with the roof and ceiling the situation is different. When creating a ventilation gap, additional installation of a counter-lattice based on wooden blocks will be required. When organizing a ventilated façade, a gap is left during the construction of horizontal profiles and racks located perpendicular to the wall and film.
Video
Studying the features of vapor barrier allows you to understand why the organization of this stage of construction is necessary. An incorrect order of activities can lead to a lack of comfortable conditions for living or working indoors.
It is for this reason that a sufficient amount of time should be devoted to the selection and installation of vapor barrier materials during the construction of various types of structures.
Last time we looked at the types and characteristics of Rockwool insulation, which is made from stone wool. Despite its ability to repel moisture, even this material needs protection. For this purpose, vapor barrier is used. Today we will tell you how to properly install vapor barriers in thermal insulation pies of walls, roofs and floors. For interfloor ceilings, where both floors are heated, such films are not needed.
