Dismantling of bimetallic and aluminum sectional products
To disconnect the radiator from the system and remove it from its mounting location, you must do the following:
- Stop water circulation and relieve pressure.
- If the heating battery is hot, you need to wait until it cools down and then disconnect it from the system. To do this, you need to unscrew the connecting couplings at the inlet and outlet.
- Move the coupling away from the radiator along the pipe and remove the device from the brackets.
- Drain the remaining water and place the product in the disassembly area, face up.
- Pull out and rinse the filter immediately to prevent dirt from drying on it.
Dismantling of bimetallic and aluminum sectional products
At the next stage, the radiator is disassembled into separate sections. To avoid damage during operation, you need to figure out which way to turn the nipple nut. This element is a ring-shaped nut with an external thread and grooves inside on both sides. In this case, one nut has both right and left threads. If you unscrew it, the adjacent sections of the battery will evenly move apart, and when twisted, they will tighten.
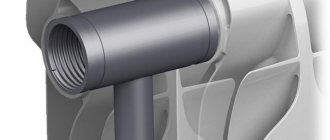
Nipple nut
Manufacturers usually make marks on the face of plugs and sleeves that indicate thread directions. O denotes right-hand thread, “S” denotes left-hand thread. To accurately determine the direction of movement, it is recommended to take a loose nipple nut and try to attach it to the threads in the radiator. Having decided which way it twists, it will become clear where to turn the key to separate the sections.
Installation of nipple nut
Having decided on the direction of the thread, insert the nipple wrench into the radiator and slide it towards the desired nut. The notches on the tool will help you do this. When it is in the grooves, insert the lever into the hole on the other side. It will take force to move the nut out of place. Call an assistant to fix the radiator in one place.
Repair of bimetallic radiators
When the nut has moved half a turn, go to the other side to unscrew the second one and do the same. After making sure that both nuts rotate without applying much physical force, gradually unscrew one side or the other, moving 5-7 mm.
Gasket between radiator sections
After disconnection, take away the metal spacers that were between the sections. If they are in good condition, then they can be installed back during reassembly; if in bad condition, then use them as a sample for purchasing new ones. Silicone gaskets must be changed.
Products
MONOLIT
Difficult conditions imply high demands on the performance of radiators. They can be roughly divided into two types. The first is related to the technical development of heating systems. The second is due to wear and tear or poor quality of maintenance of old heating systems. This leads to increased requirements for equipment strength, service life, corrosion resistance, efficiency in maintaining a comfortable temperature regime, etc. For such systems, the most rational choice is the MONOLIT model radiator. The radiator of the MONOLIT model does not have a nipple connection. The sections are connected to each other by contact butt welding.
The MONOLIT bimetallic radiator is a fundamentally new, patented heating device with particularly high technical characteristics that meet the harshest operating conditions.
Externally similar to conventional bimetallic and aluminum sectional radiators, the MONOLIT radiator differs from them in that inside it the coolant moves through steel channels connected using a unique welding technology into a single non-separable structure. Thanks to this, there are basically no areas in the MONOLIT radiator that are potentially dangerous for leaks.
MONOLIT radiators have exceptional reliability, as well as high heat transfer, which is achieved due to the developed geometry of heat transfer surfaces made of aluminum alloy.
The design and manufacturing technology of the MONOLIT bimetallic heating radiator provide:
Durability of use. Manufacturer's warranty – 25 years.
Efficiency of maintaining a comfortable temperature regime.
High resistance to corrosion. The channels through which the coolant passes are made of steel with increased corrosion resistance, and their thickness corresponds to the thickness of conventional steel water pipes.
No intersectional joints.
Indifference to the type of coolant and the quality of its preparation in individual and collective heating systems. Possibility of using various non-freezing liquids as a coolant.
Possibility of using the radiator at high (up to 135 °C) coolant temperatures.
High structural strength. Operating coolant pressure – up to 30 atm; test pressure – 45 atm.
Possibility of use in premises for various purposes, including medical institutions, preschool institutions, etc. - due to the best ratio of the radiation and convective components of the heat flow.
Ease of installation. There is no need to install adapters with left and right threads. Standard G1/2” or G3/4” threaded connections are an integral part of the radiator design.
Radiators with the number of sections from 4 to 14 are mass-produced.
Radiators of the RIFAR MONOLIT Ventil modification are designed for bottom connection to the heating system and are used when installing modern heating systems with radiant wiring or modernizing traditional heating systems with hidden utilities.
Confirming the high design characteristics of its radiators and thanks to the quality control system operating at the enterprise, the RIFAR company establishes a warranty period for radiators of the MONOLIT model of 25 years, subject to compliance with installation and operating conditions.
RIFAR MONOLIT radiators have passed mandatory certification for compliance with the requirements of GOST 31311-2005. All products are insured by SPAO INGOSSTRAKH.
Technical characteristics of one section
| Center distance, mm | Overall dimensions, mm | Nominal heat flow, W | Coolant volume, l | Weight, kg | ||
| height | width | depth | ||||
| 500 | 577 | 80 | 100 | 196 | 0,20 | 2,10 |
| 350 | 425 | 80 | 100 | 138 | 0,18 | 1,45 |
- Certificate:
How to disassemble cast iron batteries with your own hands
Most often, houses and apartments with old layouts are equipped with MS-140 cast iron batteries. Nipple nuts and sealing gaskets are also used to assemble their sections. It is especially difficult to disassemble an old battery, because... Over the course of its long-term operation, the spaces between the sections began to boil with rust. As a rule, in such cases, the niches for keys are corroded by the coolant
It is also important to keep a significant mass of cast iron in mind. For example, the weight of one battery for 12 sections is 90 kg: it will be difficult to handle such a product alone.
To implement the procedure, you will need the following tools:
- Nipple radiator key.
- Plumbing fixtures for unscrewing fittings and plugs.
- A small sledgehammer and chisel.
- Blowtorch (it can be replaced with a hair dryer).
- Steel brush.
- Wooden blocks for installing the battery on the floor.
A round metal rod with a diameter of 18-20 mm, flattened at one end, is used as a radiator key. The dimensions of the flattened part are 28x40 mm, with a thickness of 6 mm. A ring is welded to the opposite edge of the rod through which the lever is threaded. The length of the radiator key should be half the largest battery for 12 sections, plus 30 cm.
Recommendations for installing the battery yourself
- Before starting work, you need to shut off the flow of coolant in the heating system at the inlet and outlet or make sure that there is no liquid in the pipeline.
- Even before installation, you need to check that the radiator is complete. It must be assembled. If this is not the case, take a radiator key and assemble the battery according to the manufacturer's instructions.
The structure must be absolutely sealed, so abrasive materials cannot be used during assembly, as they destroy the material of the device. When tightening fasteners, do not forget that bimetallic devices use both left-handed and right-handed threads. When connecting sanitary fittings, it is extremely important to choose the right material. Typically, flax is used together with a heat-resistant sealant, FUM tape (fluoroplastic sealing material) or Tangit threads. Before starting installation work, you need to carefully plan the connection diagram
Batteries can be connected diagonally, sideways or downwards. It is rational to install a bypass in a single-pipe system, that is, a pipe that will allow the system to function normally when the batteries are connected in series. After installation is complete, the system is turned on. This must be done by smoothly opening all the valves that previously blocked the path of the coolant. Opening the taps too sharply leads to clogging of the internal pipe section or hydrodynamic shocks. After opening the valves, it is necessary to bleed off excess air through an air vent (for example, a Mayevsky valve).
Note! Do not cover batteries with screens or place them in wall niches. This will sharply reduce the heat transfer of the equipment
Correctly installed bimetallic heating radiators are the key to their long and trouble-free operation. If you have any doubts about your ability to install them yourself, it is better to contact a specialist.
Cold batteries when the boiler is running - what to do
It happens that the heating system malfunctions, and a situation arises - the boiler is working, but all the batteries, or at least part of them, are cold. Let's look at a dozen reasons for this state of affairs, how to fix the breakdowns yourself, without involving...
It's easier with automated boilers
If the boiler is automated, gas or electric, then, as a rule, the automation will not allow overheating of the coolant in the boiler itself when the supply to the batteries for some reason stops. The protections will turn off the device, show an error code, then you need to draw conclusions from this information.
A breakdown of the boiler itself can be repaired by service. It is not recommended to open complex equipment yourself.
Cold radiators, when an automated boiler is running, may occur not only due to the breakdown of complex equipment, but also because... (the most common reasons).
Wrong system
For example, in a parallel circuit, if the installation rules are violated, the middle radiators in the ring may turn out to be cold when the boiler is running. Eliminated by balancing or rewiring. Why does the passing scheme not work?
The following is also possible:
- The valves are closed - check the valves, including tuning and balancing valves, which regulated the flow along individual dead-end branches, to individual radiators.
- A sequential battery connection scheme was used, in which the last radiators in the pipe are always colder or do not heat up at all... Rework, use modern circuits.
- Various complex inclusions of radiators, “where everything is confusing.” Remodel and use conventional two-pipe heating systems - dead-end, passing, radial with the presence of balancing valves...
Pipe problems
Polypropylene pipes can create a surprise. When welding them, the internal clearances are not controlled. The installer does not guarantee anything. It’s not uncommon for the boiler to heat up, but the polypropylene system is not working properly, some of the batteries are colder for some reason, some are disconnected... First of all, start resoldering and finding the bottleneck. Or replace the pipes with more reliable ones.
- In any system, there is debris in the coolant. If there are U-shaped depressions in highways, there may be congestion.
- Perhaps just old steel pipes? Their service life is limited; from the inside they become overgrown with deposits and heating stops.
In systems without automation
There is a threat of a serious accident, destruction of the boiler if it is working and the batteries are cold. In a solid fuel heat generator, if the fuel is burning, the liquid in the heat exchanger will boil very quickly if there is no circulation and heat removal, i.e. if the heating system remains cold.
This is not an acceptable situation, which is prevented by installing an uninterruptible power supply for the circulation pump. And also by regularly checking the filter.
First of all, in such systems the operation of the circulation pump is checked, which is often located on the return line near the boiler.
Complex systems - what is the solution
Nowadays there are more and more complex heating systems. Such piping of a private house can be divided into several independent circuits, each of which has its own circulation pump. For example: - radiators of a house, heated floors in a house, an indirect heating boiler, a greenhouse, a garage and a workshop, an outbuilding, and a separate attic.
It’s not uncommon for something like this to be connected to a couple of working boilers (the backup one doesn’t count).
In order for a complex circuit to work stably, all these circuits must be connected to some kind of distributor, which would provide them with the same initial stable pressure, regardless of the operation of neighboring circuits. In complex systems (more than 4 circuits) this is done using a hydraulic arrow or a primary circulation ring of pipes.
Incompetent design or installation under such circumstances leads to the fact that some of the pipelines and batteries remain cold when the boiler is running. Those. one circuit influences the other. The solution is to create a competent scheme.
Situations in apartments
In apartments with central heating everything is simpler. The heating circuit there is not complicated - one or more radiators are connected in parallel to the risers.
- If the riser is cold, it means that the air at the top has not been vented, or the distribution along the risers has not been adjusted. In any case, you need to contact someone to bleed and adjust...
- If the riser is hot and the edge of the battery is cold, then there can be two reasons - the batteries are airy, and you need to bleed the air yourself. Or - a small pressure on the riser - you need to understand it as in the previous paragraph.
- There is also a common problem in apartments - clogging and overgrowing of old cast iron radiators. It also happens that it’s time to change them for new ones, otherwise nothing will help...
Removing cold batteries according to the above descriptions for all reasons, of course, requires certain qualifications. If you can’t do it yourself, then you need to call specialists. Particular care must be taken when handling battery plugs in apartments, since any violation of the system threatens an accident, boiling water, flooding of apartments...
Connecting sections
First you need to determine the number of sections. The generally accepted rule: one section heats 2 square meters. m of floor with a wall height of 2.7 m. It can be calculated similarly for a different room height. In addition, the properties of the radiator can be checked with the seller. Rounding in calculations is made upward. It is worth considering the insulation of the room.
The sections are connected with nipples in the upper and lower parts using special nipple keys. These tools have a flat end on one side and a hole on the other side into which a crowbar or iron rod can be inserted to make work easier.
Cast iron nipple
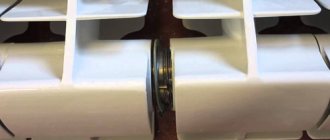
Nipple - a piece of pipe with a recess for a rubber sealing ring and threads applied on both sides.
The connecting windows must have multi-directional threads so that when screwed, the nipple connects the sections. The process must occur simultaneously on both sides, so two people are needed. On the side of the section with a left-hand thread, the key must be turned to the right, and on the side of a section with a right-hand thread - to the left.
For tightness, you can use plumbing flax, but it is better to purchase special paronite gaskets. They are more durable and can withstand high temperatures. Additionally, sealant can be applied to the nipple threads.
Paronite gaskets for cast iron radiator
If antifreeze will be used in the heating system, drying oil should not be applied to the linen winding. It is quickly corroded by antifreeze. As a result, the tightness will be broken and the sections will have to be re-unscrewed and reassembled. It is better to treat the threads with a chemical-resistant sealant and install paronite gaskets.
Connection of cast iron radiators
Types of carving
Steel pipes can be connected by welding or pipe threads. Connection of heating radiators to pipes is carried out only with metric threads, which are cut on the nuts. To assemble individual parts of a stainless steel metal line together, threaded connections of heating pipes are used, which are:
- conical (BSPT);
- cylindrical (BSPP).
In heating systems, conical threaded connections of heating pipes are used, and cylindrical ones are used only for drains. Cutting is carried out using a tool called a clamp. They are manual and electric. A hand tool consists of a handle, a ratchet and a head with cutting teeth. The presence of a ratchet allows you to work in hard-to-reach places, for example, in the section where the main runs along the wall.
To cut a thread, you need to chamfer and treat the surface with oil. In the process of cutting threads on a heating pipe, oil must be added, this reduces friction and heating of the part. In order for the joint to be airtight after connection, it must be sealed. The metric threads on the nuts of all circuit elements are also sealed.
Installation procedure
Work on installing bimetallic batteries must be carried out in a certain sequence:
- mark places for installing brackets on the wall;
- We secure the brackets with dowels and cement mortar (if we are talking about a reinforced concrete or brick wall) or double-sided fastening (if it is a plasterboard partition);
- We place the battery strictly horizontally on the already installed brackets;
- connect the radiator to the pipes, install a faucet or thermostatic valve;
- We put the air valve at the top of the radiator.
Note! An air valve (preferably an automatic one) must be installed, since a small formation of gases occurs inside the device
Calculation of the required number of sections
Determination of the required power of heating devices is carried out in accordance with the recommendations of SP 60.13330.2010 (old SNiP 41-01-2003). The following are included in the calculation:
- characteristics of the room - area, ceiling height;
- the location of the room relative to the overall building volume of the house and the cardinal directions;
- parameters of external and internal air;
- degree of thermal insulation of walls, attic;
- type and number of windows installed;
- glazing area;
- features of heating systems - insertion diagram, degree of openness;
- power of one section depending on the type of radiator.
This is a rather complex technique using many coefficients, which in practice is replaced by simpler methods.
One of them is to determine the required heat transfer based on an approximate norm of 100 W per square meter of area.
Example:
- To heat a room of 30 sq.m. you need to spend 30x100=3000 W.
- If it is planned to install a bimetallic radiator with an interaxial size of 350 mm, the heat transfer of 1 section is determined from the technical data sheet or table - 136 W.
- To find the number of sections, the required power is divided by unit 3000/136=22.
According to this calculation, 22 sections will be required to heat the room with bimetallic radiators. A more accurate result can be obtained by using an online calculator. You need to enter your data in the fields and select the radiator model. The answer will be calculated in a few seconds.
In this example, the online program gave 3 different answers at different outside temperatures:
- if the average outside temperature in winter is -10°, 16 sections are required;
- at -20° - 25;
- at -30° - 34.
The conclusion suggests itself - the calculation must be carried out as carefully as possible, since the difference in the results is significant. If the excess radiators are compensated by thermostats, then if there is a shortage, you will need to use the boiler at maximum power. It is possible that the room will be cold even at high coolant temperatures.
Pros and cons of a bimetallic heating radiator
The devices have many advantages - they are durable and practical products that can withstand high pressure and temperature changes in the coolant, and are minimally susceptible to corrosion. Due to their ability to withstand maximum operating pressure, batteries can be installed in a central heating system, which is a clear advantage of radiators. Other advantages include ease of installation, the ability to regulate heat transfer, and low inertia when heating and cooling.
Important! For full operation of the heating system, bimetallic radiators require a little liquid. In this case, circulation will be maintained in normal mode without loss of heat transfer efficiency.
There is only one minus - the price. Batteries made from an alloy of two metals are more expensive than other models, but if you come across an inexpensive radiator on the market, it may turn out to be a fake. It’s better not to save money and find an honest supplier; the investment will pay off with long-term and flawless operation of the heating device.
How to disassemble a cast iron heating radiator into sections
Before disassembling a cast iron heating radiator, you need to prepare a set of tools:
- Wrench for disassembling cast iron batteries (5/4 inches for old devices and inch for new ones);
- Adjustable wrench of the second or third number;
- Chalk;
- Inch pipe 50-100 cm long.
You also need to find a convenient platform on which to disassemble the radiator. A good option would be a durable wooden board placed on a flat area. The battery is placed horizontally on this shield, and disassembly can begin.
The technology for disassembling the radiator is as follows:
First of all, you need to understand in which direction the blind plugs are unscrewed, after which they need to be unscrewed. Before disassembling the heating battery, it is necessary to mark on the key the length to the unscrewed nipple. To do this, the key is placed on the battery and its edge is brought to the point where the bushing is located.
A mark is made on the key using chalk in a circle until the key is inserted into the battery.
Next, you need to figure out in which direction the key for cast iron batteries should rotate - they can have both left- and right-hand threads. Accordingly, when rotating in different directions, the battery sections will diverge or converge. The direction of rotation is determined using a fitting, which is screwed in on the same side where the key will subsequently be inserted. With a right-hand thread, the fitting is screwed in clockwise, so the direction of rotation of the key when unwinding will be the opposite. With a left-hand thread the situation is exactly the opposite.
The actual promotion of the radiator begins with the first section. The first step is to strip the threads on both nipples one by one (as a rule, just half a turn of the wrench is enough)
Next, the battery is gradually untwisted on each side so that the distance between the sections is about 0.5 cm. When unwinding, it is very important to maintain the specified gap between the sections - if you untwist the battery on one side more strongly, there is a considerable chance that the thread will jam. During the unwinding process, it is worth putting a pipe on the key to reduce the required effort.
Any modern radiator can be disassembled using this technology. Often, such heating devices have plugs with the thread direction marked.
General recommendations
Experienced craftsmen and professionals recommend taking into account the following points:
- When using a cast iron radiator plug on heating appliances, caution should be exercised. The fact is that cast iron is easily compressible, but is considered a rather fragile material. Therefore, even a slight mechanical impact or impact on a hard surface can cause the formation of microcracks. As for steel products, they are more reliable in this regard.
- When studying materials for the assembly and installation of heating devices, there are recommendations for using ordinary paint for more airtight connections. To some extent, these statements are true, but it should be noted that such connections do not have a very attractive appearance, and when disassembling them you may encounter certain difficulties. It is important to understand that modern heating devices and their additional accessories do not require painting.
Selecting and installing radiator plugs is not difficult, but you need to approach this process quite responsibly. It is very important to select matching materials, correctly determine the type of thread and size of the plug, as well as its purpose. By following the recommendations of professional technicians, you can avoid many problems during the operation of the heating system, including batteries and radiators.
Dismantling an old radiator
In the case of old batteries, some problems may arise - for example, the threads in such devices may become stuck, so before disassembling they will need to be heated with a blowtorch or autogen. When the joints are heated, you need to quickly tear off the nipples on both sides of the battery. Using the same method, any elements stuck to the battery are removed.
After prolonged use of the battery, the nipple may completely rust. In this case, it will be impossible to hook it with a key, so to disassemble the battery you will need a hacksaw or grinder. The remains of the nipples are unscrewed from their places, and the threads are cleaned with a brush.
If none of the described methods helps, the last resort option is to smash the battery with a sledgehammer. Before breaking a cast iron battery, it must be placed on a horizontal surface and hit along the center line with a sledgehammer until part of the section falls off. After this, the battery must be turned over and the operation repeated to break the entire section.
All that remains is to place the radiator vertically, apply several blows to the surviving sections and untwist them. Of course, in this case there is no need to talk about the integrity of the entire radiator - in most cases, half of the sections are lost.
Radiator installation includes
- A specialist will visit the customer to provide technical advice and draw up an installation diagram.
- Installing radiators by level
- Layout of insulated pipes to radiators
- Without gating
- Installation of shut-off valves on radiators
- Connecting radiators to pipelines using a special tool
You can purchase radiators in one of our stores.
Our advantages
- The work is performed by qualified specialists who are citizens of the Russian Federation;
- We treat every order with great responsibility;
- We take on even very complex orders;
- We use only modern equipment and technologies;
- We are ready to repair the old boiler system, restoring its functionality;
- We give a good guarantee and provide technical support.
By contacting our company, you will receive high-quality installation of a boiler room in accordance with the agreed deadlines and on favorable terms.
- Radiator Henrad 500x800 22V
- Headset with bottom connection
- P-ethylene pipe Sanha MultiFit-Pex PE-Xc 16x2mm 20m
- Fitting
- Radiator installation (layout of the route, installation of the radiator at a level, laying pipes in thermal insulation, without grooves)
Total: ≈ 11,000 ₽.
Types of radiator piping
Connecting devices to the pipeline can be done according to one of the following schemes:
- lateral (top or bottom);
- lower;
- diagonal.
Lateral upper and lower
In the first case, the coolant enters the upper collector and flows down through vertical channels.
The heat transfer from the radiator is uneven; the hottest area is located closer to the connection point.
The same situation is observed when tying in the lower side position. The first section heats up better, the last one worse.
Bottom connection
The coolant comes from below. According to the law of physics, it moves upward, then, cooling down, descends. Heat transfer with such a piping is better than with a side one, but losses still exist. They are 10-20% depending on the radiator model.
Diagonal connection
The coolant coming from above completely heats the radiator. All sections heat up equally well. Heat transfer with this type of piping is maximum. Thermal imager examination confirms this, so the diagonal scheme is the most effective and economical.
Upper
This is an unconventional type of connection, which is used for high-height radiators. For this method, a plug is installed in the upper manifold, due to which the coolant moves down and heats the heating device evenly.
If the model is standard, without design changes, then this connection does not work. The heated liquid passes through the upper manifold, while the lower part remains cold.
Self-installation of a domestic heating system
Currently, there are a large number of all kinds of household heating devices made from various materials using advanced technologies, so later in this article the main performance qualities of bimetallic room radiators designed for heating residential apartments and private houses with an autonomous or centralized heating system will be discussed in detail.
Also, for home craftsmen, detailed instructions will be offered here, which provide a step-by-step description of the technology for self-installation and connection of bimetallic radiators to a household heating system.
The installation of such radiators is justified only in networks with high pressure.
Design features of bimetallic radiators
All bimetallic household heating radiators are made of two different types of metal, and in most cases they are a composite design in which the internal main collectors and vertical heat-conducting channels are made of steel, and the outer coating and side fins are made of non-ferrous metals with high thermal conductivity.
The installation process itself
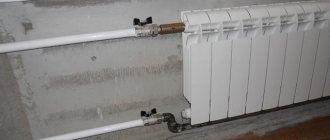
Before starting work, it is necessary to completely shut off the heating circuit, drain the water from the system, and the pump will help remove any remaining water efficiently. Using a level, carefully check the battery hung on the supports vertically and horizontally.
- You need to unscrew all plugs from the device.
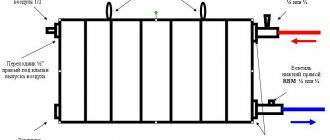
- Connect a valved bypass, which is only required for a single-pipe circuit. To connect to a two-pipe circuit, a bypass is not needed; only a squeegee with a valve connected to it is used for connection.
Using threaded connectors, we connect the battery to the system, using tow or another sealant to seal the joints (if you have experience in welding, the joints between the connectors and the pipeline can be welded).
A bypass is required for connection to a single-pipe circuit - connection diagram: 1 - tee for metal-plastic pipes; 2 - direct control valve; 3 - direct shut-off valve; 4 — adapter for metal-plastic pipes; 5 - rotating valve for air release
It is important to note that there is no need to remove the packaging from aluminum, bimetallic and steel devices until installation is completed. Installation is complete, but some more crimping will be required.
To do this, you will need to call a plumber. Both his experience and the device will be useful, which does not make sense to buy for the sake of installing several batteries
Installation is complete, but some more pressure testing will be required. To do this, you will need to call a plumber. Both his experience and the device will be useful, which does not make sense to buy for the sake of installing several batteries.
Choosing a location for installing batteries
When installing heating systems, at the first stage, heating devices are installed, equipped with shut-off and control valves, and after that the laying of pipes begins. Any battery can be installed temporarily and removed from its mounts while cutting the groove or performing other work.
Therefore, it is recommended to connect bimetallic heating radiators without removing the packaging polyethylene film, or by wrapping it yourself to protect it from dust, dirt and possible damage. The film can only be removed when conducting thermal tests of the heating system.
The basic requirements for installing sectional batteries are given by the manufacturer in the technical data sheet of each model. However, there are general mandatory conditions for installing bimetallic heating radiators:
- the middle of the radiator must coincide with the center of the window under which it is installed;
- the upper plane of the device must be positioned strictly horizontally;
- all batteries in the room must be at the same height;
- the distance from the back wall of the sections to the wall is not less than 30 mm and not more than 50 mm;
- the distance from the floor and window sill to the heating device should not be less than 100 mm.
The last condition does not define the high setting correctly. If you raise the bottom of the radiator to a height of more than 150 mm, then the possibility of insufficient heating of the lower space of the room is likely.
Disassembly procedure
It is very difficult to separate stuck intersection joints. In some cases, they become so attached that even significant physical efforts are powerless. In such situations, the joints are heated before disassembly using a blowtorch or hair dryer.
How to disassemble a heating radiator made of cast iron:
- The cast iron is heated with a blowtorch until it begins to emit a crimson glow. After this, you can begin the disassembly procedure.
- The first step is to unscrew the plugs.
- The radiator key is brought to the top of the battery: its head should be in the area where the nipple nut is unscrewed. At the end of the section, you need to use chalk to mark the circle for the location of the tool rod.
- The flattened part is inserted into the lower internal groove. Next, moving the tool in the desired direction, bring it to the marked circle.
Before starting the operation, it is important to find out in which direction the sections need to be twisted. If there is a nipple nut, screw it in turn onto the right and left ends of the battery: this makes it possible to determine the direction of rotation of the nipple
If the thread moves, it should not be completely unscrewed. To avoid distortions, the upper and lower nipples must be unscrewed one full turn alternately.
Steel panel radiators are an excellent choice at a competitive price
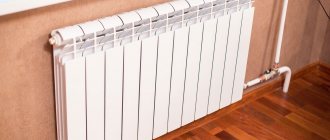
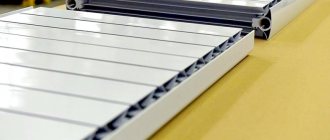
Panel radiators made of steel are the most popular heating devices in the CIS, as well as in the European Union. These devices are widely used for heating residential premises, administrative buildings, and industrial facilities. Steel panel radiators are very popular along with bimetallic and aluminum ones. Steel panel heating radiators are ideal for installation in low-rise buildings. They provide thermal comfort, are lightweight, economical, and easy to install. It is difficult to find a more suitable option for an autonomous heating system. However, like all other types of heating devices, they have a number of advantages and disadvantages. In order not to make a mistake when purchasing, you need to familiarize yourself in detail with their types, technical and operational characteristics.
Installation of steel panel radiators for the home
The internal structure of these devices is as follows: sheets of metal are welded together with symmetrical recesses. Water (coolant) circulates through recesses and channels. To increase thermal conductivity, metal fins are attached to the inside of the device. One of the advantages of steel panel radiators is the perfect combination with any design. Heating devices made of steel are installed in buildings of any purpose.
How to assemble an aluminum radiator
We assemble in reverse order. We place the sections on a flat surface (a suitable sized table or simply place it on the floor). If the radiator is not new, unscrew the end cap and Mayevsky tap.
Before installation, you should carefully examine the threads and grooves; they must be of high quality, without chips or changes. On the mounted section for testing, we “drive” the thread by screwing in and unscrewing the nipple
Here you need to pay attention to the fact that there may be a gasket under the layer of factory paint in front of the thread. Lightly rub the end with fine sandpaper; if it is found there, it must be carefully cut off with a knife with a sharp blade.
This is what an aluminum radiator looks like in cross section
Before adding sections of the heating radiator, be sure to clean the ends to a smooth surface. We even remove factory paint. It is not needed at the ends of radiators, but will only contribute to the early appearance of leaks. Sooner or later, coolant will begin to seep under the paint. In the case of non-freezing liquids, this will happen very quickly; if water is used in the system, then not very much, but it will definitely happen. And then coolant will begin to leak between the sections, although the gaskets are still in perfect condition. The whole point is that the paint on the ends has peeled off or been corroded, and microcracks have appeared. So we make sure to clean the ends to bare metal, but use fine sandpaper so that the surface of the metal is smooth and without scratches. This guarantees the operation of the system without leaks in the radiators.
For better tightness, the ends then need to be degreased (using gasoline). Gaskets are also degreased, but they need to be washed with ordinary soapy water. For a system that will be filled with water, degreasing is an optional procedure, but for systems that will run on antifreeze it is necessary. Antifreezes have high fluidity and seep into the smallest pores. After everything is dry, we begin to assemble the aluminum radiators.
Then tighten both nipple nuts half a turn. Heat-resistant paronite (silicone) gaskets are placed on top of the nipple to seal the joints. Now we take the section that needs to be screwed and place it tightly against the nuts, checking the tightness of their fit. Next, insert the key into the upper hole and tighten it 1-2 turns. At the same time, we do not use the lever yet. We twist our hands. Then we perform the same operation in the lower hole. We repeat several times, alternately tightening both nuts several turns.
We unscrew the sections gradually, one or two turns of the nut, either from below or from above.
Tighten as much as you can. Only after tightening by hand can the lever be used. This must be done in two stages on each nipple. It is better not to use excessive force when final tightening the nipples, since you can easily break the threads: aluminum is a soft metal, don’t forget.
If the section is completely assembled, screw a plug onto the unused holes on one side, and a Mayevsky valve on the other (to bleed air from the system). Now you know how to assemble sections of a heating radiator and, if necessary, you can add several sections.
Installation
Before installation, you need to drain the water from the heating system. If necessary, it is better to use a pump. If central heating is working, then replacing the radiator yourself must be coordinated with utility services. Old batteries and mounts must be removed.
Radiator location
For proper circulation of warm air when installing the radiator, the following conditions must be observed:
- The center of the battery should coincide with the center of the window sill. Deviation to the side is allowed no more than 2 cm.
- The width of the battery is from half to 2/3 of the width of the window.
- The distance from the radiator to the floor should be within 6-12 cm.
- The top edge of the radiator should be located 5-10 cm from the window sill.
- The distance between the wall and the battery is from 2 to 5 cm.
- There is an opinion that the heating system should be hung with a slope of approximately 1 cm so that air accumulates on the side of the air outlet valve. According to SNIP standards, the radiator must hang level. This will prevent air from accumulating.
- If there are several radiators in the room, they should be located on the same level.
Correct location of the cast iron battery
Installation. Professionals recommend
Connecting a cast iron radiator to a heating system is a little more difficult than installing aluminum radiators yourself. This process includes the following steps:
Determining where to screw in the brackets for subsequent fastening. If there is more than one radiator, you need to use a template made of thin plywood. Drill through it the points where the brackets are located and make marks through them in the places where the radiators will be located. The number of brackets is determined as follows: one per meter of radiator width. Two are kept at the top, and the third is at the bottom, in the center. The radiator must be well secured and not wobble, otherwise cracks may form at the joints with the pipes over time. If the battery is heavy and the wall is not very strong, it is better to use stands.
Installation of brackets
- Drill holes at least 12 cm deep and strengthen the brackets in them with cement mortar. The ends of the brackets should be rounded for better adhesion to the pipe.
- Screw the thermostat to the radiator from the pipe connection side. On the other side, attach the air vent valve,
Installing a thermostat on a cast iron battery
If the heating system does not have taps to shut off the water, you need to screw them to both pipes. With a single-pipe system, you will need to install a bypass. Place the radiator on the brackets and check the accuracy of the location with a level. Connect the structure to the heating system using pipes
It is important to maintain sealing. For reliability, it is better to use welding.
Connecting the battery to the heating system
To check the quality of the connection, crimp testing of the entire system is required. It is better to find and invite a specialist to be sure of the quality of the work done.
Cast iron radiators are quite bulky. To improve their appearance, you can install decorative screens of the desired color.
Markings for fastening
The standard location for the radiator is the partition under the window opening. According to SNiP 3.05.01–85 (clause 3.23), the battery on the side of the riser should not extend beyond the window opening, and their axes are not required to coincide. But for the battery to look harmonious in the interior, it must be located symmetrically relative to the vertical axis of the opening. Therefore, first, this axis is leveled.
The second step is to tap the horizontal level of the battery position and ensure alignment when connecting the connections to the fittings.
But there is one feature here - the horizontal channels of the radiator must be oriented strictly according to level, and the forward and return supply pipes must have a slight slope relative to the flow of the coolant. These angles are needed to reduce the force of resistance to flow and to reduce the risk of airing the battery. The slope value is very small - 5–10 mm for a line length of more than 50 cm (SNiP 3.05.01–85 clause 3.18), and steel line pipes less than 1.5 m long are not attached to the wall. And if the battery is replaced in connection with an existing wiring, then, for example, for a single-pipe system with a riser, a shift in position up (or down) can level out the slope of the forward (or reverse) supply.
The very position of the radiators must ensure that the following conditions are met:
- distance from the floor - more than 6 cm;
- distance from the window sill - more than 5 cm;
- distance from the wall - more than 2.5 cm.
First stage of installation
Considering that radiators today are presented in a huge variety, the installation of heating batteries in a private house begins with its choice. There is no ideal heating system - each type of radiator has its own pros and cons, and you should choose the option whose disadvantages will allow the system to function as efficiently as possible.
Cast iron
Photo 1 Diagram of a cast iron battery
The main advantage that such radiators have is their durability and long service life; they can be used for up to 50 years. Also, this metal can withstand aggressive conditions, including coolant with various impurities, without damage.
Among the disadvantages of cast iron, the weight of the battery and the lack of aesthetics should be noted.
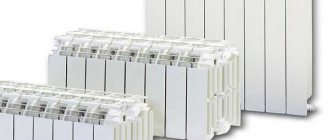
Aluminum
Photo 2 Aluminum radiators
Such batteries are distinguished by their light weight, external design, and high power ratings of approximately 190 W. They are clearly not suitable for apartments in high-rise buildings due to the low quality of the coolant, because aluminum quickly oxidizes due to constant exposure to dirty water, while for a private house such a radiator is the best option due to its high thermal conductivity and low inertia.
Bimetallic
Photo 3 Bimetallic batteries
This type of radiator is the most reliable. Among the main advantages are the following:
- resistance to sudden pressure changes in the system.
- high heat transfer.
- resistance to mechanical damage.
Steel
Photo 4 Steel radiator
These are new batteries for heating, which are still used quite rarely, they have not gained much popularity, but are still sometimes found. The heat dissipation area is high, the size and weight are small, maximum resistance to rust, provided they are always filled.
Which heating radiators to install in a private house can be decided based on the area of the building and its features.
Videos and useful tips
Having chosen a radiator, you should proceed to such a stage as installing heating radiators in a private house, the video of which can be watched below, and right now you can read useful tips.
The initial stage is calculating the battery power. To heat 1 cubic meter of a room in a modern house, built in compliance with building codes, you will need 20 W.
Calculate the volume of the house, multiply the figure by the figure described above, then divide the resulting figure by the power of the section. The resulting figure will be the number of sections.
Video 1 Installation of heating batteries (radiators) in a private house with your own hands
Installation tool
To do everything yourself, you should stock up on the following tools:
- building level;
- drill;
- screwdriver and tape measure;
- a wrench for tightening the pipes and a pencil;
- key for installing sections;
- bypass – when installing radiators in single-pipe heating;
- shut-off valves.
Installation instructions
The first thing you need to do is turn off the heating system, drain the water, even use the pump. Next, fix the radiator on the supports and, using a level, check how accurately this was done, after which you perform the following procedure:
- remove all plugs from the device.
- if you are using a single-pipe circuit, then you need to connect a bypass with a valve. Provided that the circuit is two-pipe, the connection is made only with the help of a drive, and a valve is also fixed to it.
- connect the structure to the system using threaded fittings, use special seals to seal the joints, ideally welding.
The rules for installing radiators provide for a process such as crimping, for which it is advisable to invite a professional technician who has the appropriate equipment.
During the installation process, remember that the distance from the radiator to various objects must be maintained as follows:
- from the wall - 5 centimeters or more.
- from the floor - at least 10 centimeters.
- from the bottom of the window sill to the top of the battery - 5-10 cm.
Why
Why and when is it necessary to install bimetallic radiators?
They are useful only and exclusively in the central heating system of an apartment building or (less often) a private house connected to a heating main.
The advantages of bimetallic batteries are high heat transfer per section (on average 180-190 watts) with significant resistance to hydrostatic pressure (for domestic radiators Rifar Monolit - up to 100 atmospheres).
Rifar Monolith is a champion in tensile strength. The radiator is designed for pressure up to 100 atmospheres, and is tested at a pressure of 150 kgf/cm2.
Why high heat transfer is needed - I think there is no need to explain, but strength is necessary when the parameters of the heating system go beyond the standard values.
Let me give you a couple of examples of such situations:
- After the end of each heating season, the heating main is tested for density. The pressure in it increases from the standard 3-7 atmospheres to 12 or more. During testing, the input valves of the elevator unit must be closed, but do not forget about the so-called human factor;
If the valves are not closed and the vents are open, the pressure in the heating circuit will equalize the pressure in the line - with quite predictable consequences for aluminum and cast iron radiators with low mechanical strength.
Cast iron battery after a pressure surge.
- Rapid filling of the circuit or an instant stop of circulation in it (for example, when the cheeks of a valve fall) means water hammer - a short-term increase in pressure at the front of the coolant flow to 25 - 40 atmospheres.
The consequences of depressurization of the heating circuit due to the destruction of the heating device are quite predictable. Usually all floors down to the bottom are flooded. It’s not hard to guess what happens when hot and dirty water floods the apartment’s decoration and household appliances (especially those connected to the network).
Materials
Which pipes for bimetallic radiators are best to purchase when moving a battery or changing the wiring configuration?
- Water and gas pipes made of black steel or galvanized;
If a black steel pipe can be mounted on welded joints, then galvanized pipes can only be mounted on threads. The melting point of steel is 1300 - 1400 degrees, the boiling point of zinc is 900C. When electric or gas welding, the anti-corrosion coating in the seam area will inevitably evaporate, and you will get a regular steel pipe at the price of a galvanized one.
Galvanizing is done only on threads.
- Corrugated stainless steel pipes with compression fittings;
- Copper pipes on press fittings or socket fittings for soldering.
I vote for stainless steel with both hands. Not everyone has welding and related skills. Galvanization is deterred by labor-intensive threading and a large number of threaded connections; copper is deterred by the exorbitant price of the pipes themselves and the fittings for connecting them.
Why do I so categorically reject all types of polymer and metal-polymer pipes, because they are often used for heating?
Polypropylene for heating an apartment building. They put it on, just like they put it on. And in vain.
Comrades, remember the operating parameters recommended by manufacturers for metal-plastic and polypropylene.
| Parameter | Meaning |
| Pressure | 16 - 25 kgf/cm2 |
| Temperature | +5 — +95С |
Please note that maximum operating pressure is only achievable at room temperature. When heated to a maximum of 95 degrees, the tensile strength of a polypropylene pipe decreases to 7-9 atmospheres.
The standard parameters of a heating system powered by a heating main (up to 7 kgf/cm2 at a temperature of 40 - 95C) seem to fit within these values. However, in practice, deviations from the normal operating mode are always possible. In addition to the examples of situations I gave above in which the pressure in the circuit may differ noticeably from the standard one, scenarios are also possible in which the maximum temperature specified in SNiPs is exceeded.
Let me give you the most obvious example of such a situation. If there are a large number of complaints about the cold in apartments, during the peak of cold weather, the housing organization, in theory, should agree with the heating networks (the organization responsible for delivering thermal energy from the thermal power plant to consumers) to increase the diameter of the nozzle of the water-jet elevator.
Water jet elevator with nozzle removed. The larger the diameter of the nozzle hole, the warmer the house.
Dismantling, delivery of the nozzle to a higher organization, boring it, return delivery and installation takes a long time.
It is impossible to stop the heating circuit during the peak of cold weather, even for a few hours: at a minimum, the access heating will be defrosted and will require a long and painful (it’s cold!) repair. Housing workers cannot ignore residents’ complaints: this risks recalculation of heating costs through the courts and loss of part of the funding.
At -30 outside, the access heating freezes approximately two hours after the circuit stops.
This is why the following step is often taken as a temporary measure during the coldest few weeks of winter:
- The nozzle is removed from the elevator;
- The suction (a jumper with a return line through which part of the waste coolant is drawn into the repeated circulation cycle) is suppressed with a steel pancake.
Elevator unit with dismantled nozzle and muffled suction.
As a result, the heating system does not receive a mixture of water from the supply and return lines, but only water from the supply. Which, for a minute, at the peak of frost comes out of the boiler room with a temperature of 150C and does not evaporate only due to excess pressure.
What will happen to polymer pipes designed for an operating temperature of 95C at 130-150 degrees?
- In the best case scenario for the apartment owner, their resource will decrease from the planned 30-50 years to several months;
A pipe degraded due to overheating with delamination of the shell and reinforcing foil.
- At worst, he will get a flooded room and lawsuits from neighbors in the riser.
In case of unauthorized replacement of any utility lines, the owner of the property bears responsibility for any accident. Accordingly, the renovation of apartments on the lower floors and the purchase of new household appliances by neighbors will burden his wallet.
What size should the pipes be?
The internal diameter must correspond with a minimum error to the internal diameter of the riser (typically 20 or 25 millimeters). The narrowing of the riser will cause a drop in the temperature of the batteries of all neighbors below and above.
In addition, it is at the narrowing that scale or a wooden chip that has flown into the heating system from the heating main will get stuck (yes, yes, this has happened in my practice).
Do I need any additional fittings to install the radiator?
Typically, the wiring of a heating device includes:
- Two through radiator plugs;
Radiators are often equipped with four blind plugs and two plugs for them. This allows you to use any connection method - both one-way and two-way.
- One blind plug and one flush valve. The flusher allows you to combat siltation of the radiator: a hose is connected to it, through which water, along with the silt that interferes with circulation, is discharged into the sewer;
- A pair of ball valves or a set of a valve and a throttle or thermal head. Shut-off and throttling valves will help reduce the heat transfer of the heating device during thaws and spring;
The photo shows a throttle that allows you to regulate the heating of the heating device.
- A couple of Americans. They provide much simpler and faster dismantling compared to sweeps;
- Jumper (a piece of pipe or a long bend with a lock nut and two tees). The jumper allows the coolant circulating in the riser to pass through itself when the supply taps are completely or partially closed. If you close the tap that opens the riser, after a short time offended neighbors will come to you and begin to loudly question your high moral qualities;
Thanks to the jumper, water circulates in the riser even when the valves are closed.
- On the top floor of a house with a bottom bottling (in which the heating supply and return are separated in the basement, and the risers are connected in pairs on the top floor) there is a Mayevsky tap.
Mayevsky valve for bleeding air pockets.
Tools
What tools will it take to install a bimetallic battery yourself with dismantling the old battery?
Here are the typical contents of my suitcase:
- Gas wrench No. 2-3 for unscrewing the radiator plugs of an old radiator (usually cast iron), for tightening new plugs and, if necessary, for cutting threads;
The third number will even unscrew a tightly stuck radiator cap.
- Gas wrench No. 1 for unscrewing and tightening locknuts and fittings;
- Plumbing flax for sealing threaded connections;
Sealing will be more reliable if, when winding, apply a little quick-drying paint in any organic solvent to the flax. The paint will prevent the flax from rotting when the heating is turned off and from fading when the heating is on.
- A grinder with a cutting wheel for steel or a hacksaw for cutting pipes (if installing a radiator requires changing the hose configuration);
- Die with holder for cutting pipe threads DN 15 - DN 25 (depending on the diameter of the riser);
Die with holder.
- Machine oil (for example, for lubricating sewing machines);
- Rough file for metal.
How to properly dismantle old cast iron batteries and install bimetallic heating radiators?
Just
Let's start with the simplest scenario: the supply lines and shut-off valves do not need to be replaced, new batteries are installed on the old leads.
Here is our procedure:
- We reset the heating riser (in a system with bottom filling - a couple of risers). You can find your risers in the basement by following the flights of stairs at the entrance to the entrances;
Paired heating risers in a house with bottom filling.
- We unscrew and drive the locknuts on the connections along the threads;
- We clean the threads from the old winding;
The old winding remains between the locknut and the plug. It needs to be removed.
- We unscrew and thread the radiator plugs through the threads;
- Remove the radiator from the brackets;
Keep your basin ready. There will probably be some water and a lot of sludge left in the battery.
- We unscrew and remove the old radiator caps from the connections. They do not fit the threads of bimetallic batteries (32 mm versus 25);
- Screw new plugs onto the connections;
- We screw the blind plug and flush valve into the radiator, having previously wound the external threads;
Radiator plugs are often equipped with rubber or silicone gaskets. To avoid jamming such a gasket when screwing in the plug, apply a little liquid soap to the end of the outer section.
- Place the battery on the brackets;
If necessary, bend the brackets: the radiator must be strictly horizontal.
Sometimes they have to be replaced. The easiest way to cut off old brackets is with a grinder. New ones are screwed into a plastic dowel inserted into a pre-drilled hole.
- We screw the plugs wound or equipped with gaskets into it;
- Rewind and tighten the locknuts. That's all. You can perform a test run of the riser.
Difficult
How to install a new radiator with alteration of the liner?
The key difference from the scenario described above is the need for manual threading.
This is done like this:
- The dropped riser is cut;
The risers have been dropped and cut.
- At the end of the cut pipe, a file or grinder is used to chamfer it at an angle of about 20-30 degrees to its axis. The chamfer is needed as a lead-in for the die;
- The pipe is lubricated. Lubrication will prevent metal scuffing and reduce the force required for thread cutting;
- The die is put on the pipe with the long end of the holder and pressed against it with the maximum possible force, while simultaneously rotating clockwise. After the first thread has been cut, the die does not need to be pressed;
Hold the riser with a pipe wrench. When cutting threads, you can break the tightness of the connection between the radiator and the liner in the apartment above or below yours, or even tear off the liner altogether.
- To install a fitting (angle or tee), five threads are cut.
If the holder rests against the turn of a pipe or a layer of paint, after cutting the first thread, the die can be turned over.
The technology for installing supply connections is determined by the type of pipe:
- A corrugated stainless steel pipe is inserted into the fitting with a loosened union nut, after which it is tightened;
- The copper pipe and the inner surface of the fitting are ground, treated with flux and heated with a gas burner or a hair dryer. Then a solder rod is introduced into the burner flame or into the stream of hot air, which, melting, fills the gap between the pipe and the fitting due to the capillary effect;
- Threaded fittings on galvanized or black steel pipe are assembled on plumbing linen impregnated with paint.
Rewinding the threaded connection.