The principle of operation of the solar collector
It's very simple. The panels accumulate solar heat and transfer it to the coolant. It circulates through a coil in the storage tank and releases heat to the water, which can be used for any need. The entire process is controlled by a controller, which starts the pump group if the heat exchanger reaches the required temperature.
How does a solar collector work in general?
. The entire system consists of the following elements:
- the panels themselves in the required quantity according to calculations,
- control controller (including sensors),
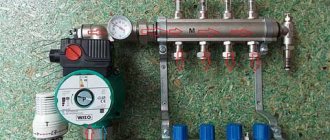
- pump group,
- storage capacity (usually a tank of 300-3000 liters),
- mounting elements, pipes and fittings.
It is impossible to remove any element from this scheme; it will not work. The only exception is collectors with flow-through heaters. More on them a little later.
Performance you can count on
Before installing such equipment, it is worth considering such a factor as payback. After all, a bad entrepreneur is one who does not make a profit from his investments. The payback of a collector depends directly on its productivity.
Operating temperatures
Collectors are divided into types according to the temperature of the working environment:
- low-temperature - in them the coolant warms up to 50 degrees. They are used for heating containers with water for irrigation, arranging summer baths and showers, creating comfort in cool spring or autumn, and other tasks that do not require high temperatures;
- medium temperature, heating up to 80 degrees. From this point on, the solar collector can be used for space heating (including in winter), and similar options are common in private house projects;
- high-temperature, where the media is heated up to 300 degrees. Such systems are used in commercial buildings, workshops and other similar places. High-temperature complexes require a complex mechanism for accumulating and transferring heat and take up a lot of space, which is why they are not suitable for private household tasks. In addition, they are labor-intensive to manufacture and install, requiring special tools and appropriate skills.
Absorber, the most important part of the system
The part of the solar collector that receives, accumulates and transfers heat to the coolant is called an absorber. The efficiency of the entire system depends on this element.
This element is made of copper, aluminum or glass, followed by coating. The efficiency of the absorber depends more on the coating than on the material from which it is made. Below, in the photo, you can see what kind of coatings there are and how effectively they can absorb heat.
The description of the system indicates the maximum possible absorption of solar energy incident on the absorber. "α" is the maximum possible absorption percentage. "ε" is the percentage of reflected heat.
By type of structure
Absorbers also differ in the type of device; now there are only two types:
Feather
- are arranged as follows. The plates connect tubes with coolant to each other. The tubes themselves can be interconnected into one system in several ways. This is a simple type of absorber that you can make yourself.
Cylindrical
— in this case, the coating is applied to the glass surface of the flask and used in vacuum manifolds. Thanks to this device, the heat is concentrated more precisely in the center of the tube where the heat extractor, or rod, is located. This system operates with higher efficiency than the pen system.
Features that you should pay attention to when choosing a collector
The rate of transfer of radiant solar energy from the sun into thermal energy of the coolant in a vacuum solar collector directly depends on the size of the tubes of this device. If the vacuum tube of the collector is short and thin, then it will not be able to accumulate vacuum energy effectively enough. Typically, tubes up to 2 meters long with a diameter of about 6 centimeters are used to complete vacuum solar collectors. A simple straight or curved U-shaped tube can be mounted inside the vacuum tube for more efficient heat collection.
What types of solar collectors are there?
There are two types of such systems: flat and vacuum. But, at their core, their operating principles are similar. They use the sun's heat to heat water. They differ only in the device. Let's look at the operating principles of these types of solar systems in more detail.
Flat
This is the simplest and cheapest type of collector. It works as follows: The metal body, which is internally treated with a highly efficient feather absorber to absorb heat, contains copper tubes. A coolant (water or antifreeze) circulates through them, which absorbs heat. Next, this coolant passes through a heat exchanger in a storage tank, where it transfers heat directly to the water that we can use, for example, to heat a house.
The upper part of the system is covered with high-strength glass. All other sides of the body are insulated with insulation to reduce heat loss.
| Advantages | Flaws |
| Low cost panels | Low efficiency, approximately 20% lower than vacuum |
| Simple design | Large amount of heat loss through the body |
Because of their ease of manufacture, such systems are often made even with their own hands. You can purchase the necessary materials at construction stores.
Vacuum
These systems work a little differently, this is due to their design. The panel consists of double tubes. The outer tube plays a protective role. They are made of high-strength glass. The inner tube has a smaller diameter and is covered with an absorber that accumulates solar heat.
Structural drawings
Let's get started
Before building a solar collector, it is necessary to make the appropriate calculations and determine how much energy it should produce. But you shouldn’t expect high efficiency from a homemade installation. Having determined that there will be enough of it, you can begin.
The work can be divided into several main stages:
- Make a box
- Make a radiator or heat exchanger
- Make a front camera and storage device
- Assemble the collector
To make a box for a solar collector with your own hands, you should prepare an edged board 25-35 mm thick and 100-130 mm wide. Its bottom should be made of textolite, equipped with ribs. It should also be well insulated using polystyrene foam (but preference is given to mineral wool), covered with a galvanized sheet.
4 more effective ways to alternatively heat your home
Which you can learn about in our next article.
Having prepared the box, it’s time to make the heat exchanger. You should follow the instructions:
- It is necessary to prepare 15 thin-walled metal tubes 160 cm long and two inch pipes 70 cm long
- In both thickened tubes, holes are drilled with the diameter of the smaller tubes into which they will be installed. In this case, you need to ensure that they are coaxial on one side, the maximum step between them is 4.5 cm
- The next stage is that all the tubes need to be assembled into a single structure and welded securely
- The heat exchanger is mounted on a galvanized sheet (previously attached to the box) and fixed with steel clamps (metal clamps can be made)
- It is recommended to paint the bottom of the box in a dark color (for example, black) - it will better absorb solar heat, but to reduce heat loss, the external elements are painted white
- To complete the installation of the collector, it is necessary to install a cover glass near the walls, while not forgetting about reliable sealing of the joints
- A distance of 10-12 mm is left between the tubes and the glass
All that remains is to build a storage tank for the solar collector. Its role can be played by a sealed container, the volume of which varies about 150-400 l
. If you cannot find one such barrel, you can weld several small ones together.
Like the collector, the storage tank is thoroughly insulated from heat loss. All that remains is to make a fore-chamber - a small vessel with a volume of 35-40 liters. It must be equipped with a water-falling device (a swivel valve).
The most responsible and important stage remains - to assemble the collector together. You can do it this way:
- First you need to install the front camera and storage. It is necessary to ensure that the liquid level in the latter is 0.8 m lower than in the front chamber. Since a lot of water can accumulate in such devices, it is necessary to think about how they will be reliably shut off
- The collector is placed on the roof of the house. Based on practice, it is recommended to do this on the south side, tilting the installation at an angle of 35-40 degrees to the horizontal
- But you need to take into account that the distance between the storage tank and the heat exchanger should not exceed 0.5-0.7 m, otherwise the losses will be too significant
- At the end, the following sequence should be obtained: the front camera must be located above the drive, the latter - above the collector
The most important stage is coming - it is necessary to connect all the components together and connect the water supply network to the finished system. To do this, you will need to visit a plumbing store and purchase the necessary fittings, adapters, sockets and other shut-off valves. It is recommended to connect high-pressure sections with a pipe with a diameter of 0.5 inches, low-pressure sections with a diameter of 1 inch.
Commissioning is carried out as follows:
- The unit is filled with water through the bottom drainage hole
- The anterior chamber is connected and the fluid levels are adjusted
- It is necessary to walk along the system and check that there are no leaks
- Everything is ready for everyday use
Additional costs associated with operation
Using this does not imply any care or maintenance other than periodic cleaning of dirt and snow in winter (unless it thaws itself). However, there will be some associated costs:
- Repairs, everything that can be changed under warranty can be replaced by the manufacturer without any problems, it is important to buy an official dealer and have warranty documents.
- Electricity, very little of it is spent on the pump and controller. For the first one, you can install only 1 solar panel of 300 W and it will be quite enough (even without a battery system).
- Washing the coils will need to be done once every 5-7 years. It all depends on the quality of the water (if it is used as a coolant).
What's happened
A solar power plant is a modern, environmentally friendly way to obtain and subsequently use thermal energy from the sun. In many countries, installations have long been used in the private sector and on an industrial scale. The systems are suitable for water heating or heating. Benefits for the owner:
- The owner of the installation receives solar energy for free, which he can then distribute throughout the house.
- The process of obtaining and converting energy is environmentally friendly and does not harm the planet.
- The sun's energy is inexhaustible, so the owner of the installation can always be sure of receiving it.
- Compared to other alternative energy plants, the cost of the collector is low.
Like any installation, the solar collector also has its disadvantages - the result of the work depends on the weather.
In our country, the use of solar systems is not as widespread as in Europe and America, due to low efficiency associated with weather conditions. The leaders in the installation of solar collectors today are Japan and China.
What does a solar collector consist of and how does it work?
Each solar collector includes the following elements:
- collector for energy collection;
- circulation pumps;
- pipeline where the coolant circulates;
- installation control system;
- coolant;
- boiler.
The solar installation is compatible with water heaters and gas boilers. Additionally, a heat meter is installed, which helps calculate the energy generated and calculate the real savings of kilowatts.
1. Solar collector. 2. Buffer tank. 3. Hot water. 4. Cold water. 5. Controller. 6. Heat exchanger. 7. Pump. 8. Hot flow. 9. Cold flow.
How to install a solar collector
You can install this system yourself. To do this, you need to understand the main principle of installation - maximum sunlight.
- We choose a place
. It should be on the sunny side. To do this, it is enough to observe for several days which place on the site the sun illuminates for as long as possible (you need to avoid getting into the shadows of trees or buildings). Select a starting point and an ending point, and direct the solar collector to the center of these points. This way we will get maximum coverage of thermal radiation. - Tilt angle
. This is an important stage of installation, on which its effectiveness depends. As a rule, such data is provided by the system manufacturer, but on average it is 45 degrees. It cannot be installed at a larger or smaller angle, as this will reduce the absorbing area. - We connect the rest of the equipment
. This is a pump group with a controller, a storage tank and connecting pipes. This is all connected according to the instructions. There is nothing complicated here, since the principle of the device is quite simple.
Detailed installation video
View all construction myths
A little about the use of systems in practice
I decided to add this section because actual usage data appeared. A good friend of mine installed it 3 years ago (Ukraine, Kiev region).
A solar system is used to heat a house of 100 sq. m and hot water for 6 people. Gas costs for heating and hot water amounted to 33,400 UAH
in year. It was decided to purchase a solar collector.
The kit includes 6 flat collectors and a storage tank of 1000 liters. Result:
- — 100%
for 6 “warm” months according to the DHW load (temperature 55 degrees), - — 50%
during 6 “cold” months according to the DHW load, - — 25%
for 6 “cold” months based on heating load in maintenance mode.
The total savings for the year amounted to UAH 11,300
(in terms of rubles, the amount must be multiplied by 2.2).
The whole system cost 94,000 UAH
. At this cost of gas, it will pay for itself in 8.4 years. Manufacturers provide a 15-year guarantee, so at least 7 years of net profit.
The efficiency of the system could be significantly increased by purchasing vacuum models. Also, low temperature heating systems, such as heated floors, which operate at a temperature of 30-40 degrees, will be more efficient.
Varieties
Modern solar collectors come in water and air types. The former use water, antifreeze or other liquid with suitable properties as a coolant. Circulating through the internal tubes, it transfers heat to the heat exchanger of the heating system. Inside the air modification, the air flow is heated in a similar way, which is then supplied for heating needs.
Schematic design of a flat solar collector Source tildacdn.com